
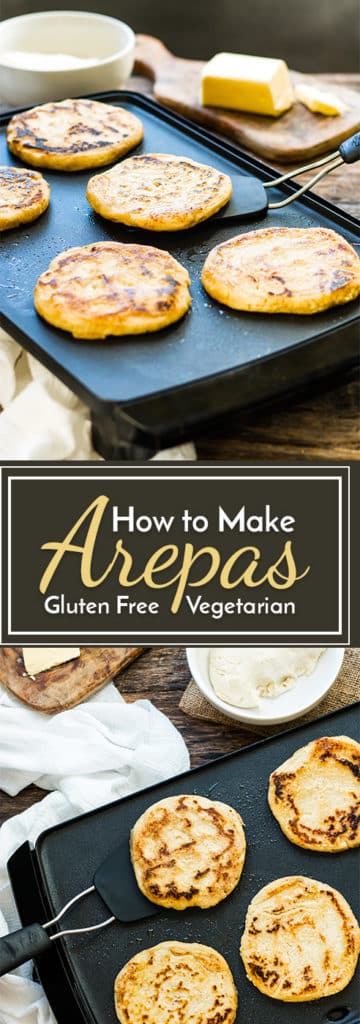
Learning how to make arepas is actually super easy! This arepa recipe is made from instant corn flour and makes a yummy gluten-free and vegetarian alternative to bread.
My new food-love has officially been found!!
Finding alternatives to bread when you are gluten-free is quite challenging. You pretty much have a few brands to choose from, none of which seem to quite compare to the gluten-laden classic.
So why not switch up your sandwich? Instead of trying to replace the gluten-filled sandwich bread with a gluten-less imitation… why not try out this classic Venezuelan sandwich… the Arepa!!

What are Arepas and are they Gluten-Free?
Arepas are found primarily in the cultures of Venzuela and Colombia. They are made of masa that has been treated with lime, or masa harina, water, a bit of shortening and salt. In their classic form they are 100% gluten free. <–Do you know what this means?! You can go to almost any classic Venezuelan or Colombian restaurant and order straight from the menu. Can I get a WOO-HOO?!
How to Make Arepas — Watch the Video Above!
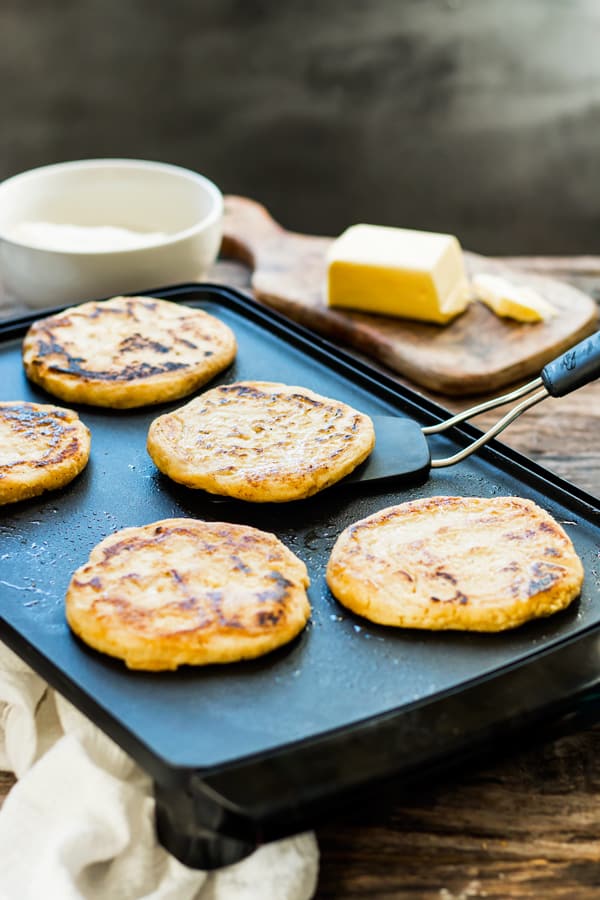
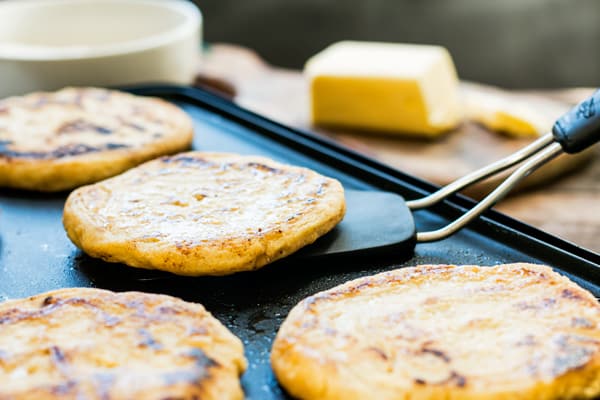
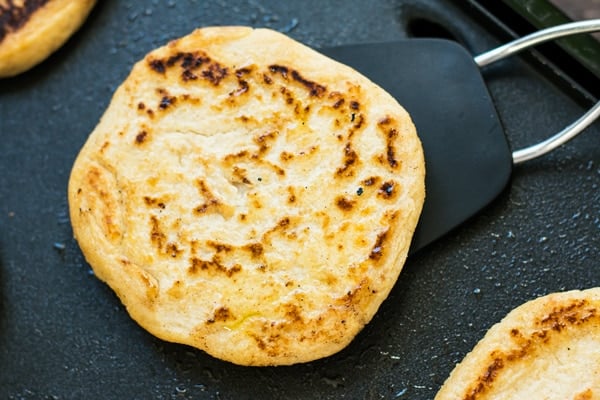
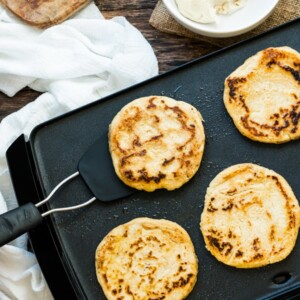
While whipping up arepa dough is actually rather easy, the process of making them is a bit tedious… It reminds me of making pancakes. A lot of the process is spent over this hot griddle or skillet.
Instead of cooking the arepas completely in a skillet, I prefer searing both sides for a few minutes and then letting the oven do the remainder of the cooking. This means less time for me and evenly cooked arepas every time!
Where do I get Arepa Flour?
Most grocery stores will carry “arepa flour.” Just remember, masa harina, or instant corn masa, is VERY different from corn meal, or regular masa. Personally, I have used the Maseca Instant Yellow Corn Masa Flour and I have also heard that P.A.N.’s Pre-cooked White Corn Meal is great, too!
What should I fill my arepas with?
Absolutely whatever you please!! Some of our favorite filling ingredients include beans, chicken, cheese and a bit of veggies. You can even eat these for breakfast and load them up with eggs and bacon!
If you want to see our favorite Stuffed Arepa Recipe you can check it out on the site in just a few days!
Tap stars to rate!
How to Make Arepas
email this recipe!
Ingredients
- 2 c warm water
- 1 ½ tsp salt
- 1 tbsp shortening butter flavored, melted
- 2 c instant corn masa flour
Instructions
- Preheat oven to 350 degrees.
- Place water, salt and shortening in a large bowl. Slowly add flour, mixing well after each addition with a spoon.
- Once almost all flour is added, start mixing dough by hand until dough is just combined.
- Cover arepa dough with a moist towel and let sit at room temperature for 10 minutes.
- Scoop out ½ cup of arepa dough, roll into a ball, and flatten into a 4-5 inch diameter and ½ inch thick arepa.
- Test to see if dough is the right consistency by placing the arepa in the palm of your hand and then flip your hand over. If the arepa sticks for a second or two, and then falls off, the dough is the perfect consistency. If it falls off quickly, add a bit more water. If it doesn’t fall at all and sticks to your hand, add more arepa flour.
- Repeat step 5 with the remaining dough.
- On a griddle or cast iron skillet, set to medium-high heat (about 400-450 degrees), place 1 tablespoon of butter or shortening. Once griddle is heated, add arepas.
- Cook each arepa for 3-4 minutes or until they begin to brown, flip, and cook for an additional 3-4 minutes on the other side.
- After all arepas have been seared on both sides, place them on a baking sheet and bake in preheated oven for 12-15 minutes.
- Slice arepas in half and stuff with your favorite fillings. Enjoy!
Tap stars to rate!
Video
Nutrition
Nutrition information is automatically calculated, so should only be used as an approximation.
Want to see more recipes like these Arepas?
Easy Pad See Ew with Chicken


Is it possible to leave out the shortening
Hi! You will definitely want to keep some type of fat in the recipe to get the best results. You can always try a different type (i.e. coconut oil?) and see how they turn out!
Hey 🙂 thanks a ton for your recipe! I have a question that might sound silly but I mean it completely honest : how do you cut the arepa in half without cutting through the bottom?
I already made arepas a million times but I never managed to cut them like it should be. This discouraged me so that I completely stopped making them.
Greetings
Hey Aida! It definitely is a bit difficult! The best way I have found to not cut through the bottom is to 1) Make them a bit thicker 2) Use a serrated knife and slowly saw through the edge. Best of luck in your future arepa-cutting endeavors!
I made the recipe however,the inside of the arepa didn’t seem to be cooked fully. should I bake at higher than 350 degrees or bake for a longer period of time (how long would that be?)
Hi Sherrie! Depending on the thickness of your arepas you may have to cook them a bit longer! Also, make sure you get a good sear on the outside (more of a brown versus a light golden) before you pop them in the oven. When you reheat them just cook them a bit longer and they will taste great!
Can the Arepas be frozen?
I am sure they can, Rosia! I have not ever had enough left over to try it out, though. Just make sure you wrap them tightly in wax paper or plastic wrap and then seal them in an airtight zip-top bag. I would guess they can last for 3-6 months without losing too much flavor!
Arepas are the best! The one encouragement I’d give would be to definitely try the P.A.N. Pre-cooked While Corn Meal. It’s prepared a bit differently than the Maseca and had a very delightful, almost fresh corn taste.
Thanks so much for the tip! I will have to order the P.A.N. brand online since our local grocery stores do not carry it. Can’t wait to do a taste comparison 🙂