
Cut-Out Sugar Cookies (Gluten-Free Recipe)
This is hands down the BEST sugar cookie recipe I have ever tasted… and no one will ever be able to tell that they’re gluten-free. (I know this for a fact because I make these every year at Christmas!)
Not only is the flavor wonderful, full of buttery goodness and hints of almond extract, but the texture is perfectly soft and the cookies don’t spread out while baking.
Making them absolutely perfect to decorate for Christmas or other holidays!
And it’s all thanks to using the right ingredients and a few simple tips: no leavening agents, cold cubed butter, metal cookie cutters, and a dusting of powdered sugar! (Don’t worry- I’ll go over all of these tricks with you below!)
So if you’re ready to make the most impressive gluten-free sugar Christmas cookies ever, keep reading and find out all the tips and tricks!
Table of Contents
Ingredients
The simple ingredients you need to make the best gluten-free sugar cookies include:
- Flour. A gluten-free 1-to-1 blend is the best option for the chewiest, most flavorful cookies. Bob’s Red Mill is easy to find at the grocery store. You can also use regular, all-purpose flour for traditional sugar cookies if you don’t need a gluten-free option.
- Sugar. Regular, white sugar is best. Do not replace with a sugar alternative such as coconut or even turbinado sugar.
- Egg. These will give the cookies their lift. Make sure you get large eggs.
- Salted Butter. This is where a large majority of the flavor comes from. You can try substituting with vegan “buttery sticks” or margarine if you are dairy-free. Avoid unsalted butter if at all possible.
- Extracts. Both clear vanilla extract and almond extract are used to give this recipe a unique taste. DON’T skip the almond extract or you won’t get that classic flavor.
How to Make Gluten-Free Sugar Cookies
Please see the recipe card for more detailed ingredient amounts.
Make the Cookie Dough (No Need to Chill!)
First, preheat the oven to 375°F.
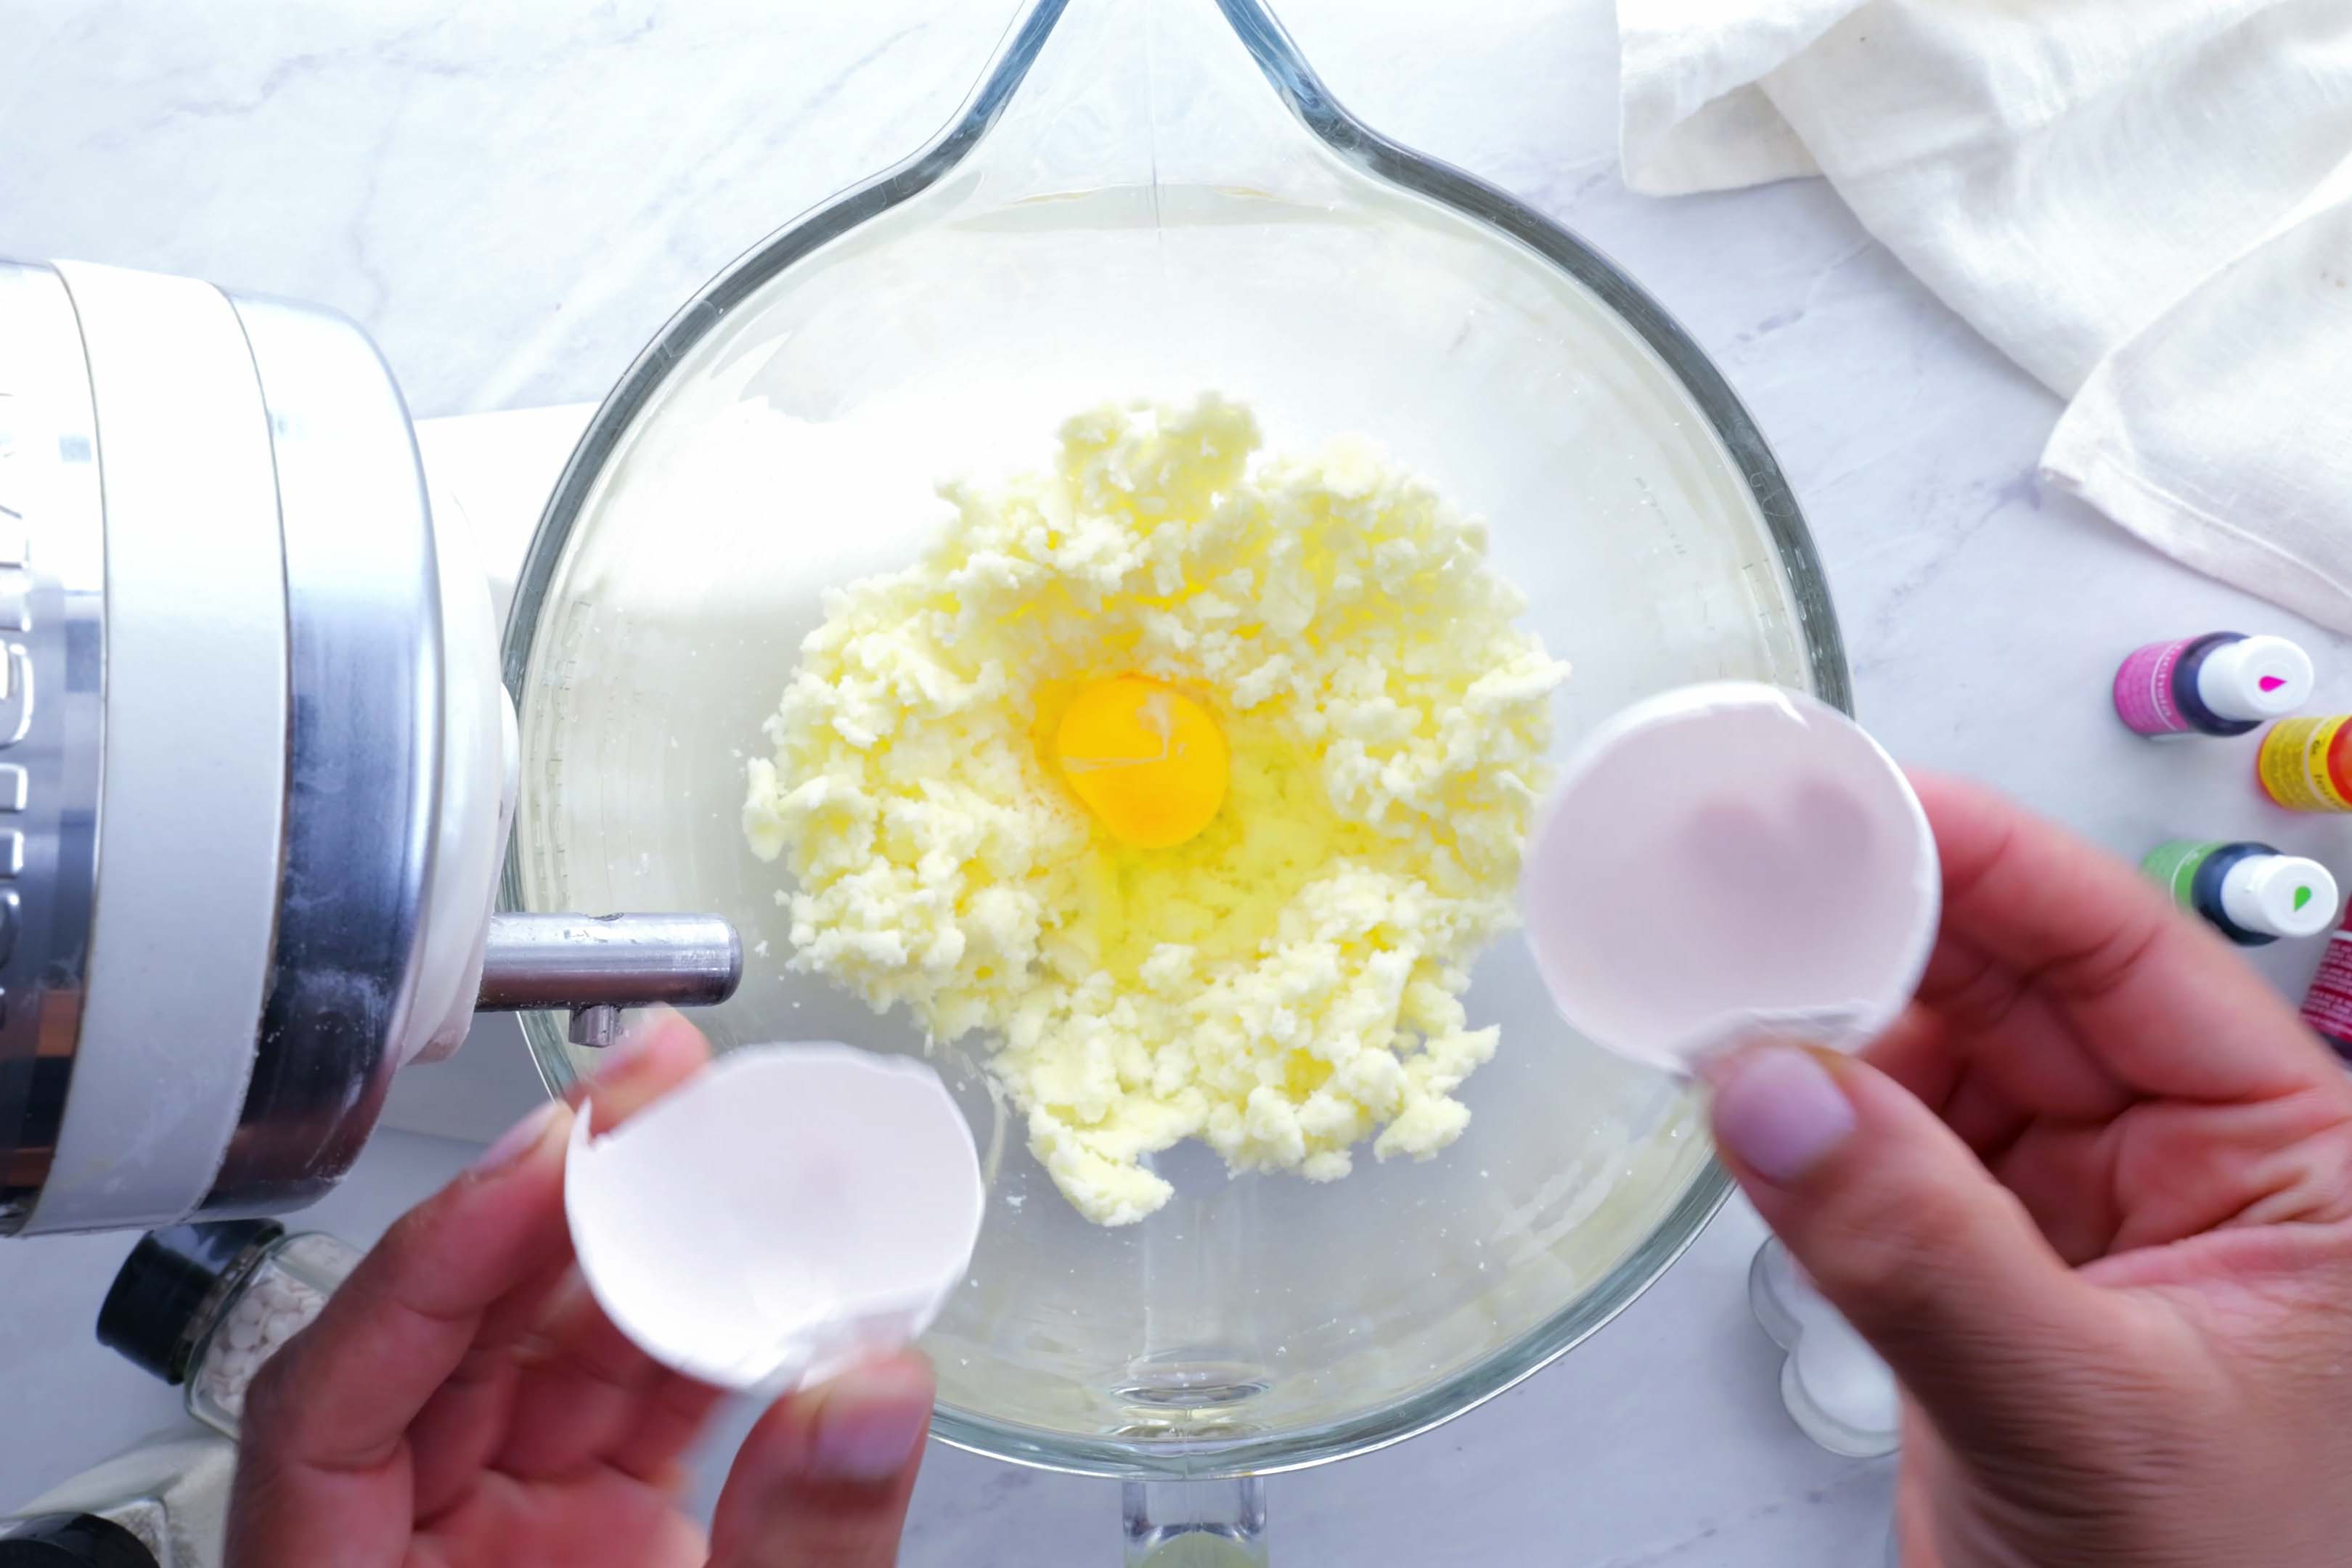
Take your butter straight from the refrigerator. Cut it into cubes and load into a large mixing bowl or bowl of a stand mixer along with the sugar. (This is the secret to not having to chill the dough!)
Cream the butter and sugar with the paddle attachment on a stand or handheld electric mixer on medium speed for 1-2 minutes, or until the dough resembles coarse crumbs.
Add in the egg and extracts and continue to mix for 1-2 more minutes.
Little by little pour in the flour allowing it to fully combine after each addition.
Once the flour is completely absorbed and the ball of dough sticks together, you are ready to roll. You don’t have to worry about chill time.
If needed, you can either refrigerate the gluten-free sugar cookie dough by covering it in plastic wrap at this stage for up to 3 days or freeze it for up to 2-3 months until ready to use.
Roll Out Cookie Dough
Sprinkle powdered sugar over a cutting board before you start rolling. By skipping flour and using powdered sugar you prevent sticking while adding even more flavor to your cookies!
Place half of the dough onto the surface and sprinkle with another 2-3 tablespoons of powdered sugar.
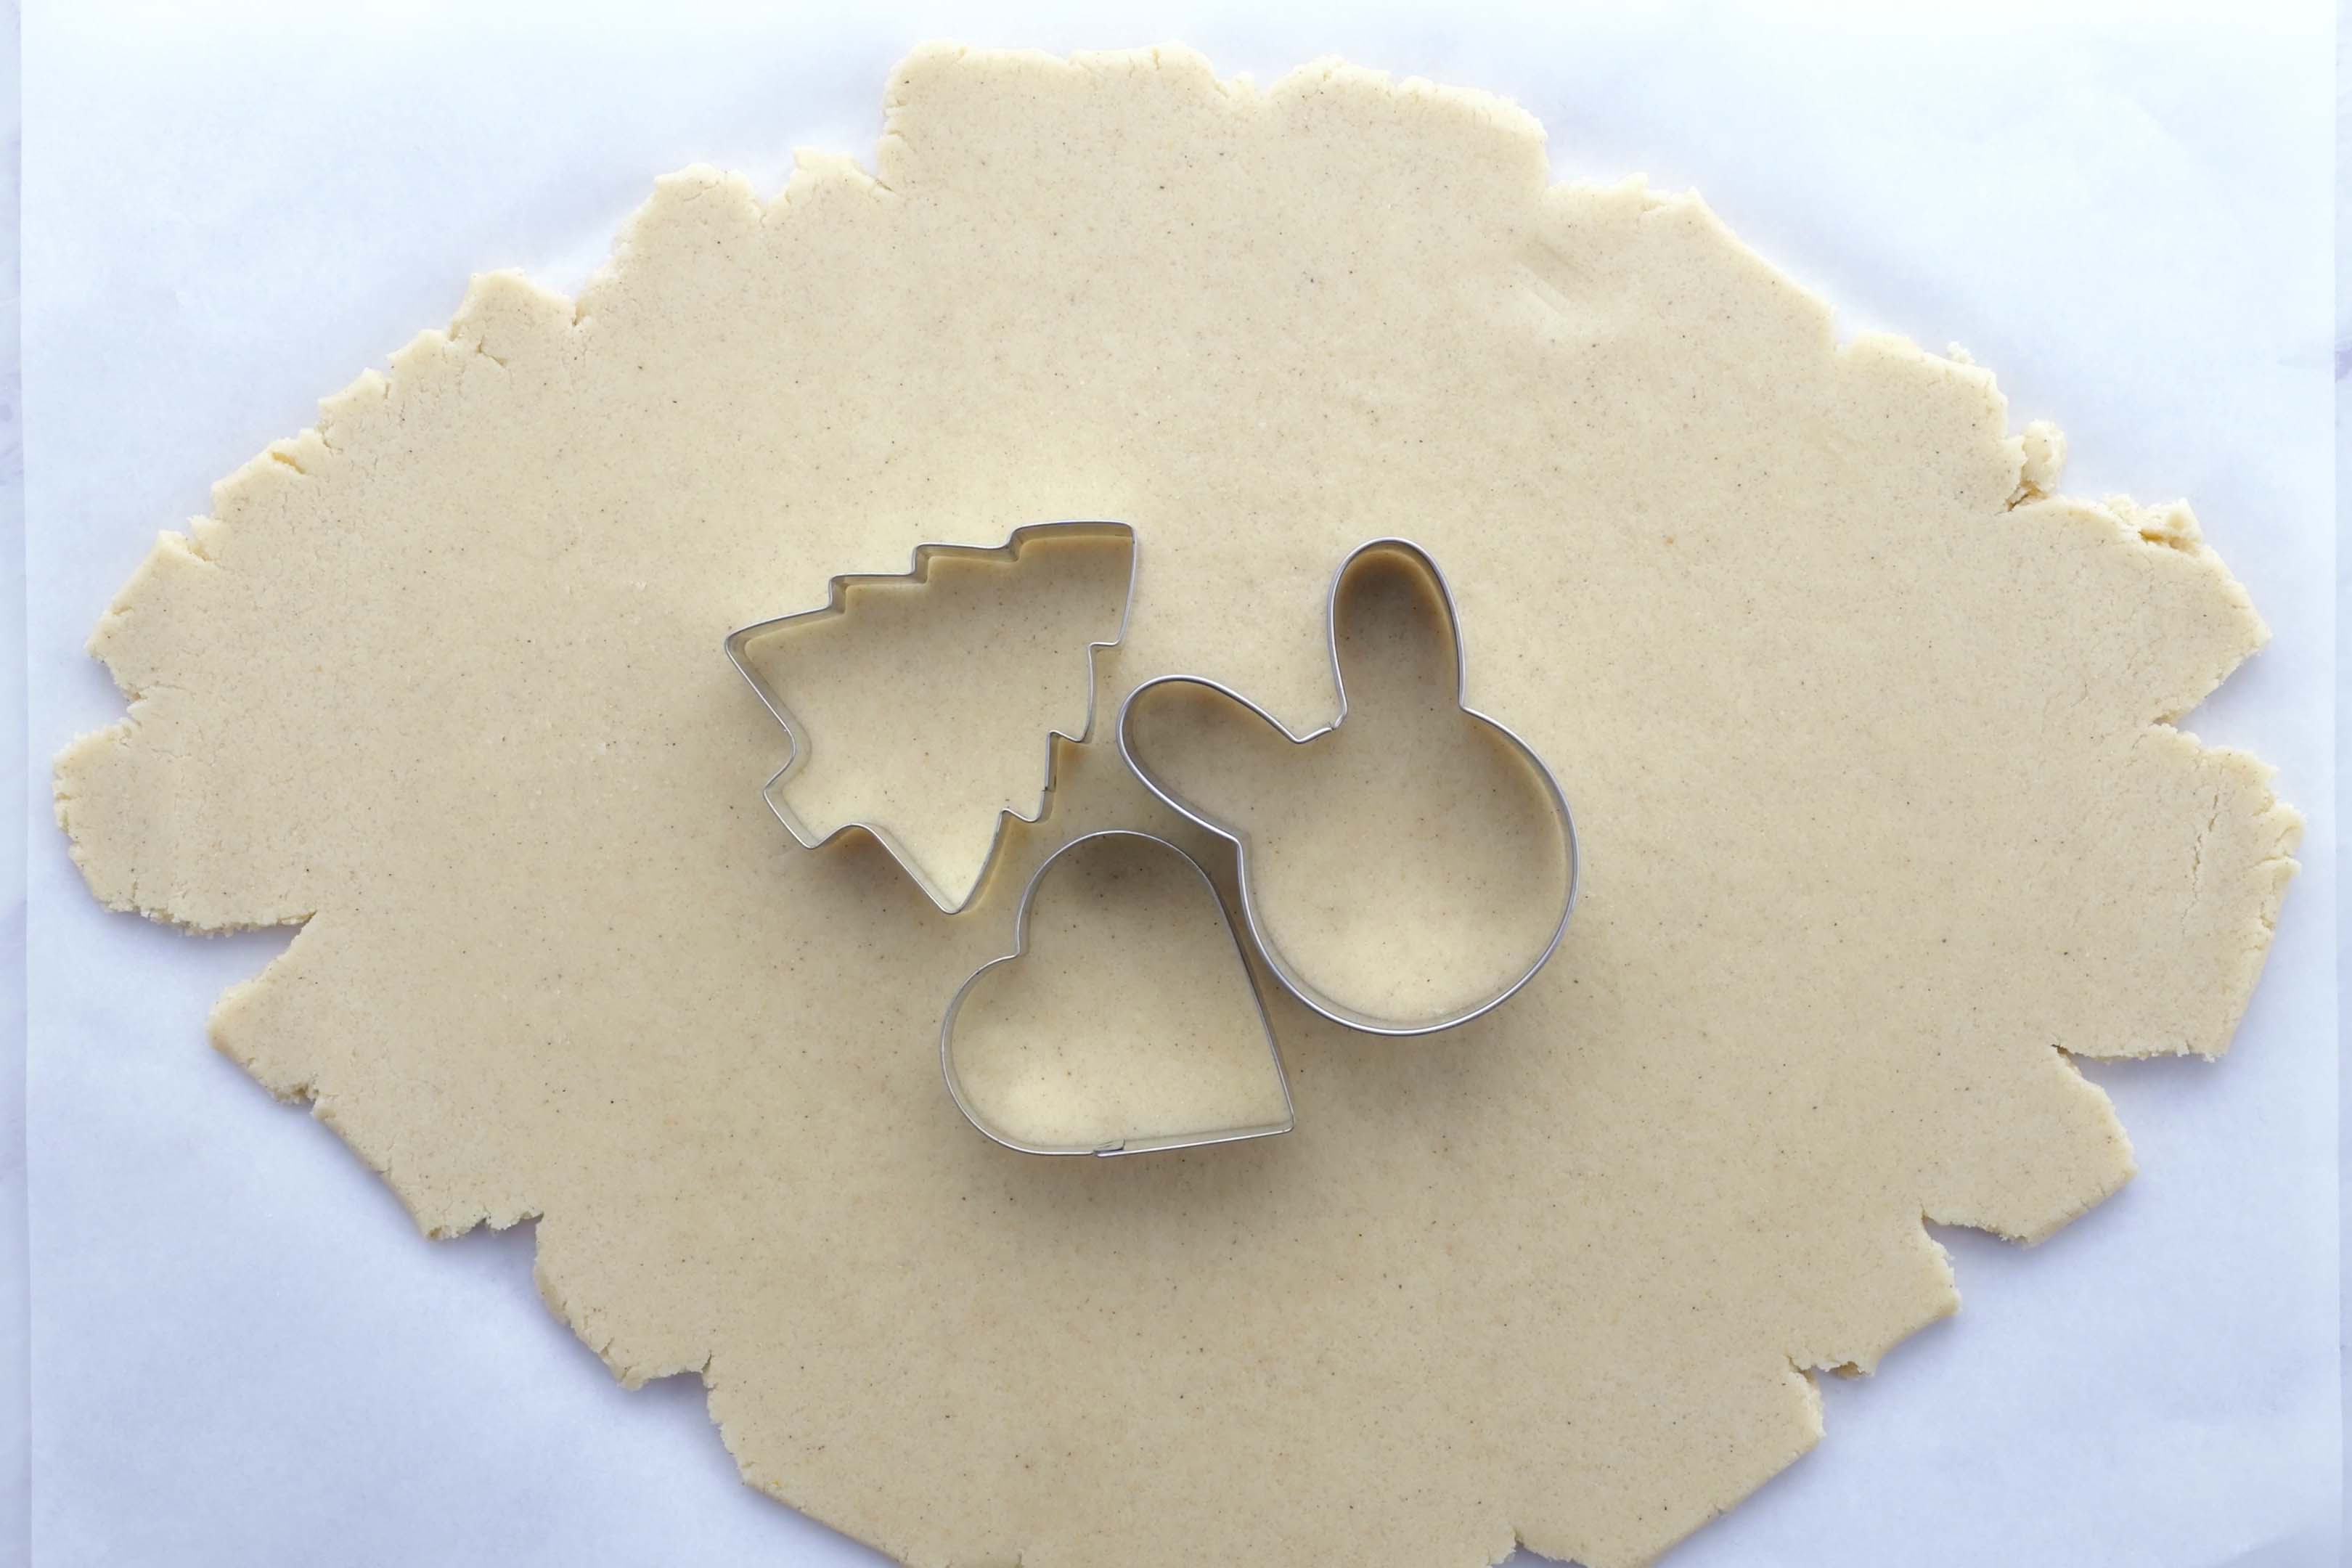
Roll out the cookie dough using a rolling pin until the dough is ¼- to ⅓-inch thick.
Cut into Shapes
Cut dough into shapes with metal cookie cutters. The metal ones make cleaner cuts than the plastic ones and are easier to use.
You can use your favorite cookie cutters in any shape you want all year, as well.
Bake in Oven
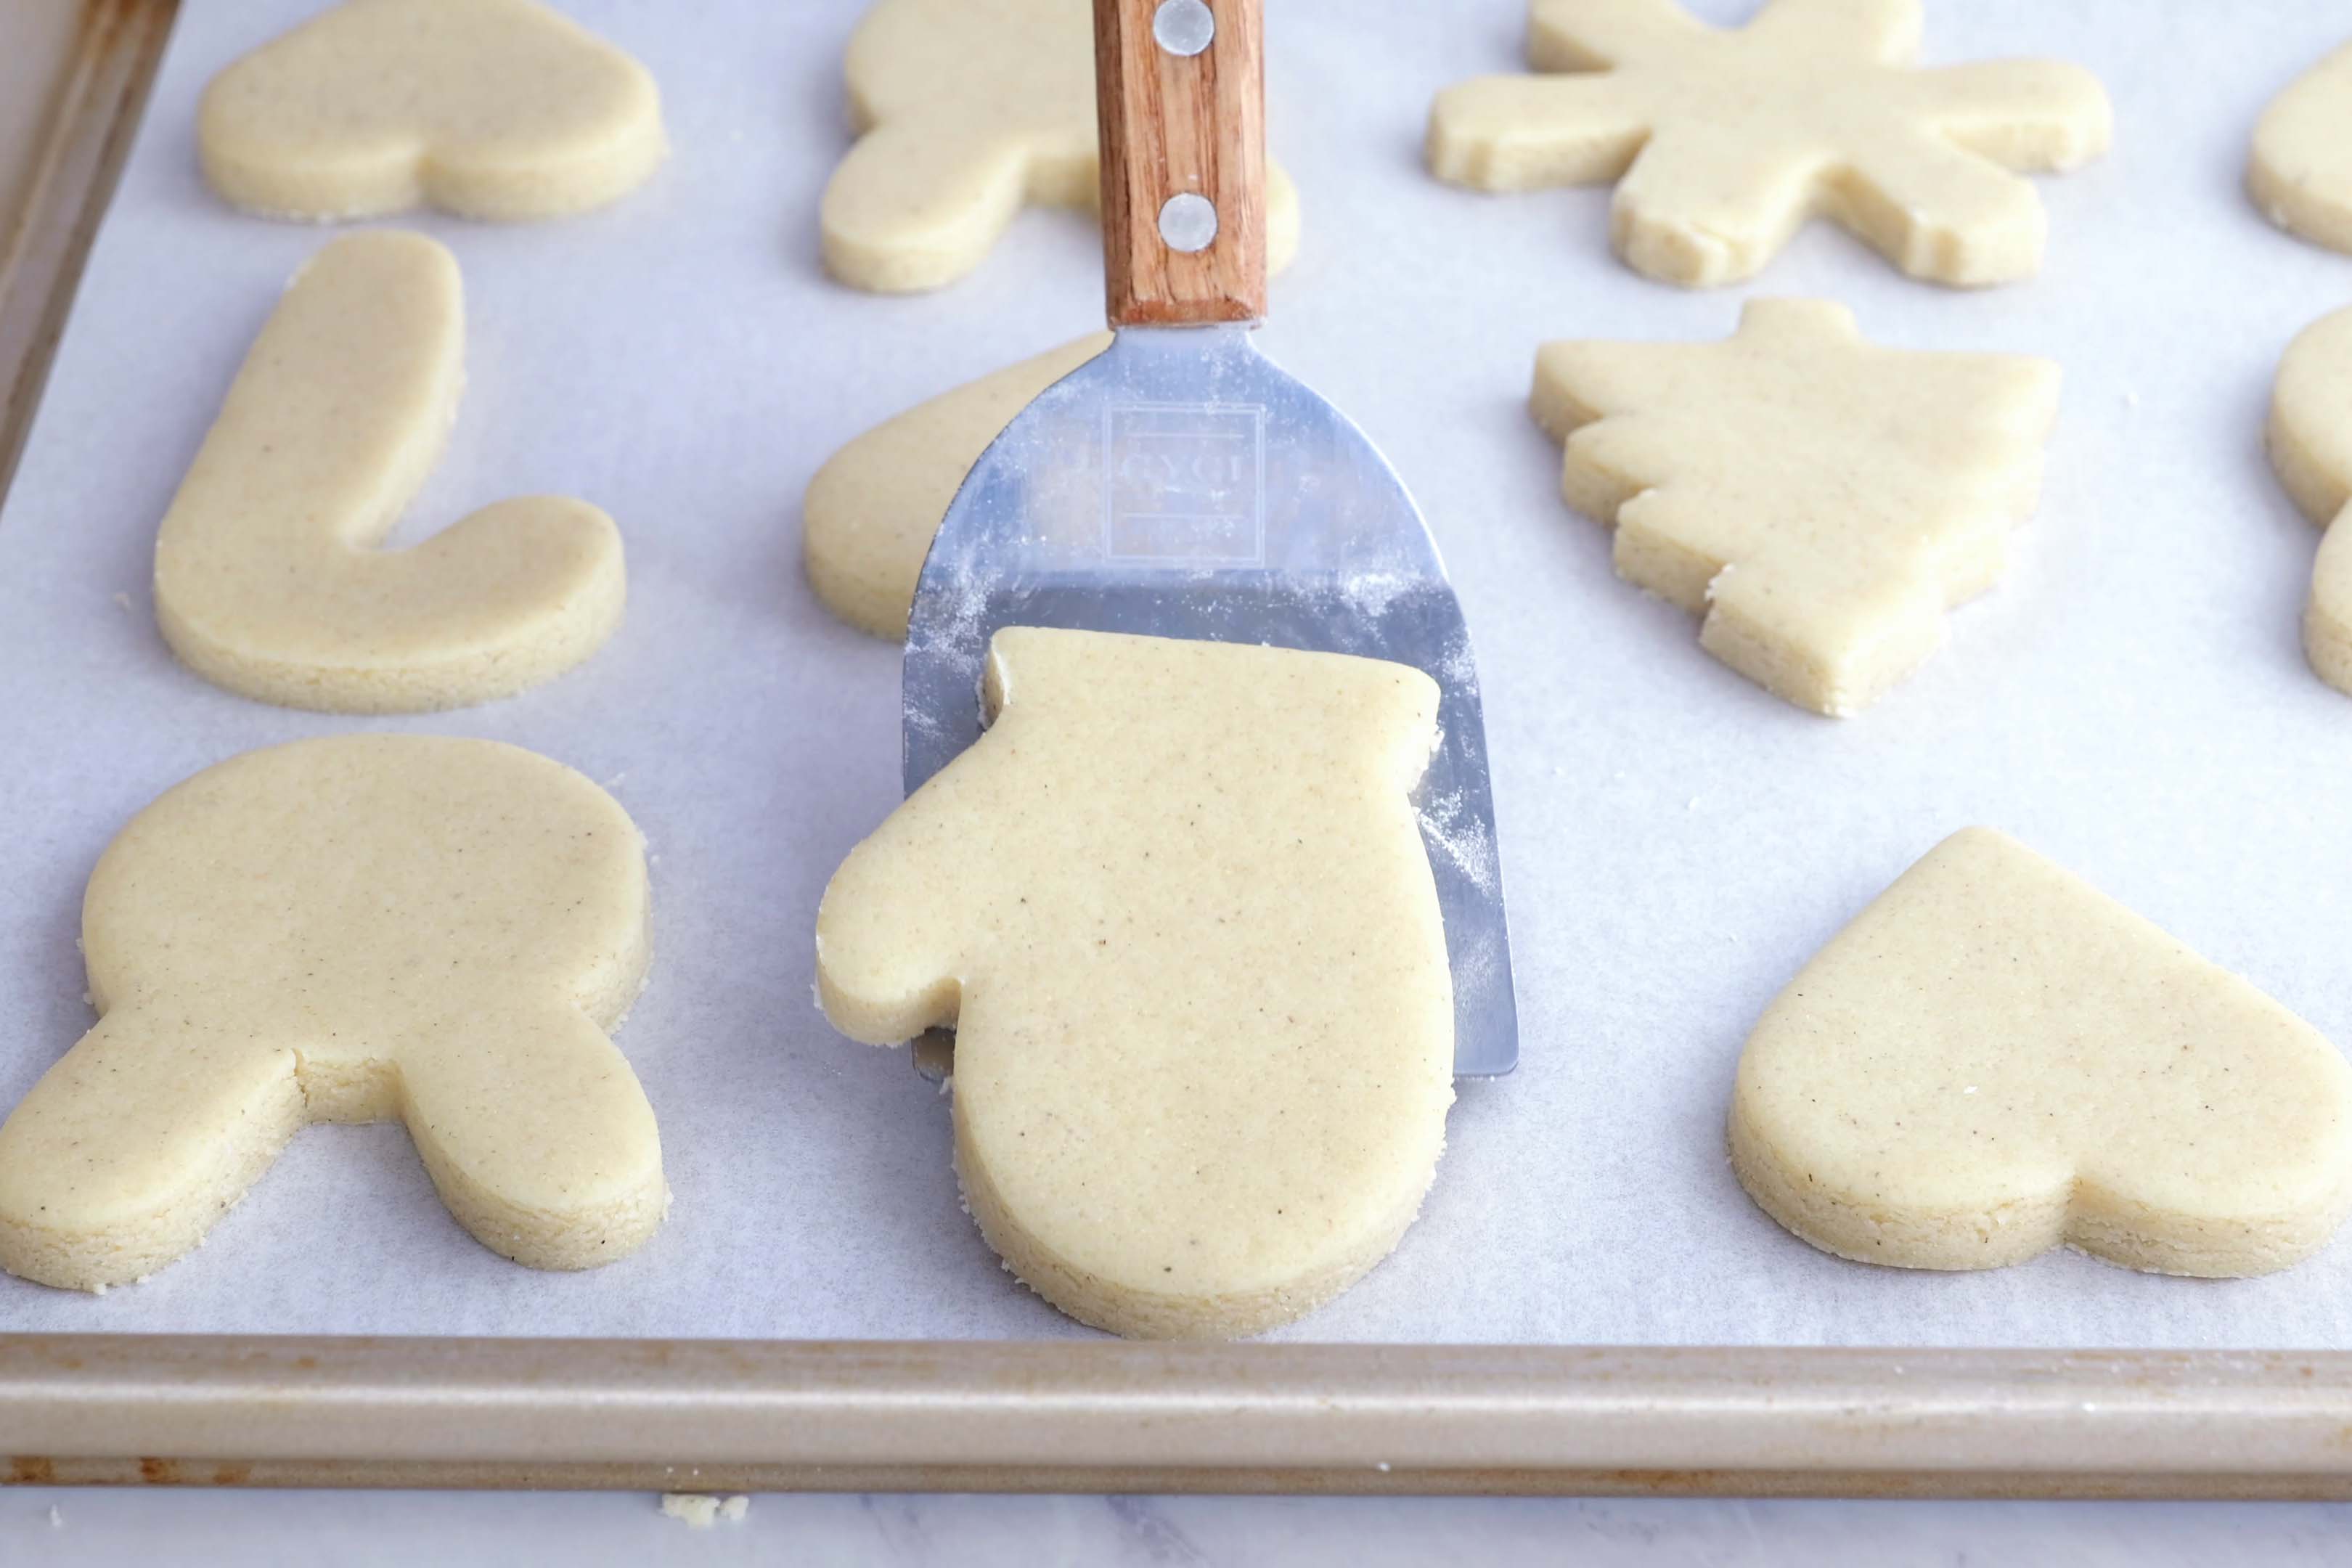
Place the shapes on a parchment paper-lined baking sheet about 1-inch apart. You can also use a silicone mat, if you’d prefer.
Bake the cookies on the prepared baking sheet in a preheated 375°F oven for 9-11 minutes, or until the crisp edges of the cookie begin to turn golden brown slightly. Cook on the longer side if they are thicker, and for less time if they are thinner.
Let the fluffy sugar cookie batch rest on a wire rack until they come to room temperature. To save on cleanup, spread some wax paper under the rack while these easy sugar cookies cool down.
Sugar Cookie Icing
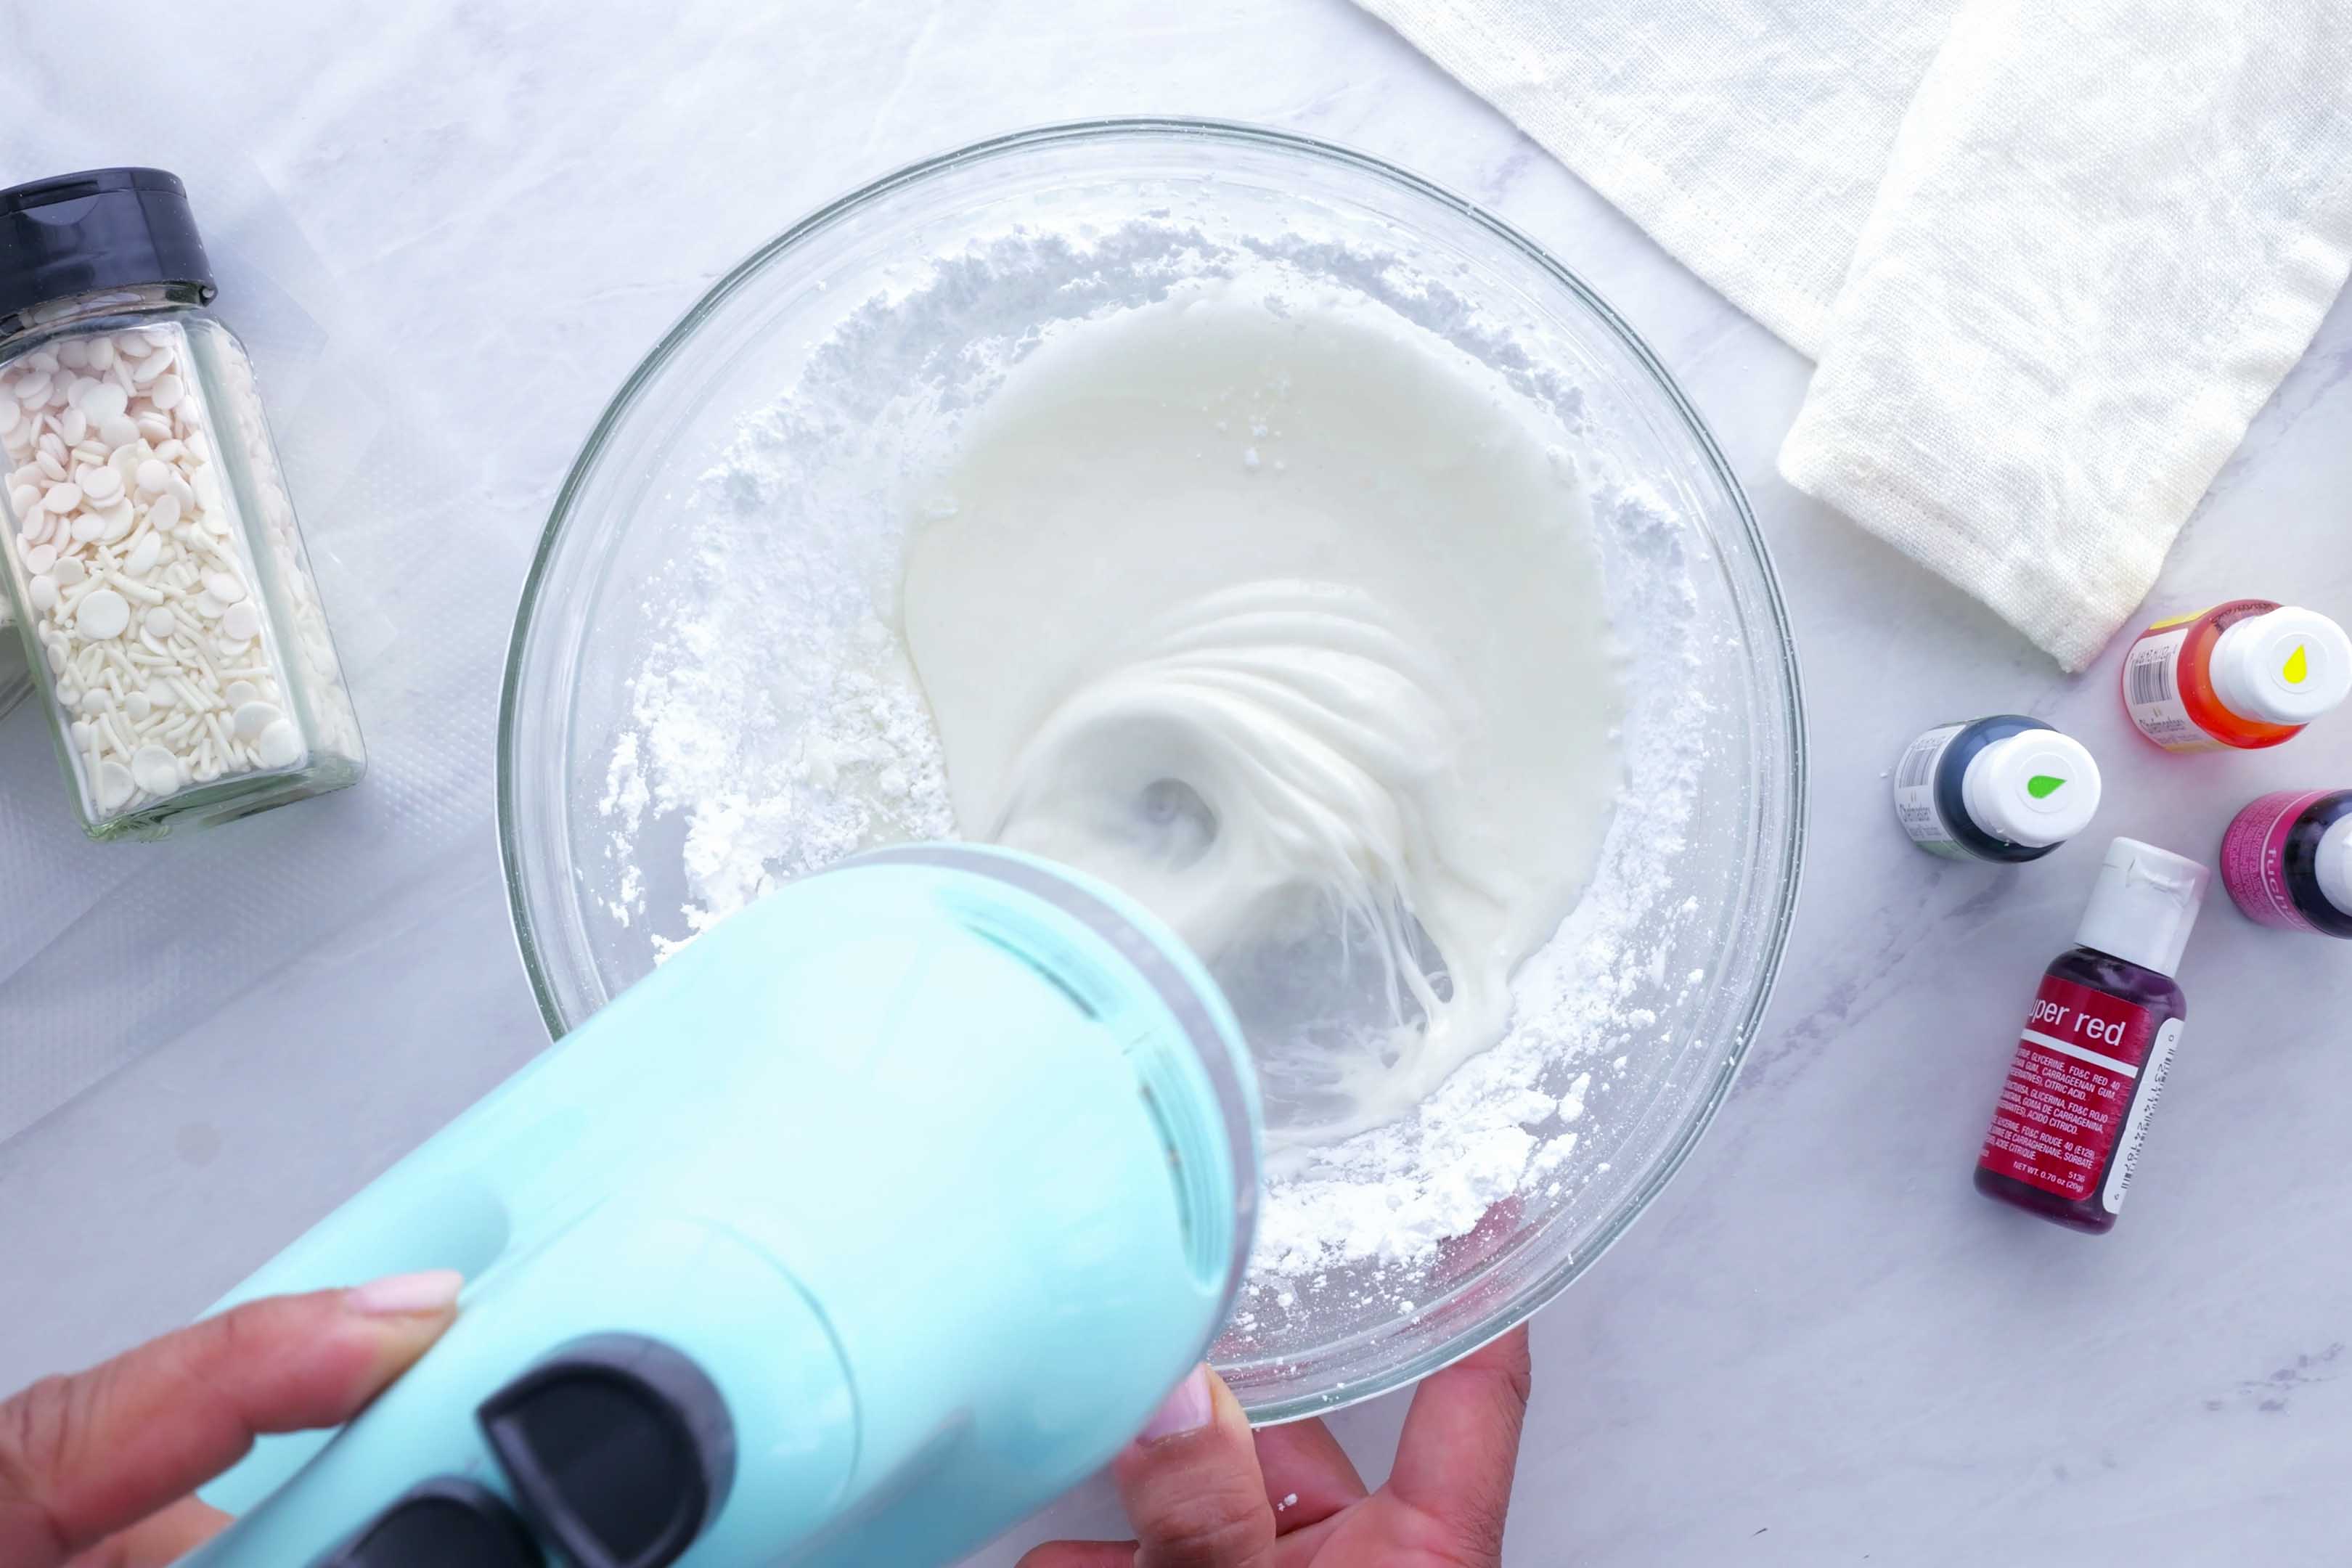
Mix egg whites on medium speed for 1 minute. Add the butter (for the family icing), vanilla, and 1-cup of powdered sugar. Combine until the sugar is fully incorporated.
Add the remaining sugar incrementally and stir well each time. If the frosting is too thick, add 1 to 2 tablespoons of milk until the desired consistency is reached.
Finally, drop in your desired food coloring (gels work the best!) and stir until combined.
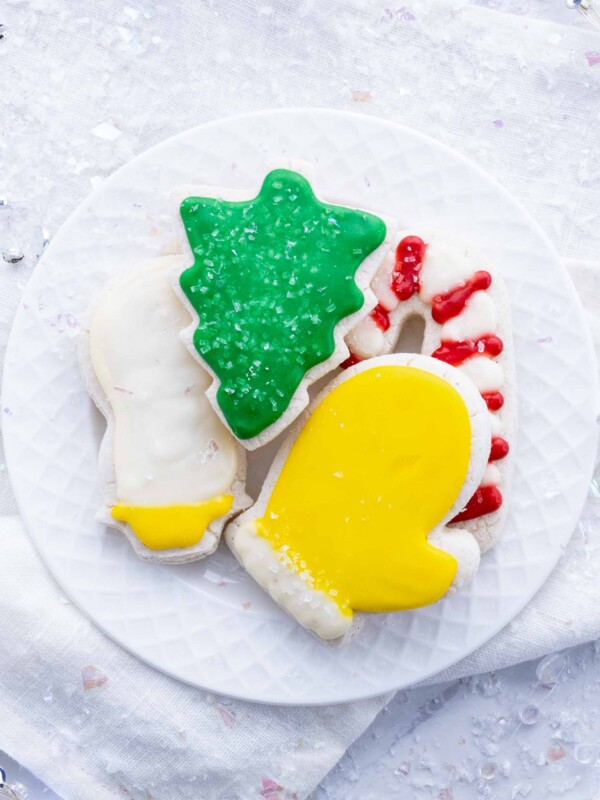
Decorating Christmas Cookies
Use a piping bag fitted with a 3M piping tip to outline where you would like the family icing to fill. Then use a toothpick to spread it all over evenly.
You can also just spread it on with a butter knife or a spoon if the kiddos are helping you out!
Once it has set you can pipe designs with the royal icing.
Place white nonpareils on the wet icing with tweezers.
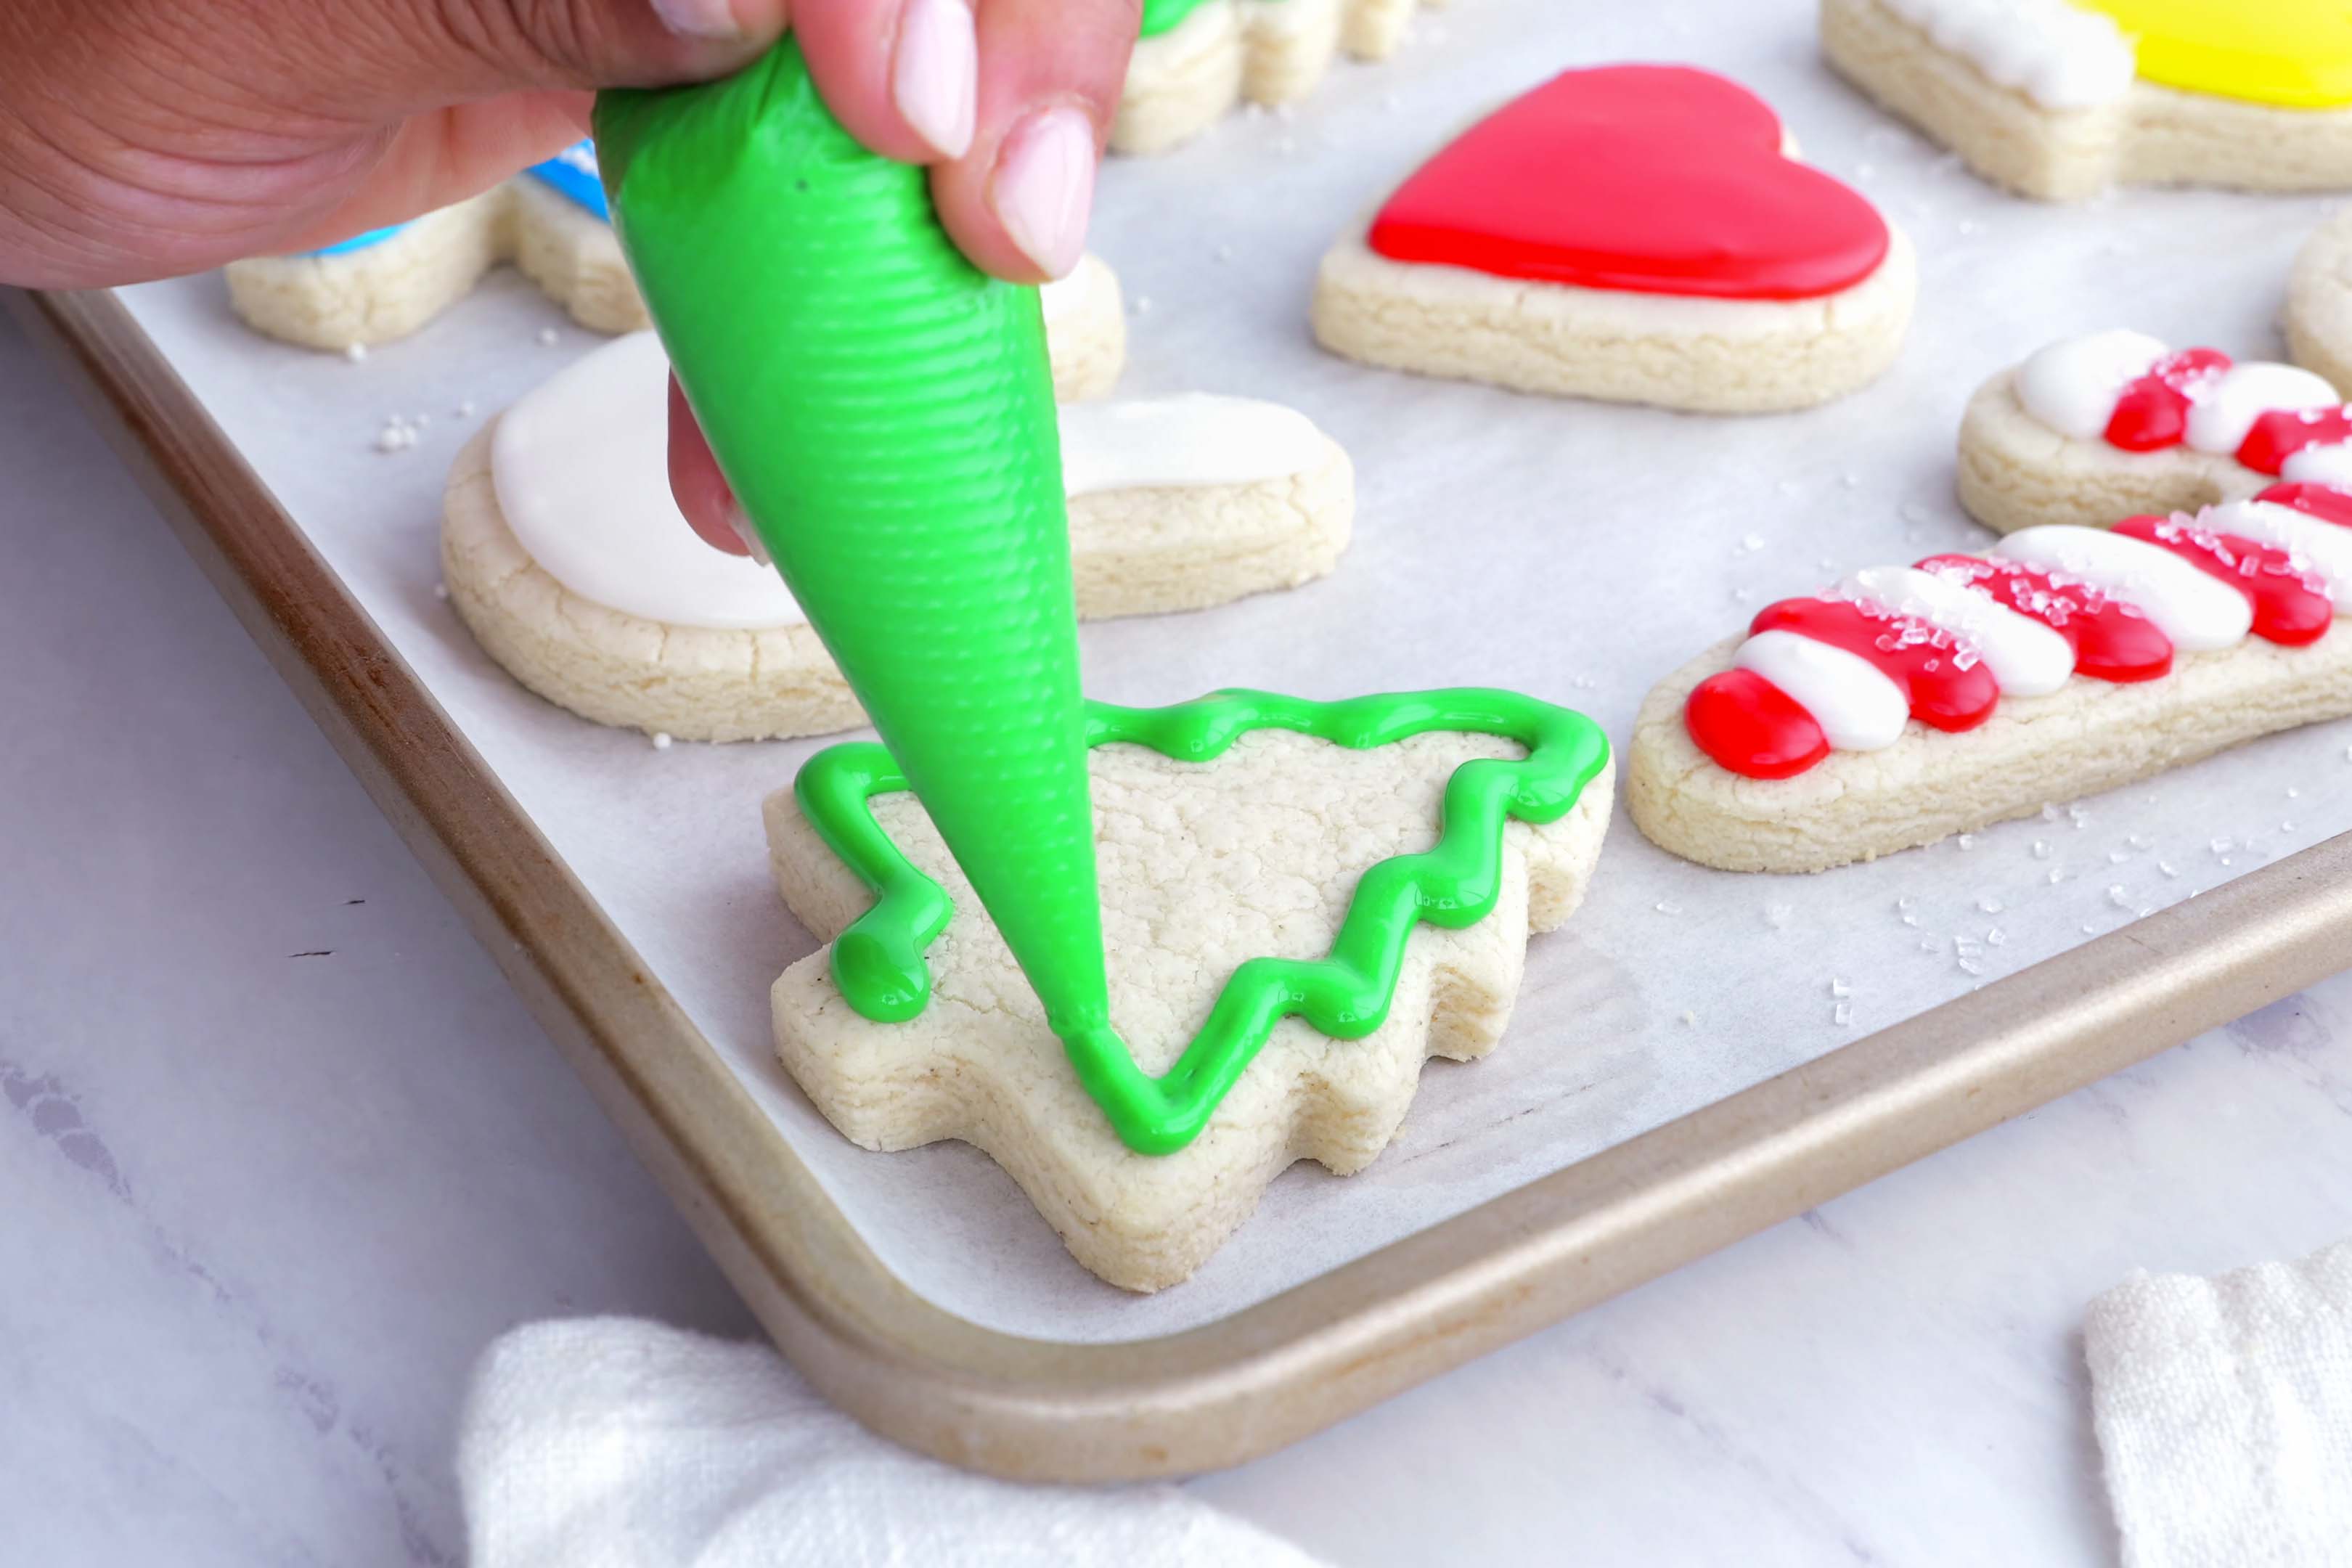
Shake on sprinkles and enjoy!
FAQs
Cut-out sugar cookies are made by rolling out the dough and cutting it into shapes before baking. Drop sugar cookies are simply made by dropping the dough onto the cookie sheet, and are generally thicker.
Sprinkle powdered sugar on a wooden surface and use a rolling pin to press and roll the dough until it is flattened. You can use flour to roll them out, but it will dull the sweetness of the cookies or make them more brittle.
To avoid burnt or undercooked cookies try to roll the dough so that it is ¼- to ⅓-inch thick. You can check the thickness of cookie dough by measuring with a ruler.
The trick to getting cut-out sugar cookies to hold their shape is to use relatively cold or chilled butter. You don’t want the cookie batter to be too warm before it goes into the oven. Also, avoid using leavening agents, such as baking powder and baking soda. These make the cookies inflate artificially; upon deflating they will spread out.

More Gluten-Free Christmas Cookie Recipes
There’s never a bad time for cookies! And these cookies can all be made gluten-free, as well. So whip up a batch today.
PB lovers will go crazy for Peanut Butter Blossoms and Peanut Butter Chocolate Chip Cookies.
The holidays get a lot sweeter with Cinnamon Roll Cookies.
Or, stick with a classic like Pecan Sandies.
No-Bake Chocolate Oatmeal Cookies and Almond Butter Oatmeal Cookies are surprisingly simple.
Tap stars to rate!
Gluten-Free Sugar Cookies (Cut-Out Recipe)

email this recipe!
Ingredients
- ½ cup butter cold, but not frozen, cubed*
- 1 cup sugar
- 1 large large egg
- 1 tsp. vanilla extract
- ½ tsp. almond extract
- ½ tsp. salt
- 2 ¼ cups gluten-free 1-to-1 baking blend such as Bob's Red Mill
Family Icing Recipe:
- 2 egg whites
- 2 Tbsp. butter melted*
- 3 cups powdered sugar sifted
- ½ tsp. vanilla extract
- 1-2 Tbsp. milk if needed
- food coloring
Royal Icing Recipe:
- 1 egg white
- 2 cups powdered sugar sifted
- ½ tsp vanilla extract
- 1 tbsp milk optional
Instructions
- Preheat oven to 375 degrees.
- Mix the Wet Ingredients: In the bowl of an electric mixer combine cubed butter and sugar. Mix on medium for 1-2 minutes, or until butter and sugar are just combined. Add egg, vanilla extract, almond extract, and salt. Continue mixing for 1-2 more minutes.½ cup butter, 1 cup sugar, 1 large large egg, 1 tsp. vanilla extract, ½ tsp. almond extract, ½ tsp. salt
- Add in Flour: Slowly add the flour to the butter sugar mixture. Continue mixing on medium until dough starts to form a ball.2 ¼ cups gluten-free 1-to-1 baking blend
- Cut Dough into Shapes: Place dough onto a lightly powdered sugar-coated surface. Use a rolling pin to roll dough to ¼- to ⅓-inch thickness. Cut dough into desired shapes using cookie cutters. (The metal ones work the best!) Place cookies on a parchment paper-lined baking sheet at least ½-inch apart.
- Cook in the Oven: Bake cookies for 9-11 minutes or until edges just begin to brown on the edges. Let cookies cool completely before frosting.
For the Family Icing:
- Mix Whites, Butter, Sugar: In a medium-sized bowl place, mix egg whites over medium speed for 1 minute. Add butter, vanilla and 1 cup powdered sugar. Mix until sugar is incorporated.2 egg whites, 2 Tbsp. butter, ½ tsp. vanilla extract, 3 cups powdered sugar
- Thicken Icing and Add Coloring: Add remaining sugar incrementally and mix well between each addition. If frosting is too thick, add 1-2 tbsp milk until desired consistency is reached. Add food coloring as desired.1-2 Tbsp. milk, food coloring
- Decorate Cookies: Frost cookies while the icing is still wet, using a toothpick to spread it delicately across the cookies.
For the Royal Icing: (optional)
- Beat Egg Whites: Place egg white in a medium bowl. Beat with a hand-held electric mixer for 1-2 minutes or until it becomes frothy. Add vanilla and mix for another minute.1 egg white, ½ tsp vanilla extract
- Mix in Sugar: Add powdered sugar and mix over medium-low speed for 4-5 minutes. If icing is too thick, add milk as needed to reach an easy piping consistency.2 cups powdered sugar, 1 tbsp milk
- Pipe Designs: Place royal icing in a piping bag fitted with a 3M piping tip or another round tip. Pipe designs on cookies and enjoy!
Tap stars to rate!
Video
Notes
- You can also use 1 1/2 cups sweet white rice flour, 3/4 cup tapioca starch, and 1 teaspoon of xanthan gum instead of the gluten-free flour blend.
- Food coloring gel works best when getting really vibrant colors in your icing.
- Use tweezers when placing small nonpareils onto the cookies.
- These sprinkles and these white nonpareils were used to decorate the cookies you see pictured.
- You can also use vegan “buttery” sticks or margarine if dairy-free.
Meal Prep and Storage
- To Prep-Ahead: The cookie dough can be made in advance and refrigerated for up to 3 days or frozen for up to 3 months. Defrost in the refrigerator before rolling out.
- To Store: Baked sugar cookies taste best when kept in an airtight container at room temperature for up to 3-4 days.
- To Freeze: Seal in a freezer-safe airtight container and freeze for up to 3 months.
Nutrition
Nutrition information is automatically calculated, so should only be used as an approximation.


Do you think I would still get great results if I made the dough ahead of time, refrigerated and then used a few days later? (Trying to prep for a 3 year olds birthday party with a business trip jammed right before it)
Hi Beth! Yes! I think you will still get great results. Just make sure you set the dough out 1-2 hours ahead of time so it comes completely to room temperature and you’re able to roll the dough easily. Also, try shaping the dough into a few round discs before refrigerating them instead of in one big bowl to help with this, too. Thanks for the question!
LOVE LOVE LOVE these cookies. They turned out perfect! Can I make the family icing recipe and the royal icing the day before I need it and just keep it refrigerated?
Hi Susan!! I am SO happy you love the cookies so much. Yes! You can absolutely make the icing the day before and keep it refrigerated. Just pull it out about 15-30 minutes before you’re ready to use it so it comes to the right temperature. Thanks for your comment and rating!!
I’ve been GF baking for 10 years…and these are thee best cut-out cookie. Easier, tastier, and more texturally accurate than Land O Lakes, GF on a Shoestring, gfJules, Betty, King Arthur, and my own experiments. I usually scale my ingredients but this cup ratio works (I used the rice and tap as written above). I also used psyllium powder instead of xanthan gum (I do this for every recipe, not just this one.). Finally, I omitted the almond extract and tripled the vanilla. Made two batches, pressing out in powdered sugar is key for that perfect sweetness (We didn’t even feel like we had to ice them.). They don’t run. They just sit there, still, like the little shapes they’re meant to be. My son said, “Oh my gosh, mom, we have to make these for Christmas.” Done. Evolving Table for the win.
Do you really mean 1/2 inch thick? That seems really thick. I would like to make them crispier. Has anyone made them thinner so they are crispier?
Great question, Betty! I made them again recently and measured with a ruler… They should be cut a little closer to 1/4-1/3 inch thick. I will update the recipe to reflect this for you. Thanks so much for your question!
Hi London,
I’m so excited to try your recipe. Do you have any thoughts about subbing sweet white rice flour for regular white rice flour? I’m trying to prevent the possible grittiness some of the other comments mention.
Thanks!
Hi Natalia!! I think that would work out just fine! The “grittiness” is all dependent on the fineness of the flours. The brand I use, and never get gritty cookies with, is Bob’s Red Mill. I use their tapioca starch and white rice flour with excellent results!!
I subbed arrowroot for tapioca starch. These cookies are incredible!! After multiple GF cookie fails, I was astonished when these worked out, and were SO good! I made them with my toddler and she was so proud of herself. You made our day!
Hi Kim! Arrowroot subs great for the tapioca starch! So so happy you and your little enjoyed them. 🙂 Thanks for the comment and rating!!
Thank you so much for this recipe! These are as close to the sugar cookies from when I could eat gluten as I can imagine any recipe coming! Couldn’t believe how well they rolled out – at first I thought the dough was a little too dry to work out, but It came together nicely as it was rolled. Great tip using powdered sugar instead of flour too! Can’t wait to try this again at Christmas!
Yay, Denise!! I am SO happy to hear you loved the sugar cookies. Can’t wait to see what you make at Christmas! Thanks for the comment and rating!
So great….I made peach cut outs for a Georgia Peach Party…so cute!
Those sound absolutely adorable, Rebecca!! So happy you enjoyed them. Thanks for the review and rating!
The cookies were delicious! But they did spread -so much so that I had to carefully cut them apart to retain some shape. There were some casualties.
I left them in the oven quite a while to try to get a little browning. So they were crisp, but got rave reviews!
This was my very first venture into gluten-free baking. So I’m thrilled. Next time I’ll just leave more space between the cookies :o)
Hi! Making sure your ingredients are at the appropriate temperature can help with spreading. If you are unsure, refrigerate the dough for about 30 minutes before baking next time! Thanks for the comment 🙂
These were very very good but I found them to be much too gritty. I divided your recipe in 3 parts because I had some trial ideas. I followed your recipe and baked as directed (tho’ thinner and shorter baking time) but they were gritty as was the unbaked dough (a personal fondness). On the 2nd batch, I let them sit for a while so the starch could be absorbed some by the liquids. Still, too gritty. So on the last batch I added 1 oz of cream cheese. That worked much better. In my GF baking trials, which I have been doing for the last 3 years as my daughter-in-law is GF, I have found that American’s Test Kitchen GF free baking book is nearly a bible. They talk about the whys and wherefores of what does and does not work so I have been learning how to adapt my lifetime favorite recipes. Starch needs to be absorbed by liquids and it takes a little time. I will try your recipe again adding 3 oz of cream cheese, and see what happens. I think I may also try ATK’s flour blend recipe rather than straight white rice flour. That may also contribute to the grittiness. But they are delicious. Everyone loved them – GF and non-GF alike!
I love your adaptation of the recipe, Elizabeth! I would love to hear how adding 3 tablespoons of cream cheese turns out. So happy that everyone enjoyed them! Hope you have had a Merry Christmas 🙂