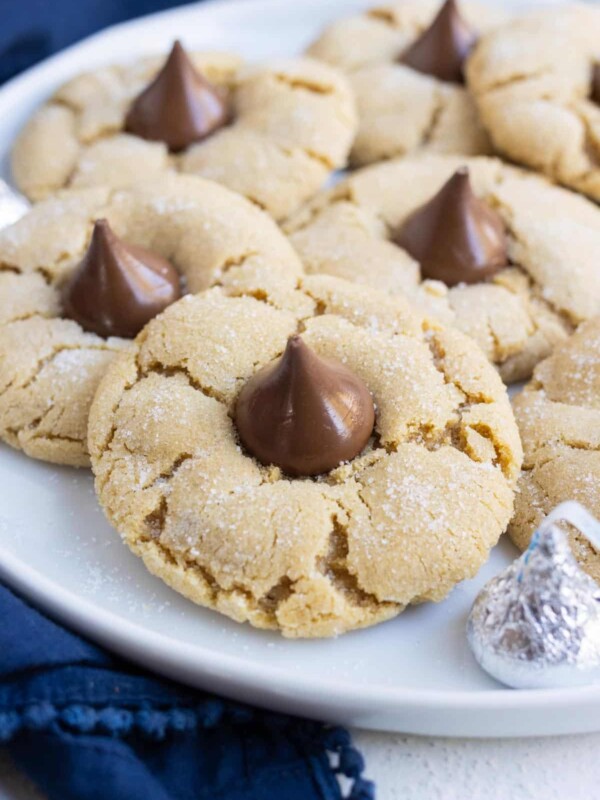
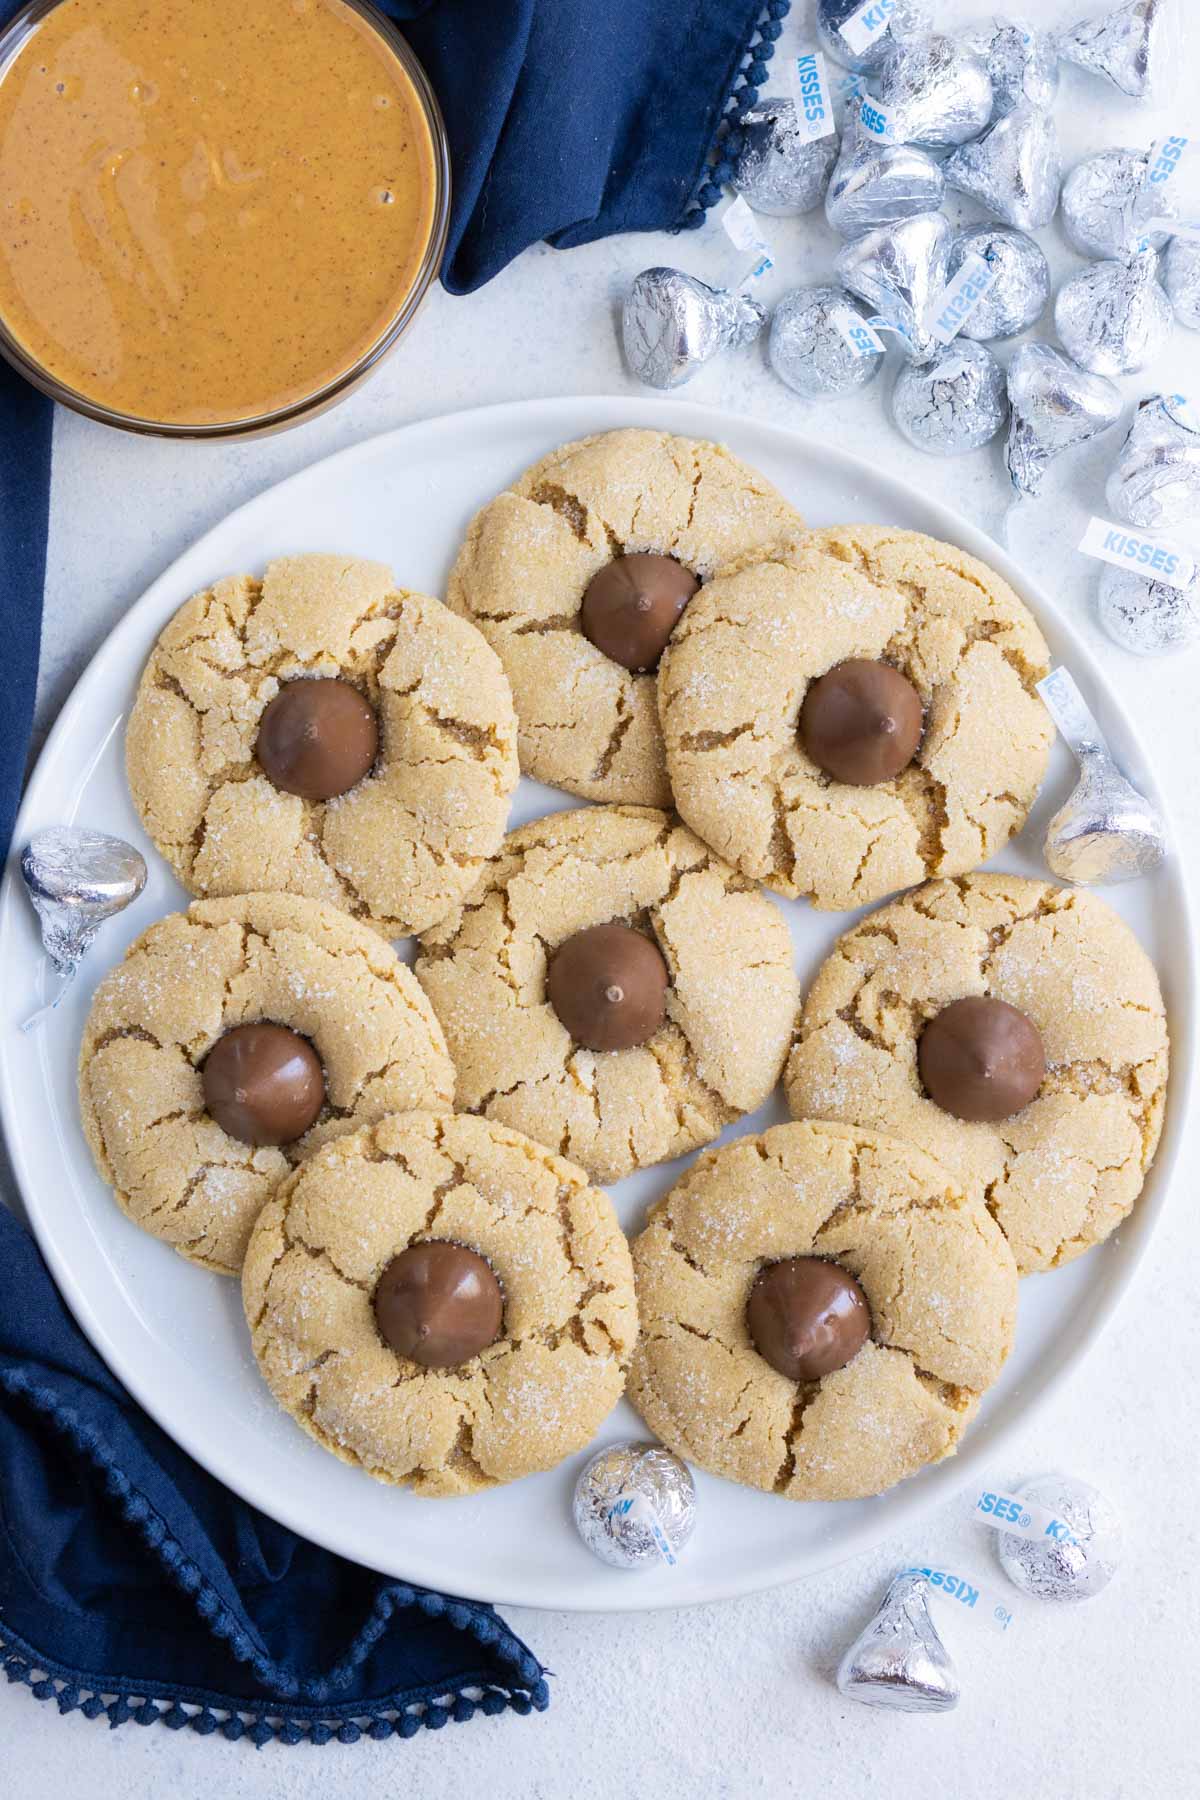
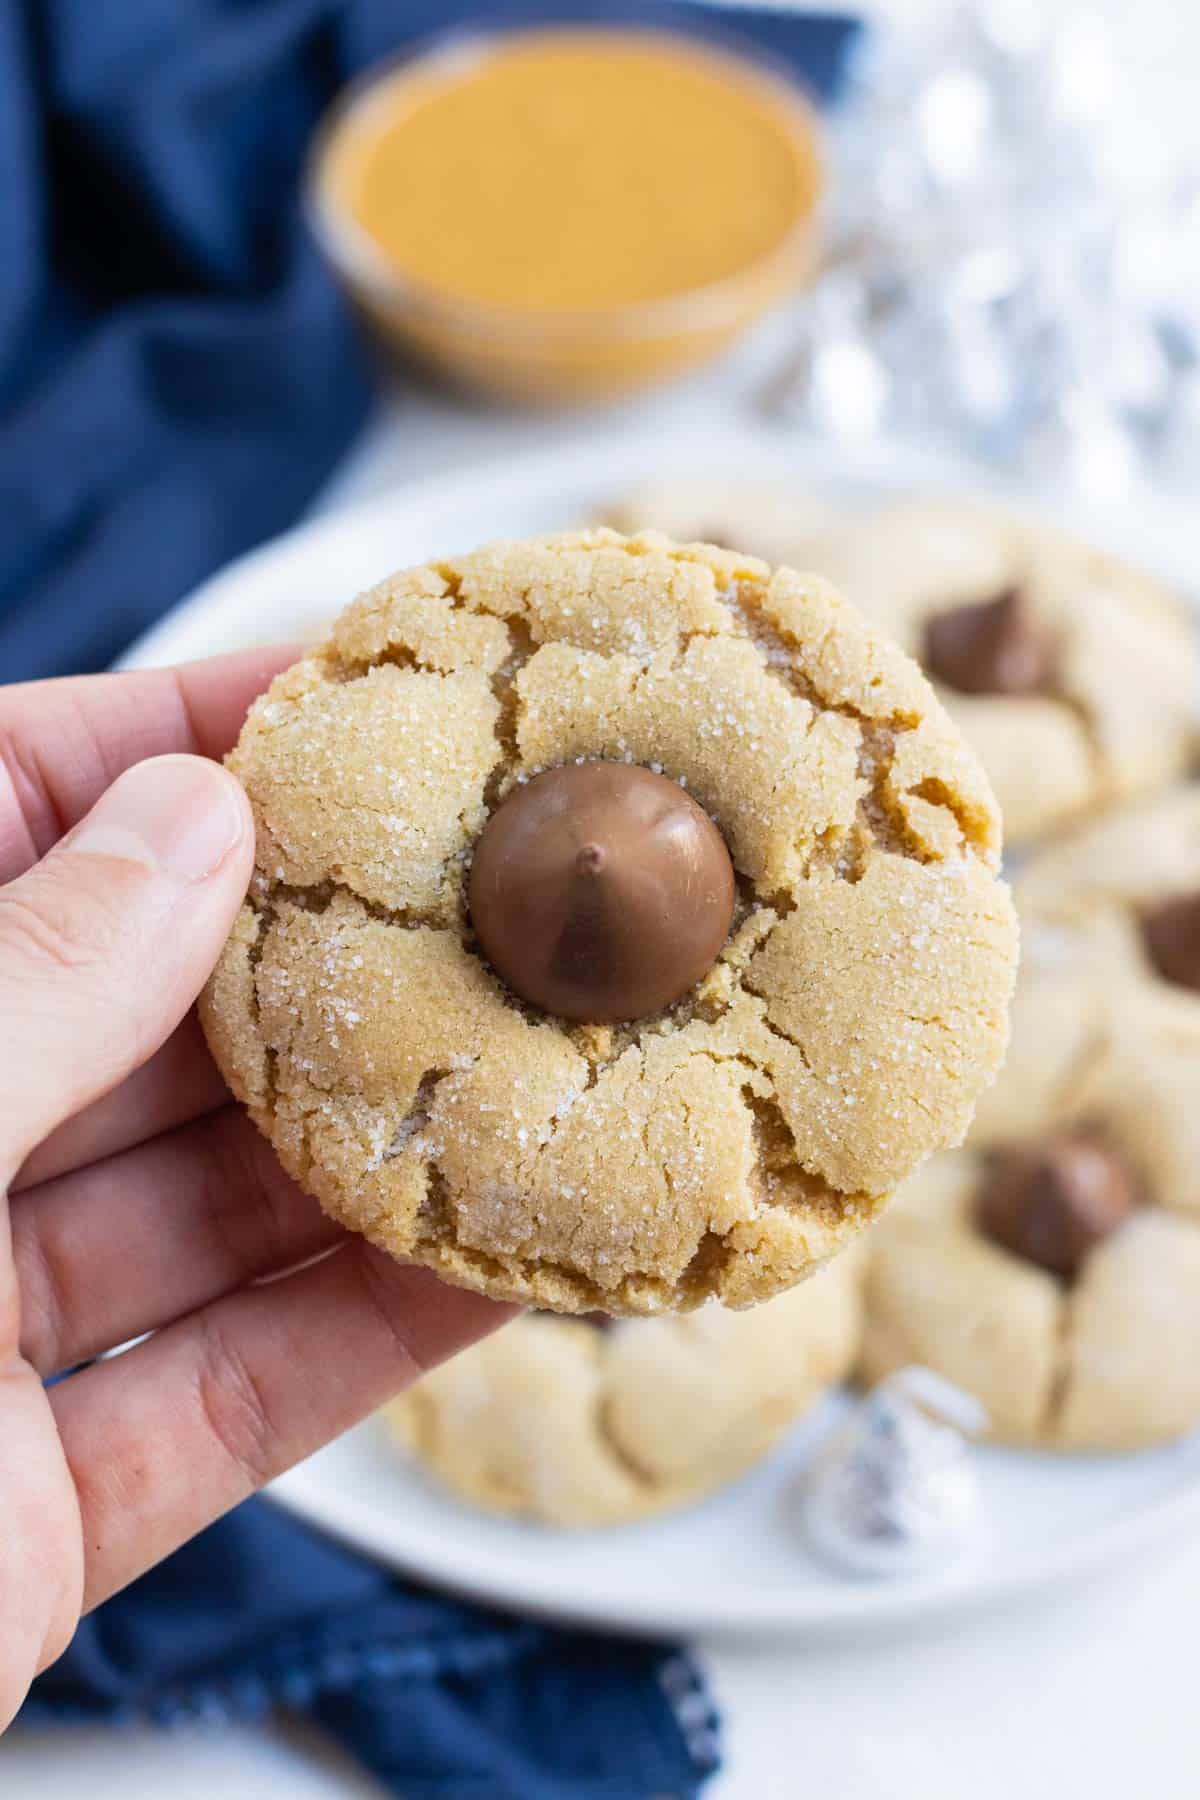
Everyone knows those fun little Christmas cookies with the Hershey’s kiss perfectly centered in the middle. Many kids grab those from the tray first.
I know I did! These were my absolute favorite growing up. I loved helping my mom unwrap all of the kisses before she’d press them into the cookies. It’s one of my best memories.
As an adult, I still love digging into these tasty cookies.
And if you’re looking for other holiday treats, try these Cut-Out Sugar Cookies or these Peanut Butter Chocolate Chip Cookies next!
Ingredients
For the exact measurements and detailed instructions, you can jump to the recipe.

- Flour. A gluten-free 1-to-1 blend is delicious, but an all-purpose flour works just as well if you don’t need them to be gluten-free.
- Butter. Softened butter is essential. Salted or unsalted will both work great and will have minimal impact on the finished product.
- Peanut butter. Creamy peanut butter is necessary for the smooth texture. Avoid using chunky.
- Sugar. Both brown and white sugar are used in the recipe.
- Egg. One large egg is needed, opt for cage-free and/or organic if possible. You can use a flax egg if you have to avoid eggs.
- Hershey’s kisses. You need 30 unwrapped pieces. Some stores have these ready in the baking aisle!
How to Make Peanut Butter Blossoms
Jump to the recipe for the full instructions, ingredient amounts, and a printable recipe.
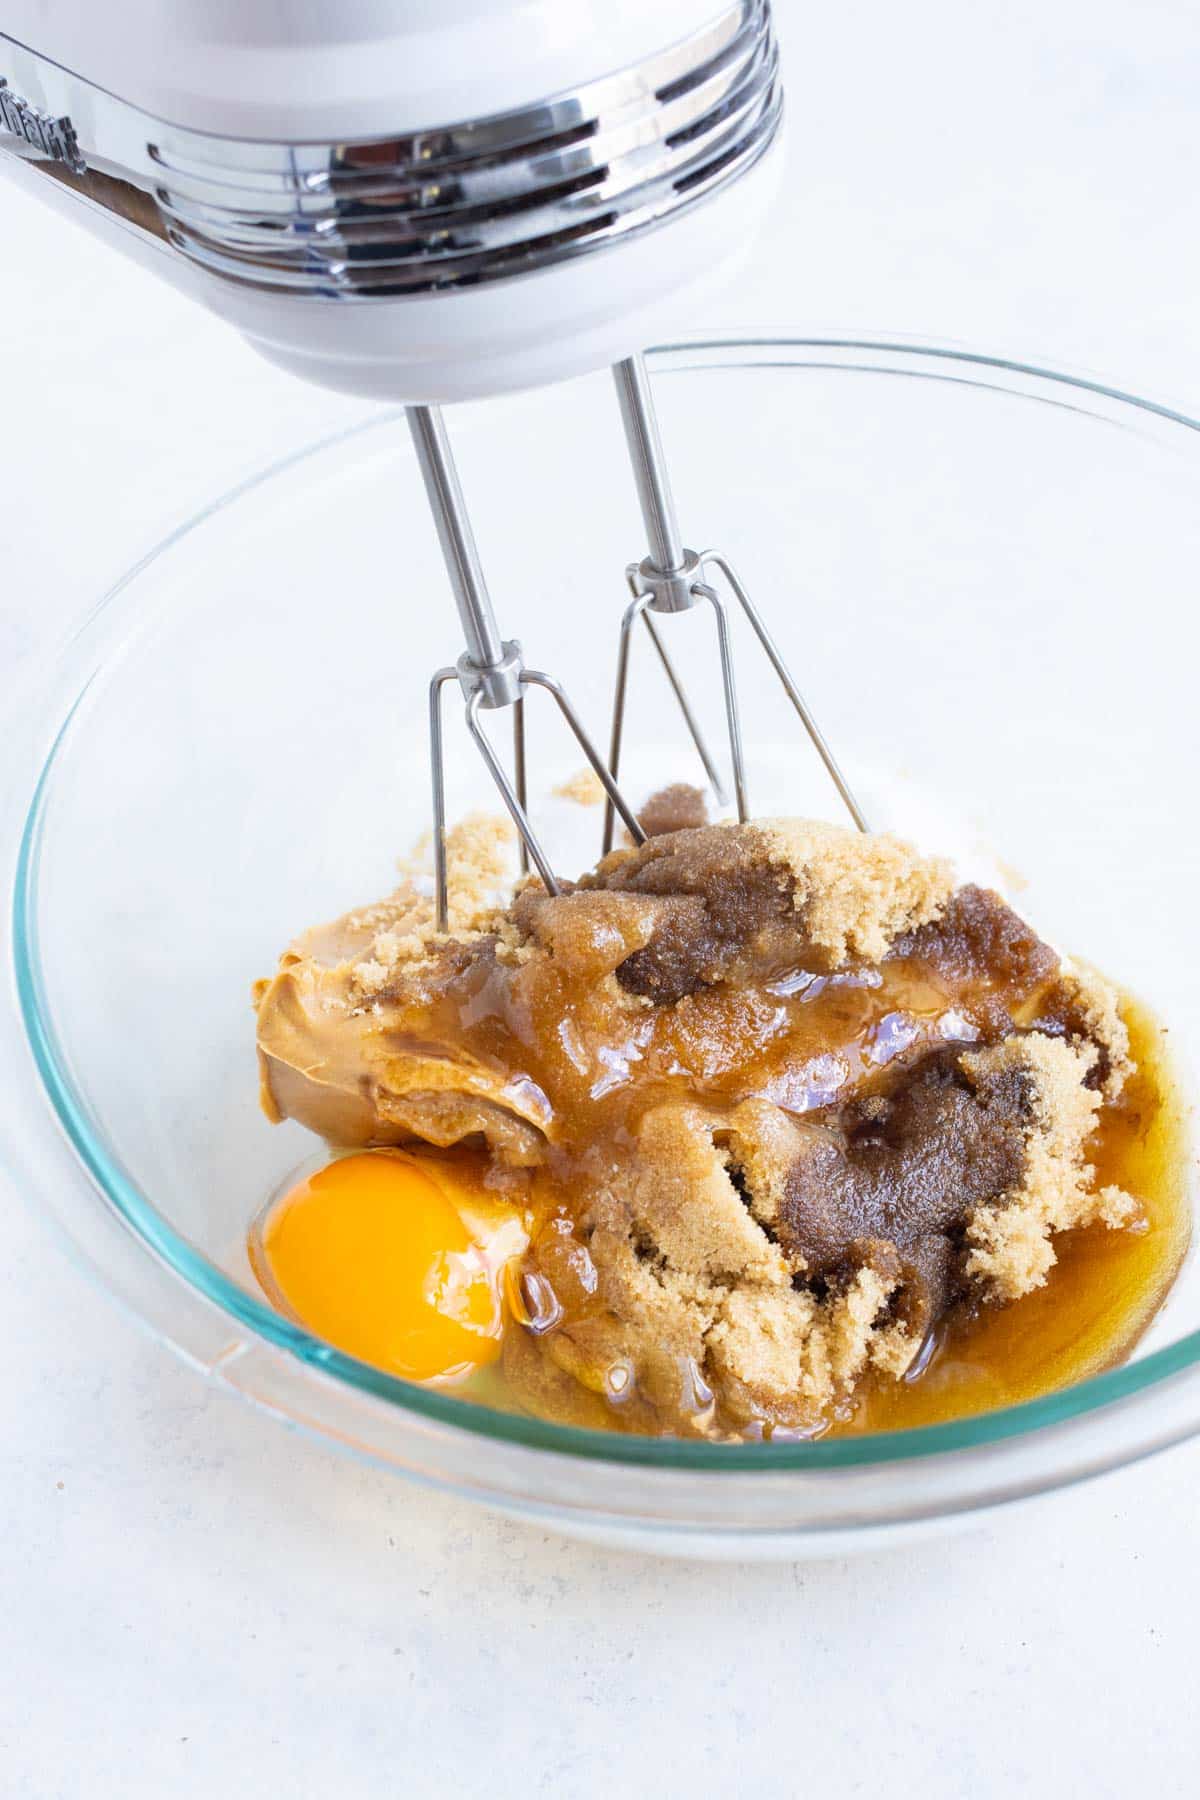
- Beat the wet. In a large bowl, combine softened butter with the creamy peanut butter, brown sugar, ½ cup of white sugar, egg, and vanilla extract. It is easiest to use a hand mixer or a stand mixer and beat the peanut butter cookie dough for about 30 seconds. If you mix by hand, be sure everything is thoroughly combined.
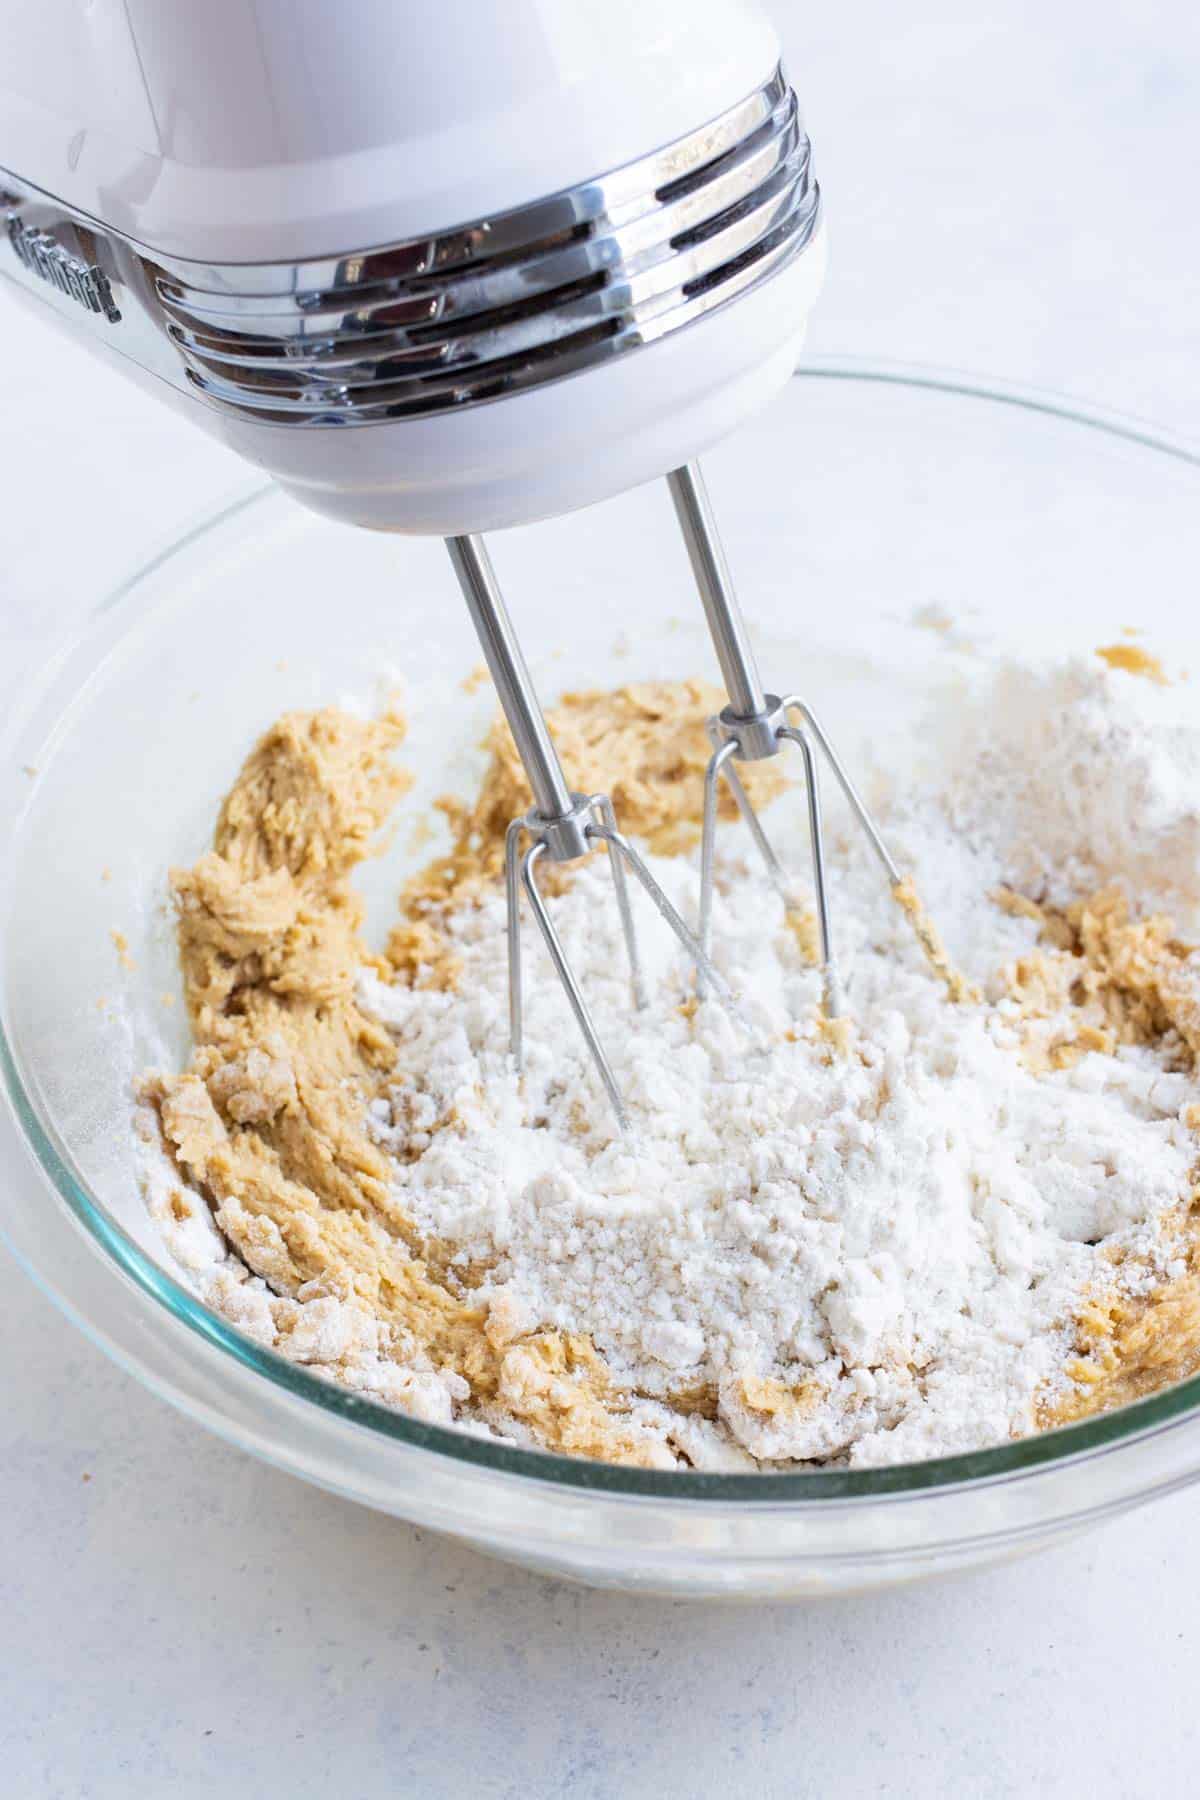
- Add the dry. Add 1 cup of flour, baking soda, baking powder, and salt to the bowl with the peanut butter mixture. Slightly whisk these ingredients until they’re evenly distributed. If you’re using a mixer, beat everything on medium speed until the dry ingredients are fully incorporated into the dry. Continue adding the flour in ¼-cup increments until it is well combined.
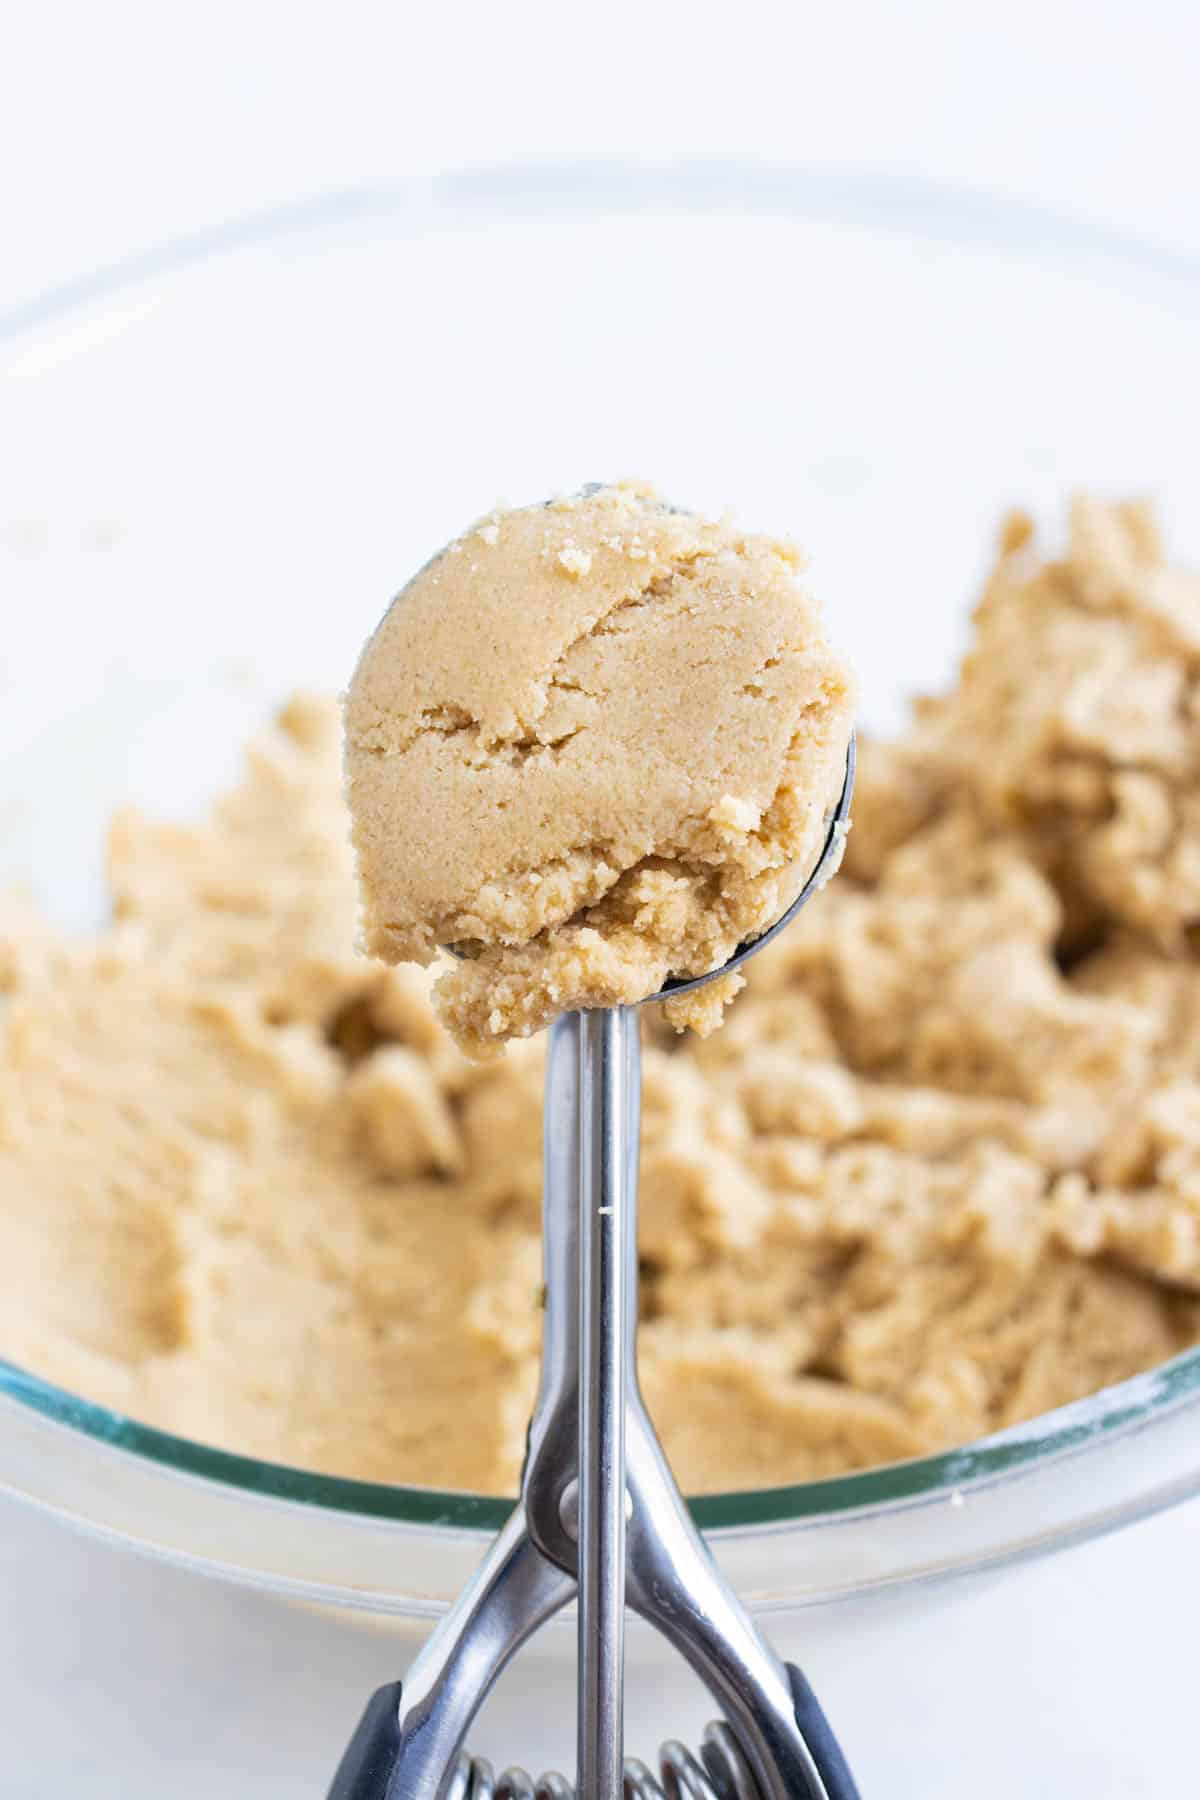
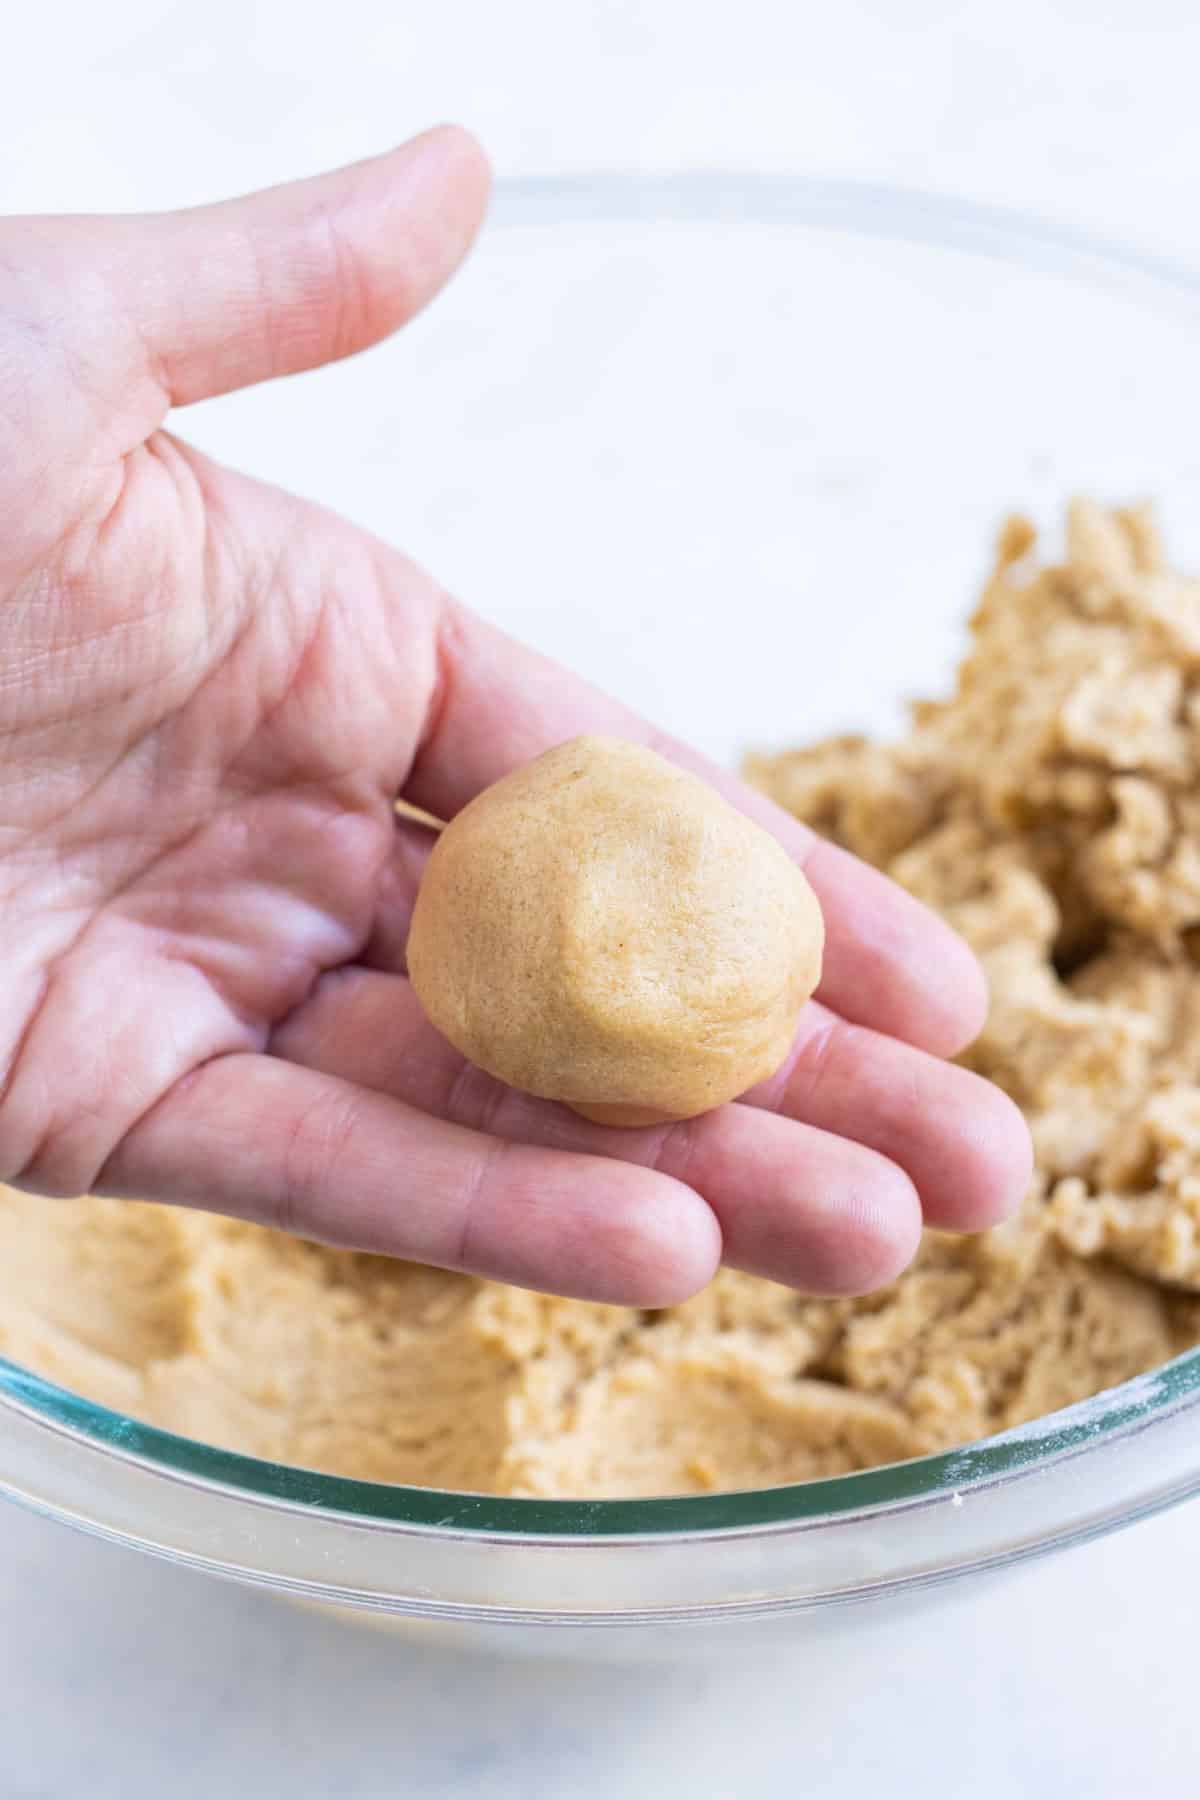
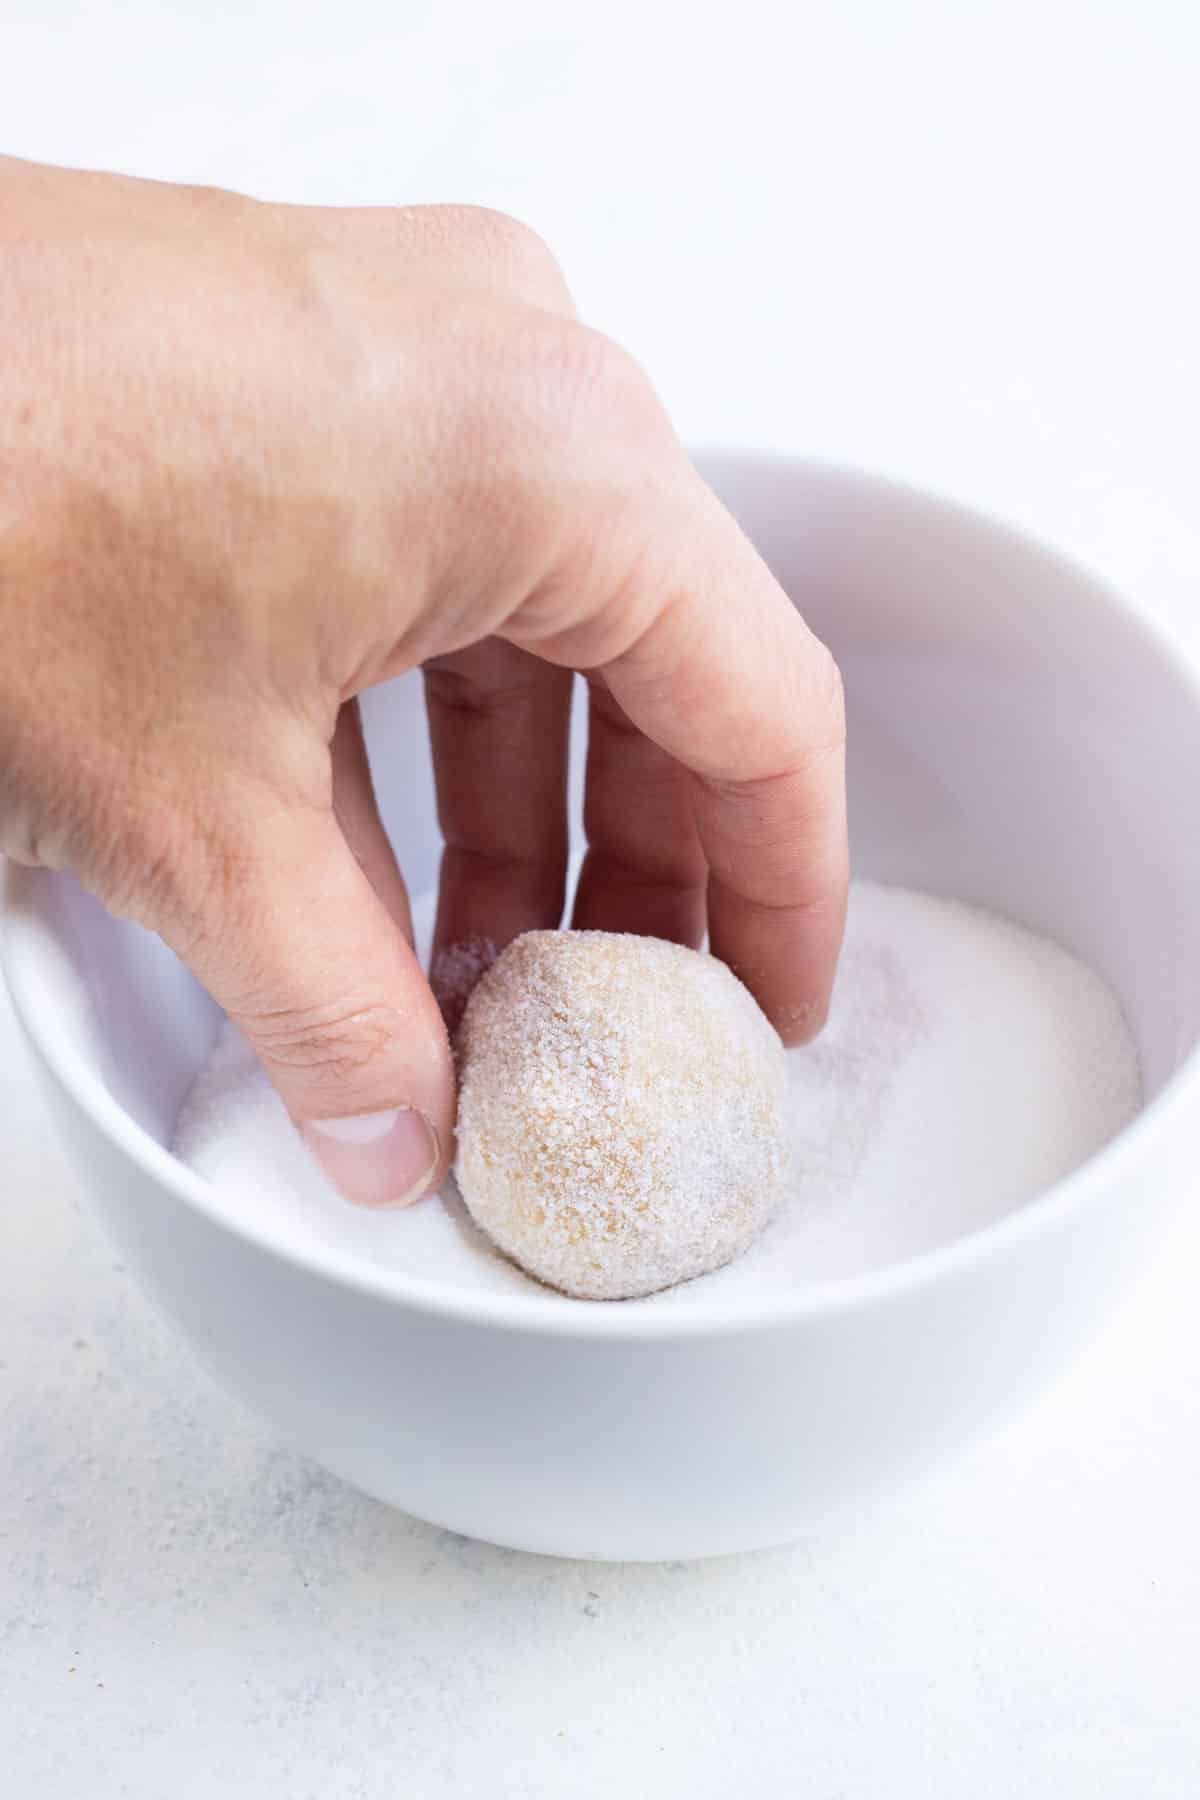
- Scoop the cookies. Use a cookie scoop or large spoon to measure out about 1 ½ tablespoons of cookie dough. Roll it into a ball using your hands. If the dough is sticking to your fingers, rub a little butter or olive oil on your hands. Pour the remaining ¼ cup of sugar into a small bowl. Roll the cookie dough balls in the bowl until they are completely coated.
- Chill before baking. Place the cookies on a plate and set them in the refrigerator for at least 2 hours. This allows the dough to firm up slightly and will prevent them from spreading once baked. If you need to unwrap the kisses, now is the time to do it!
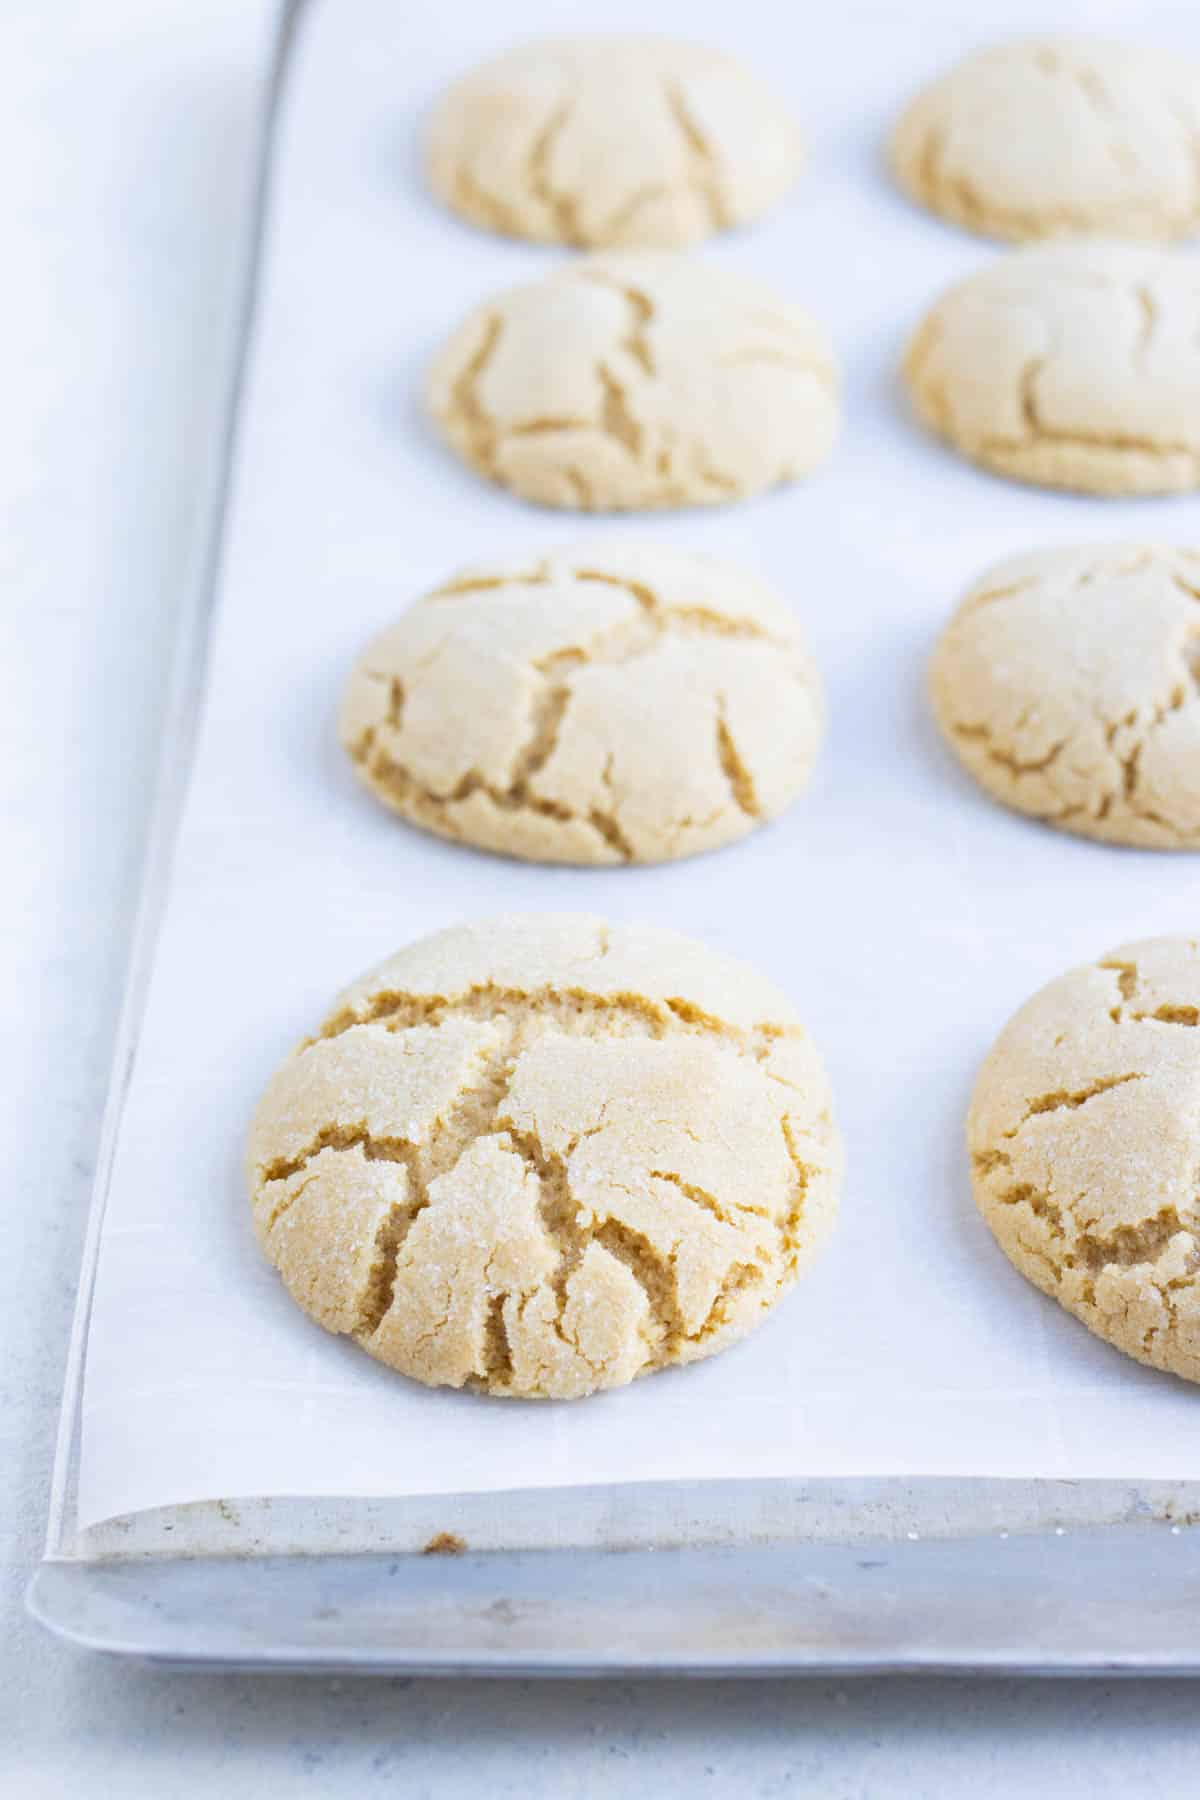
- Bake in the oven. Near the end of the chill time, preheat the oven to 375℉. Line a baking sheet with parchment paper. Set the chilled cookies at least 1 inch apart from each other on the sheet. Bake the cookies for 8 to 10 minutes. They are done when the middle is no longer doughy, and they are a slight golden-brown color.
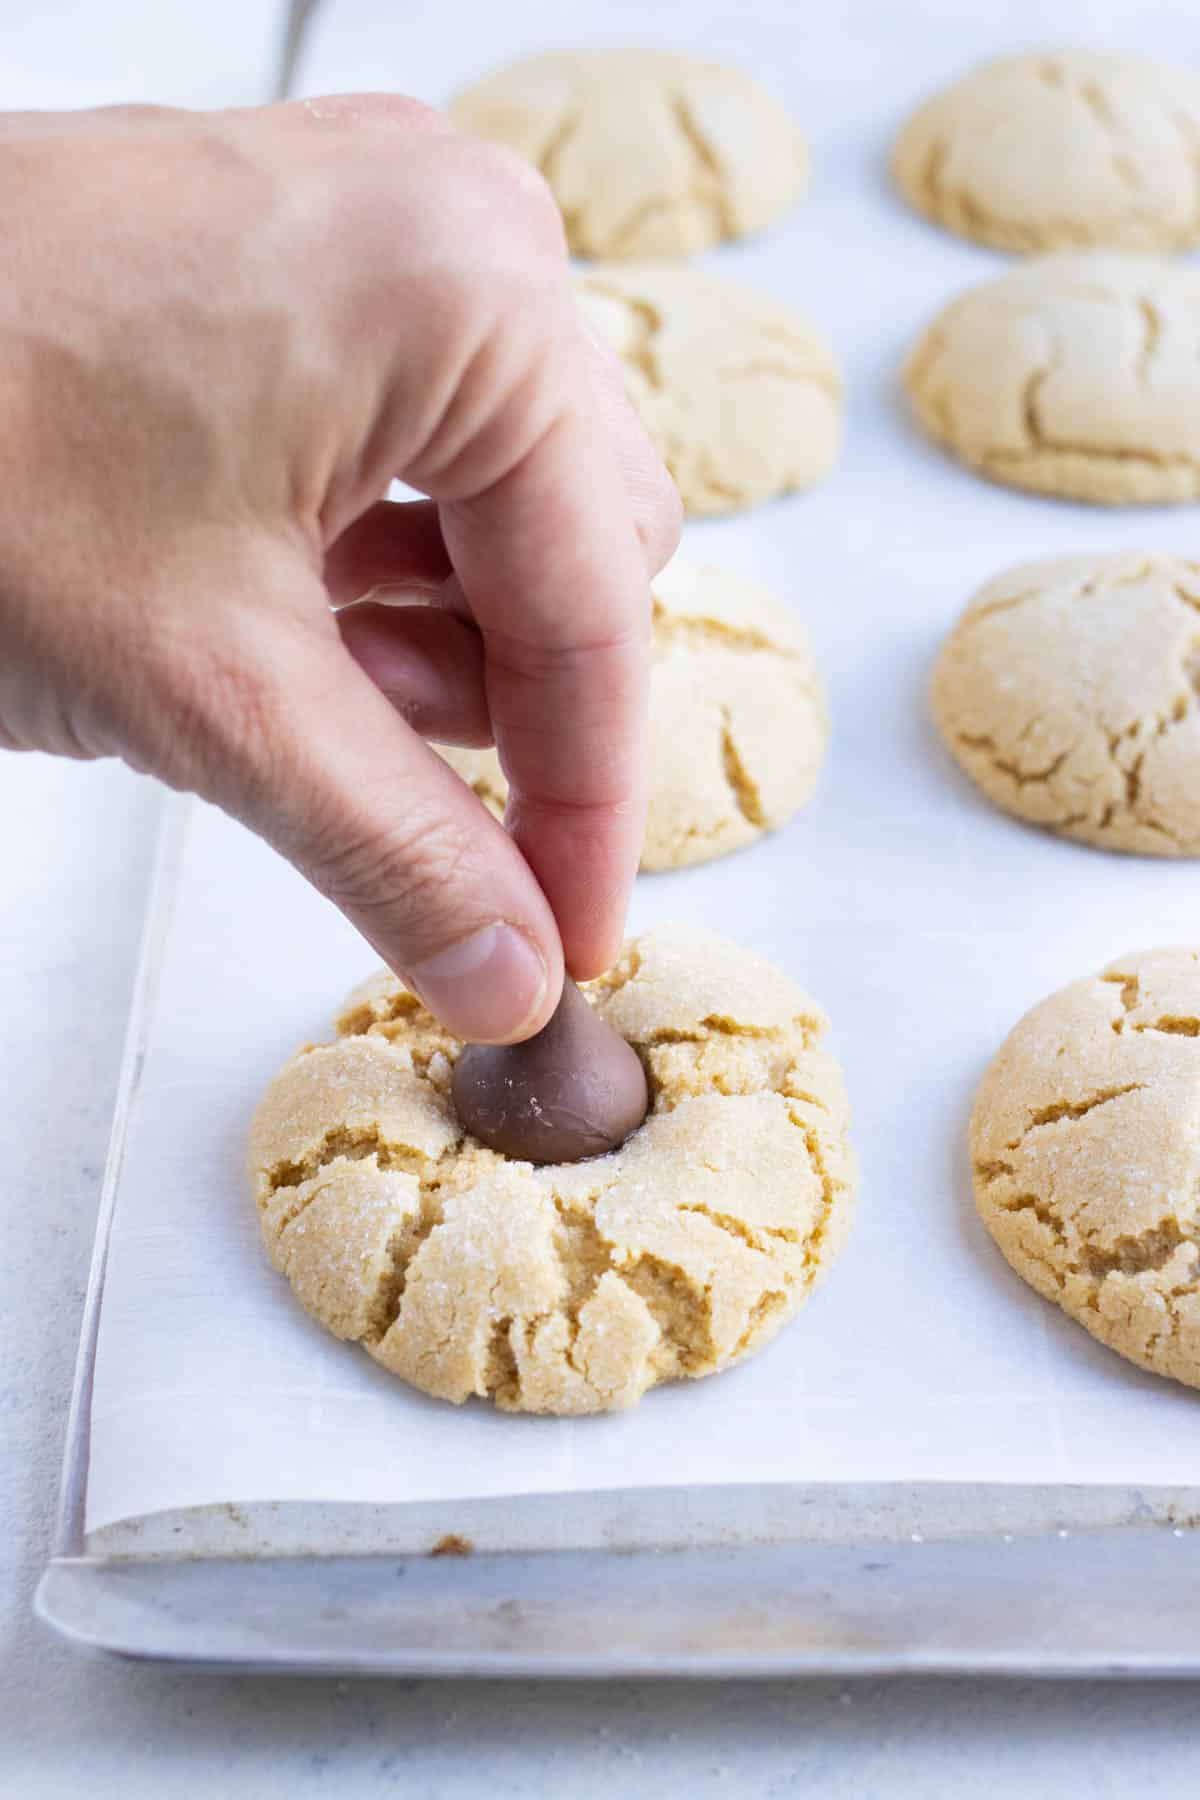
- Add the kisses. As soon as you remove the pan from the oven, place a Hershey’s kiss in each cookie and slightly twist down to ensure it sticks in. Remove the cookies to a wire rack to cool completely before enjoying!
Meal Prep and Storage
- Prep-Ahead: You can unwrap the kisses and store in a bag. The dough can be made a day early, as well. Simply keep it covered in the fridge.
- Storage: Place cookies in an airtight container and leave at room temperature for up to 3 to 4 days or in the fridge for up to 6 to 7 days.
- Freezing: These cookies freeze beautifully. Tightly wrap them in plastic and store in the freezer for up to 4 to 6 months.
FAQs
Your cookies could be dry and fall apart for a couple of reasons. Very likely you either added too much flour to the dough or baked them too long.
Originally, this peanut butter cookie with a kiss was invented in the 1950s and entered into a baking competition. Eventually, Pillsbury renamed them to Peanut Butter Blossoms and inducted them into Bake-off Hall of Fame.
It is believed that the peanut butter cookie was developed in America as early as 1900.
More Gluten-Free Cookie Recipes
Finding a delicious gluten-free cookie recipe is tough.
But I promise these Cinnamon Roll Cookies are both easy to make and super tasty. Try this Peanut Butter Chocolate Chip Cookies recipe, as well.
Pecan Sandies are deceptively good, and these Cut-Out Sugar Cookies are a classic!
For a non-traditional option, try these No Bake Samoa Oatmeal Cookie Bars or Almond Butter Oatmeal Cookies.
Tap stars to rate!
Gluten-Free Peanut Butter Blossoms

email this recipe!
Ingredients
- 1 ¾ cups flour gluten free 1-to-1 blend
- 1 teaspoon baking soda
- ½ teaspoon baking powder
- ½ teaspoon salt
- ½ cup butter softened
- ½ cup peanut butter creamy
- ¾ cup packed brown sugar packed
- ½ cup sugar plus more for rolling
- 1 large egg
- 2 teaspoons vanilla extract
- 30 Hershey’s chocolate kisses
Instructions
- Add softened butter to a large bowl along with the peanut butter, brown sugar, ½ cup of white sugar, egg, and vanilla extract. Beat on medium speed with a handheld mixer for 20-30 seconds, or until combined.½ cup butter, ½ cup peanut butter, ¾ cup packed brown sugar, 1 large egg, 2 teaspoons vanilla extract
- Add 1 cup of flour, baking soda, baking powder, and salt to the bowl. Whisk just the dry ingredients with a fork or whisk so they’re evenly distributed. Beat everything together on medium speed until the flour is incorporated into the wet ingredients. Add in the rest of the flour ¼ cup at a time until it is well combined.1 ¾ cups flour, 1 teaspoon baking soda, ½ teaspoon baking powder, ½ teaspoon salt
- Scoop out 1 ½ tablespoons worth of cookie dough and then roll it into a ball. Add the cookie dough ball to a medium-sized bowl with the remaining ¼ cup of sugar in it. Toss the ball in the sugar until it is completely coated and place on a large plate. Repeat this with the remaining cookie dough. Refrigerate the balls for at least 2 hours so the dough can firm up.
- Once almost done chilling, set the oven to 375 degrees. Add the cookie dough to a parchment paper lined baking sheet, making sure the balls are at least 1-inch apart.
- Bake cookies in the preheated oven for 8-10 minutes. As soon as they are done baking, sink a Hershey’s kiss into the middle of each cookie and then give it a slight twist to ensure the cookie sticks to the chocolate.30 Hershey’s chocolate kisses
- Let the cookies cool to room temperature before serving or storing. Enjoy!
Tap stars to rate!
Video
Notes
- Butter. Softened butter is key.
- Kisses. Buy unwrapped kisses to save time and stick them into very warm cookies.
- Peanut Butter. Choose creamy over crunchy for the best texture.
- Chill. Be sure to allow time for the dough to rest in the fridge.
- Prep-Ahead: You can unwrap the kisses and store in a bag. The dough can be made a day early, as well. Simply keep it covered in the fridge.
- Storage: Place cookies in an airtight container and leave at room temperature for up to 3 to 4 days or in the fridge for up to 6 to 7 days.
- Freezing: These cookies freeze beautifully. Tightly wrap them in plastic and store in the freezer for up to 4 to 6 months.
Nutrition
Nutrition information is automatically calculated, so should only be used as an approximation.