
Instant Pots can seem overwhelming at first with all their buttons and functions.
And if you’re like me, maybe you’re a tiny bit scared of blowing up your kitchen…
But once you get the know the basics of how to use an electric pressure cooker, the fear and intimidation will melt away!
After learning a few simple concepts and cooking principles you too will fall in love with its’ ability to make quick and delicious meals.
So, keep on reading to learn how to set up and use your pressure cooker and get to making your favorite healthy recipes in a fraction of the time!
What is an Instant Pot?
An Instant Pot is a particular brand of pressure cookers.
An electric pressure cooker heats food by increasing the amount of pressure, or steam, within the pot.
It also makes the food as tender as slow cookers but in much less time.
Using an Instant Pot will decrease the cook time by up to 70% in some recipes. For most dishes, however, it will save you on average about a third of the time versus traditional cooking methods.
You can prepare dry beans in under 30 minutes, brown rice in under 15 minutes, and it’s even a yogurt-maker!
Best Instant Pot to Buy
The best Instant Pot to buy is really any of them that you feel the most comfortable using!
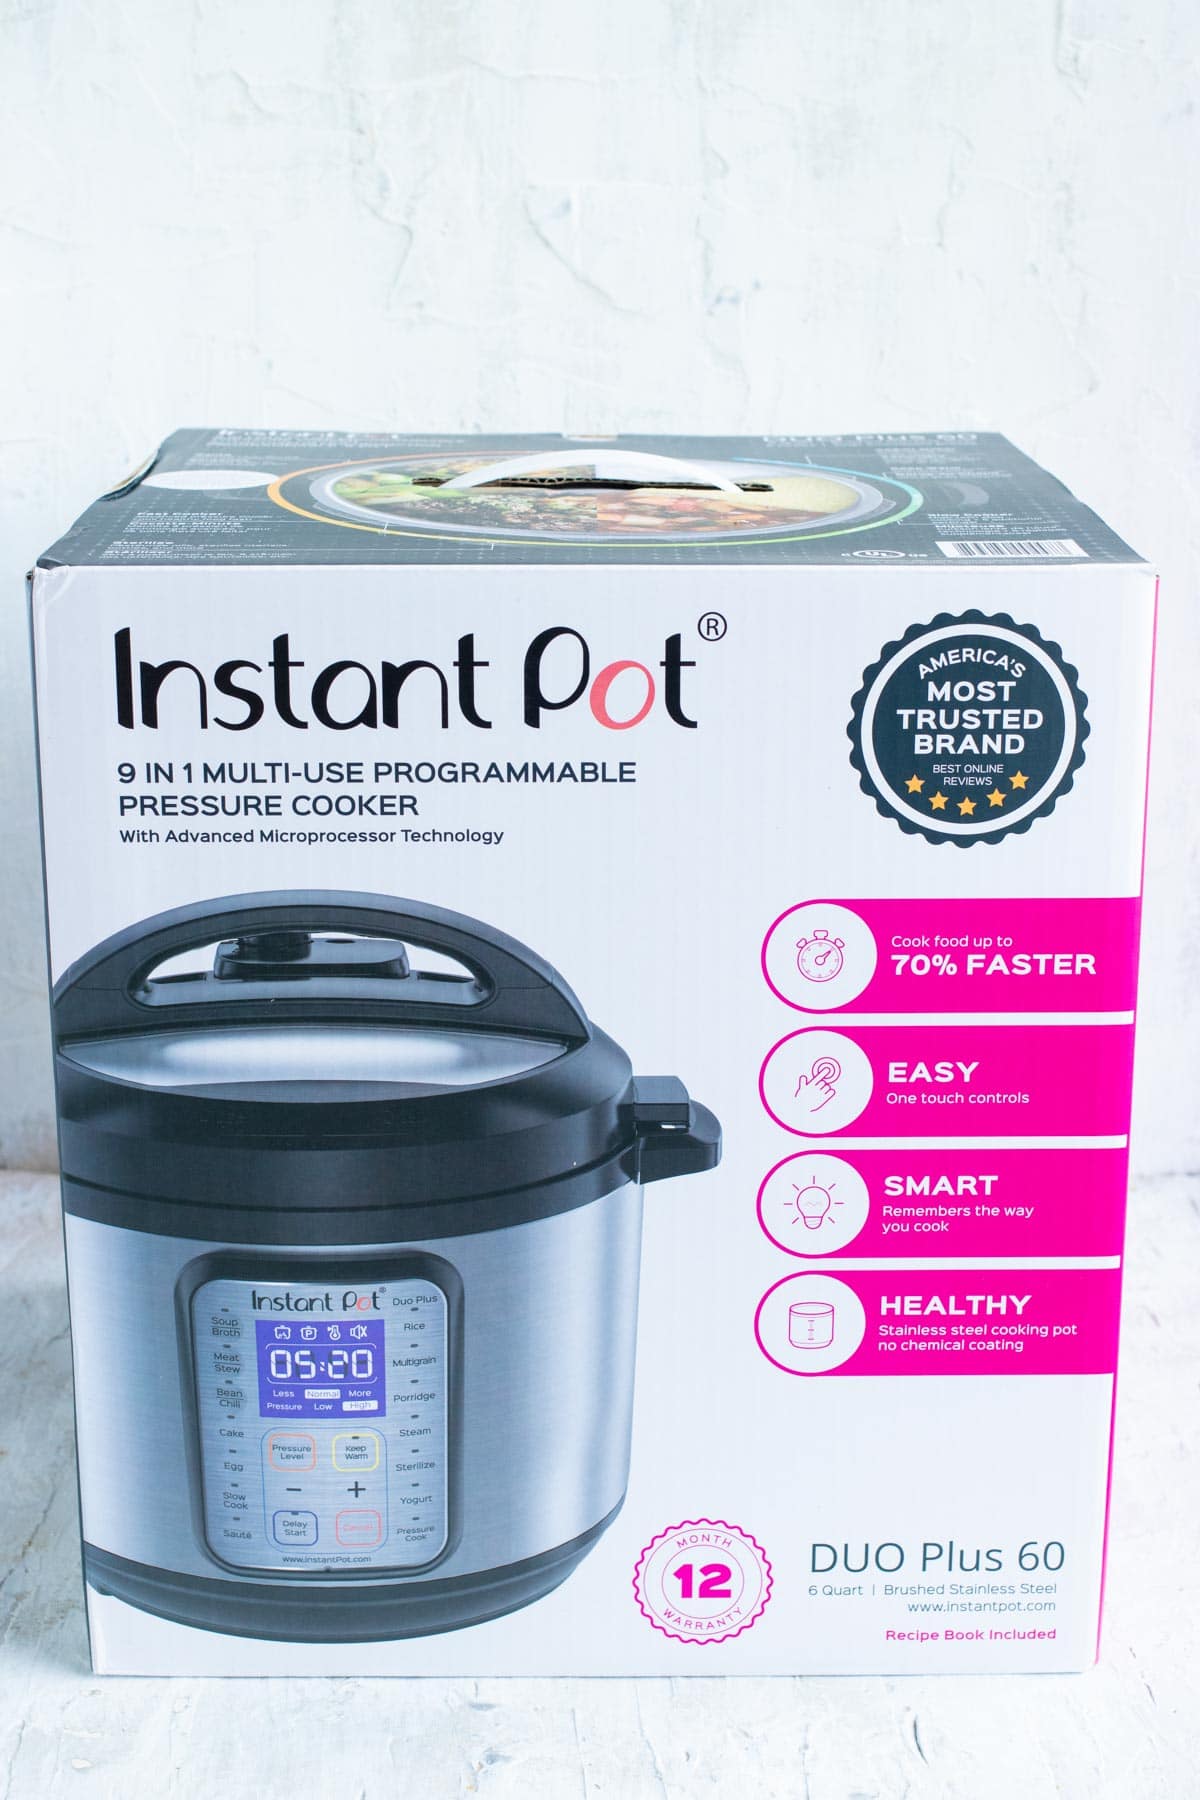
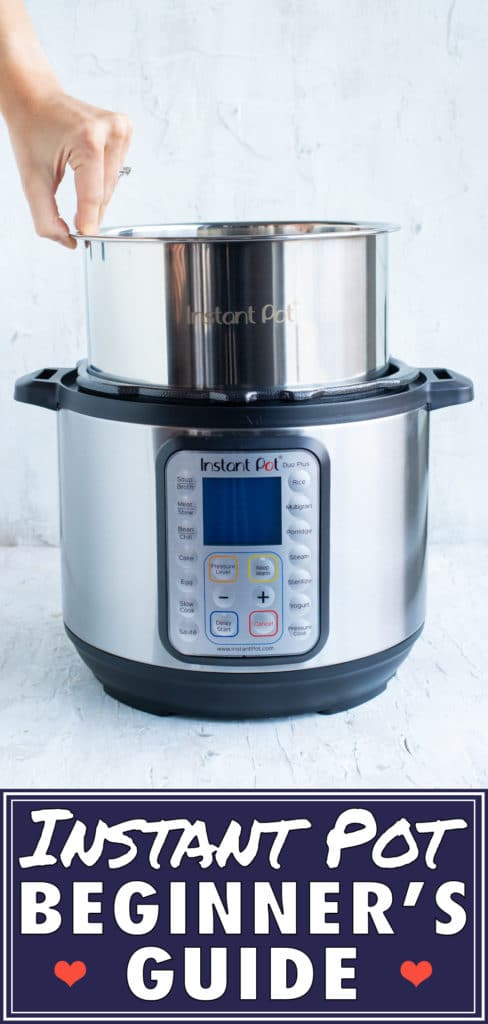
The Instant Pot Duo Plus 6-quart 9-in-1 is what you will see pictured below and is what I use, but it may be harder to find since it’s a few years old.
The Instant Pot Ultra 60 Ultra 6 Qt 10-in-1 is very much like the Duo Plus and is available where most pressure cookers are sold.
A 6-quart model is an adequate size for a family of 4-6.
An 8-quart model is great if you plan on making double batches of soups, or have more than more than 5 or 6 people in your family.
Since the sauté function, slow cook, and the manual cooking are the primary settings used, there’s no need to splurge on extra functions.
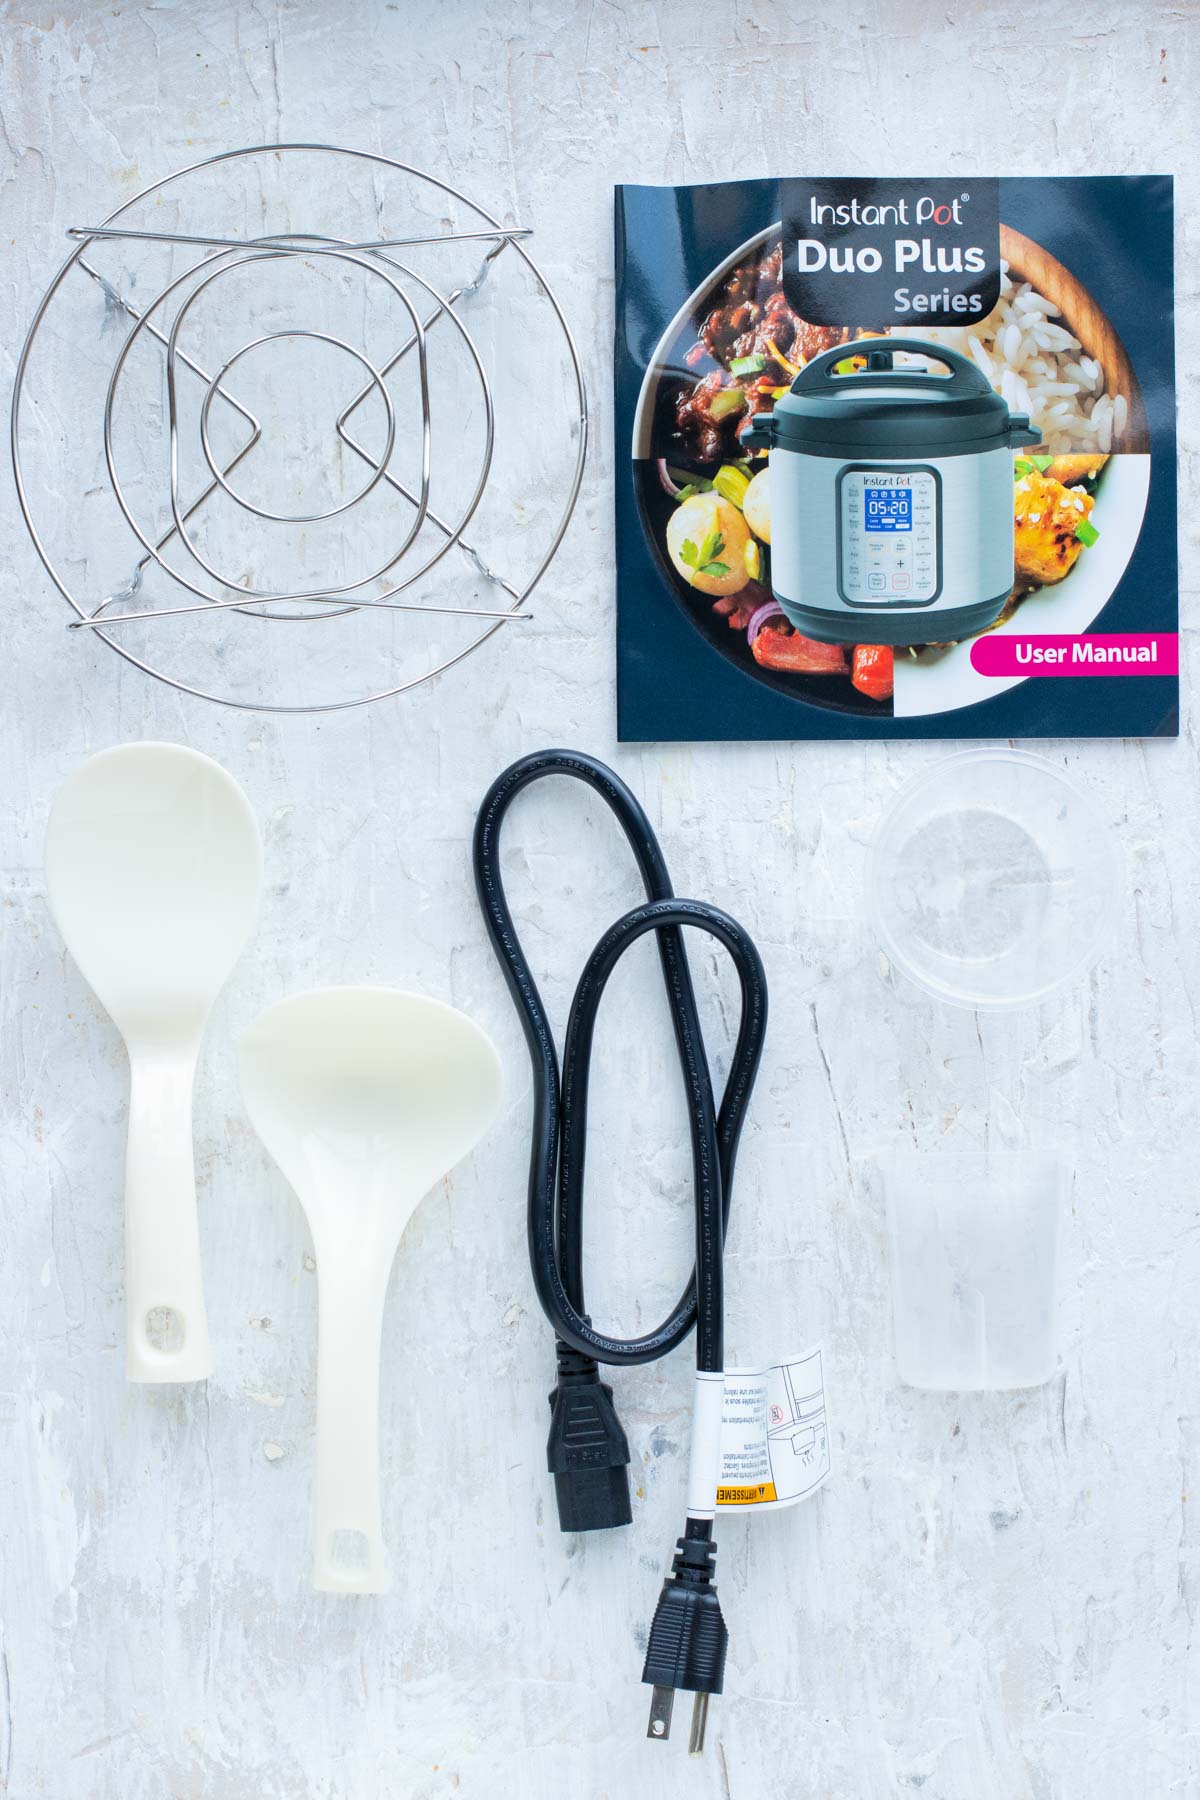
What’s in the Box
The Duo Plus series comes with a few small items and accessories you want to make sure you grab before tossing the box:
- User Manual – Hold onto this wonderful resource for any additional questions you may have.
- Trivet – This can be used to steam vegetables or hold delicate ingredients like eggs.
- Soup spoon – A plastic spoon to serve soup.
- Rice paddle – For dishing up rice.
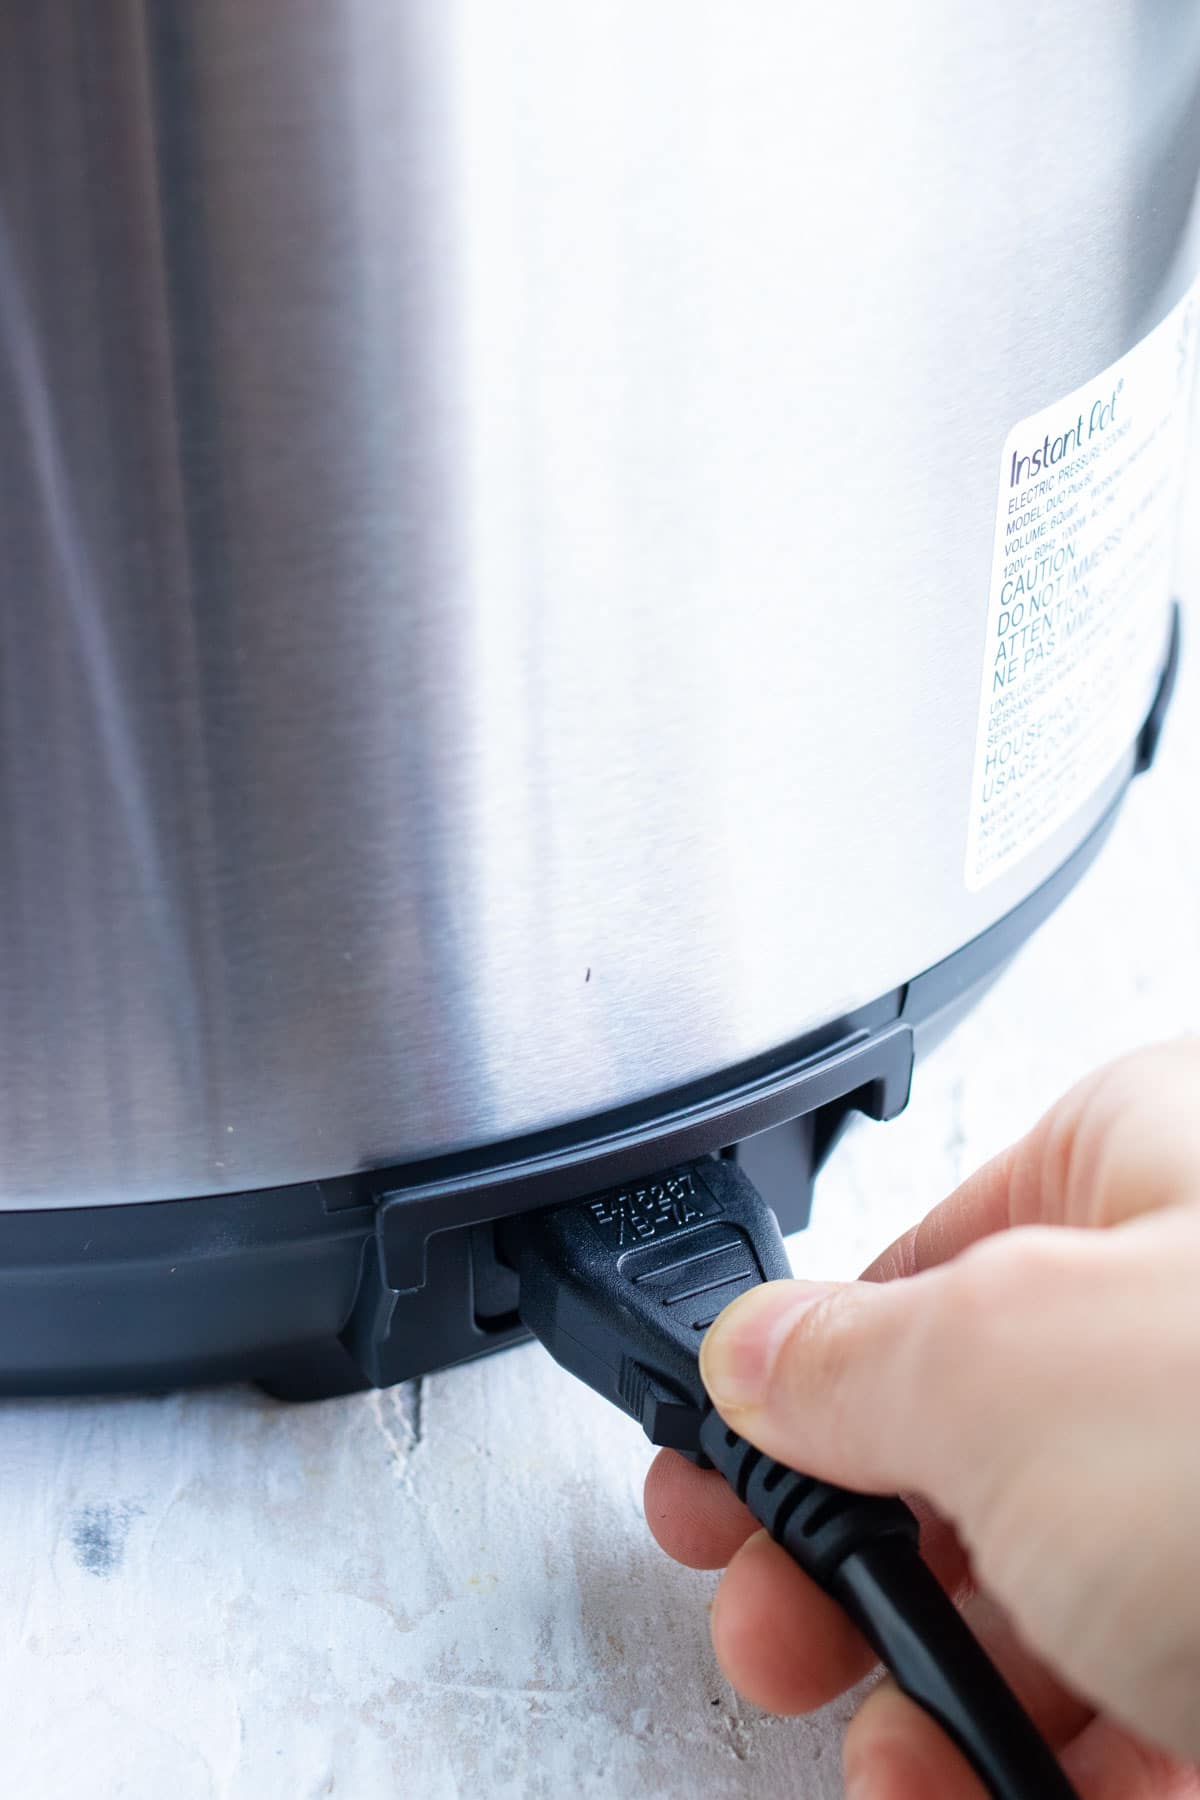
- Power cord – The detachable cord plugs into the backside of the appliance.
- Measuring cup – This is intended to measure rice. It is 160 ml which is just shy of 5.5 oz.
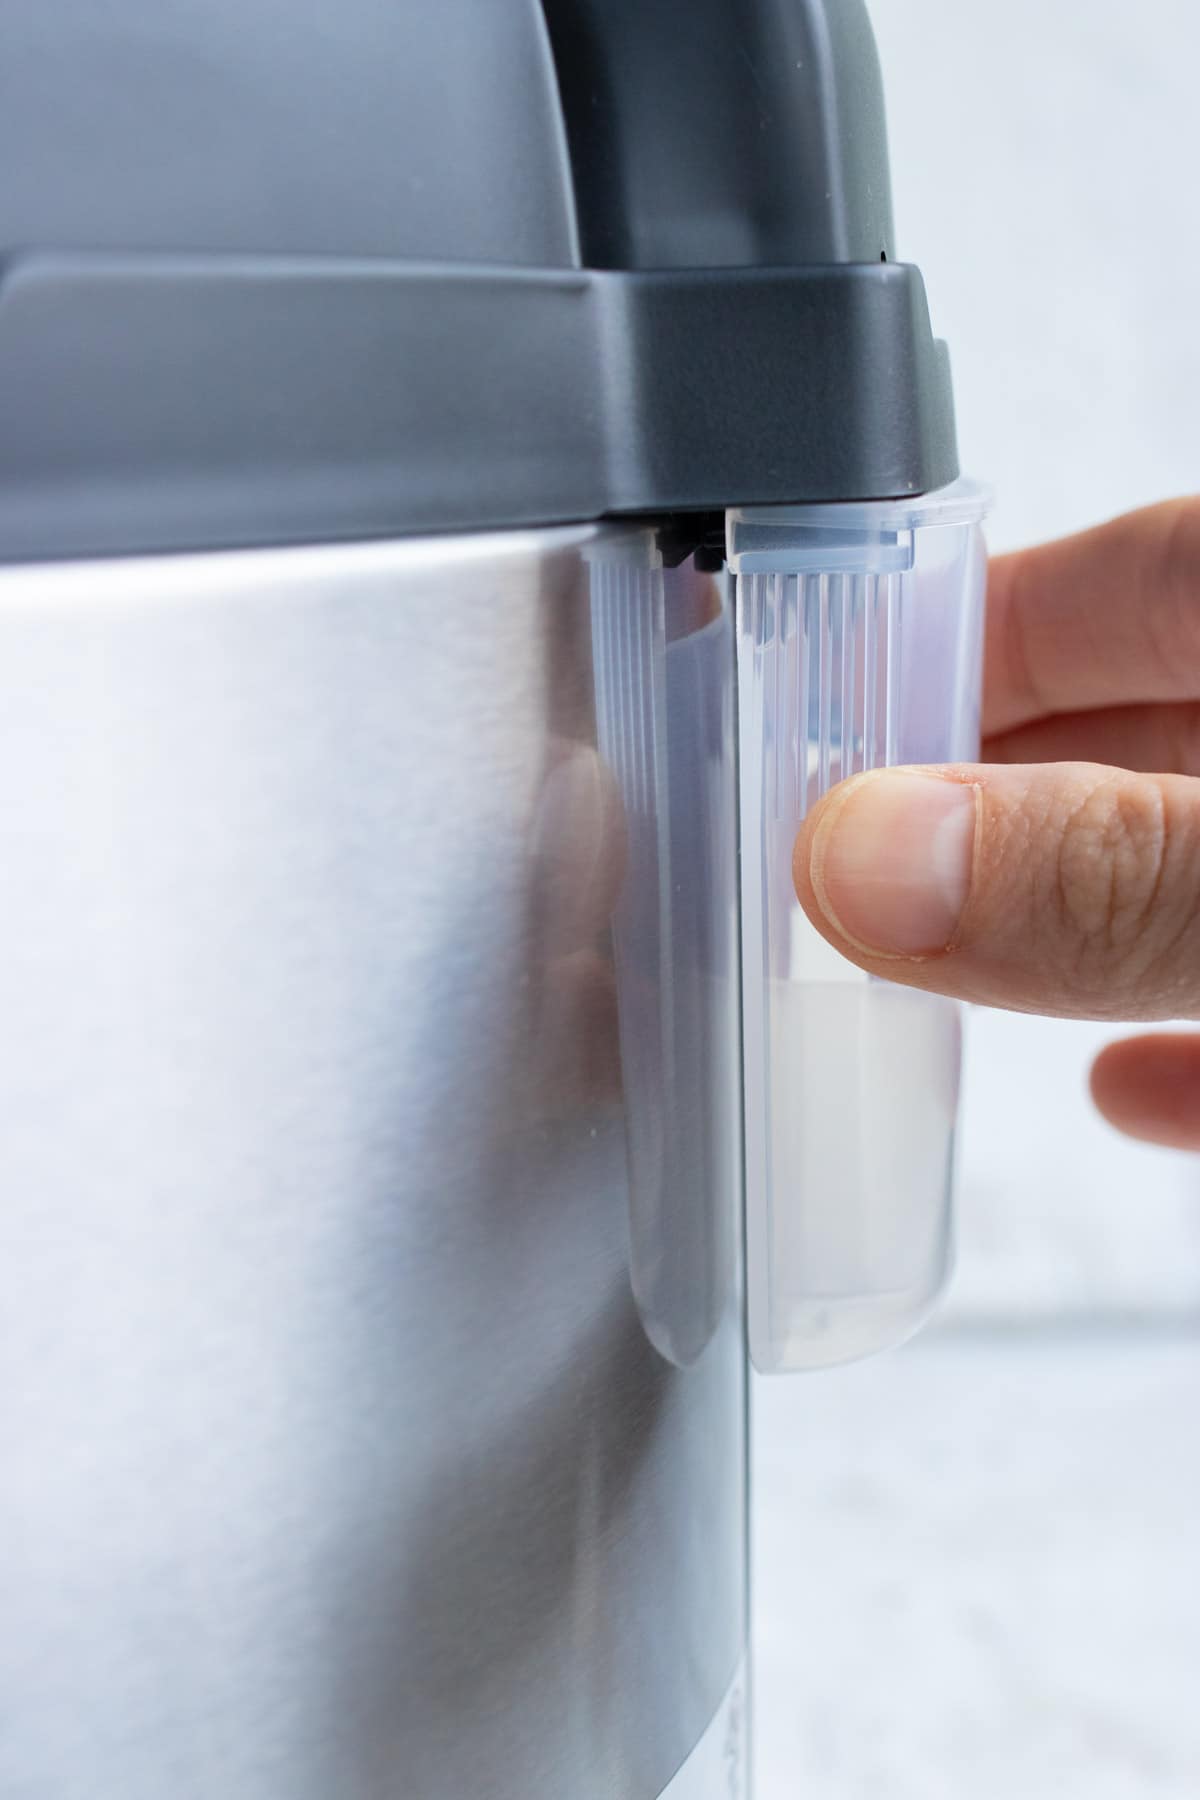
- Condensation collector – To catch excess liquid so it does not land on your countertop.
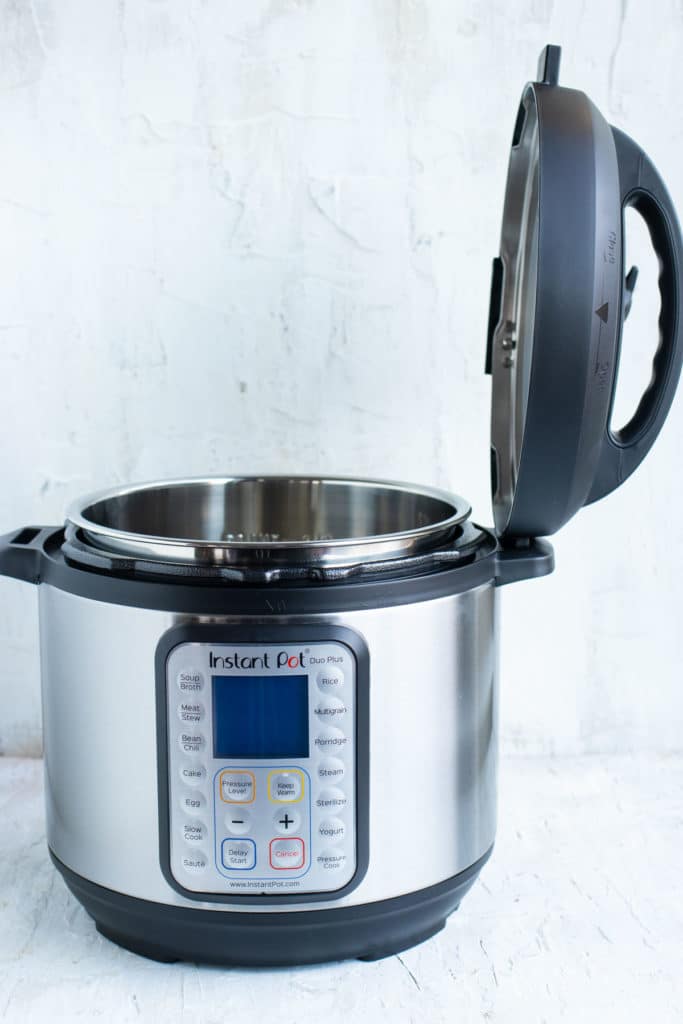
How to Set Up an Instant Pot
Rinse the stainless steel pot and lid with soap and water before using it for the first time.
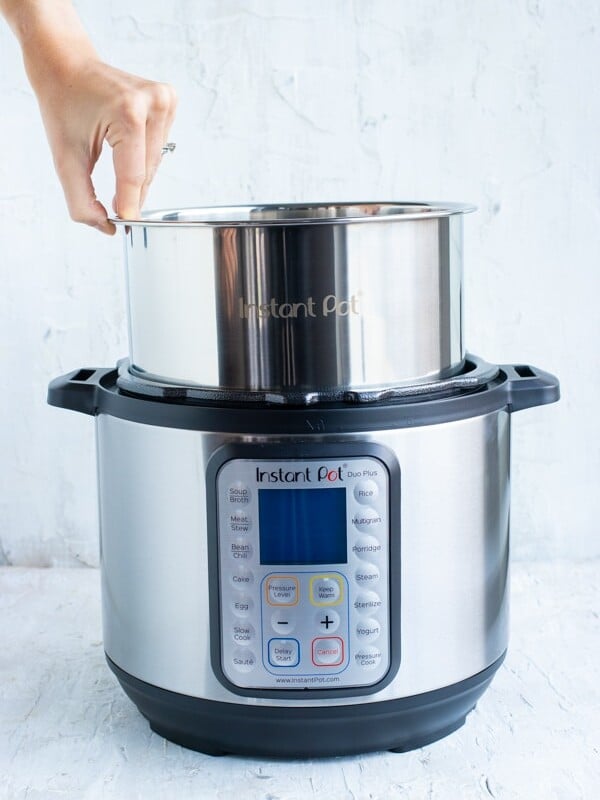
Place the stainless steel pot inside your Instant Pot. (Make sure to remove the orange warning label.)
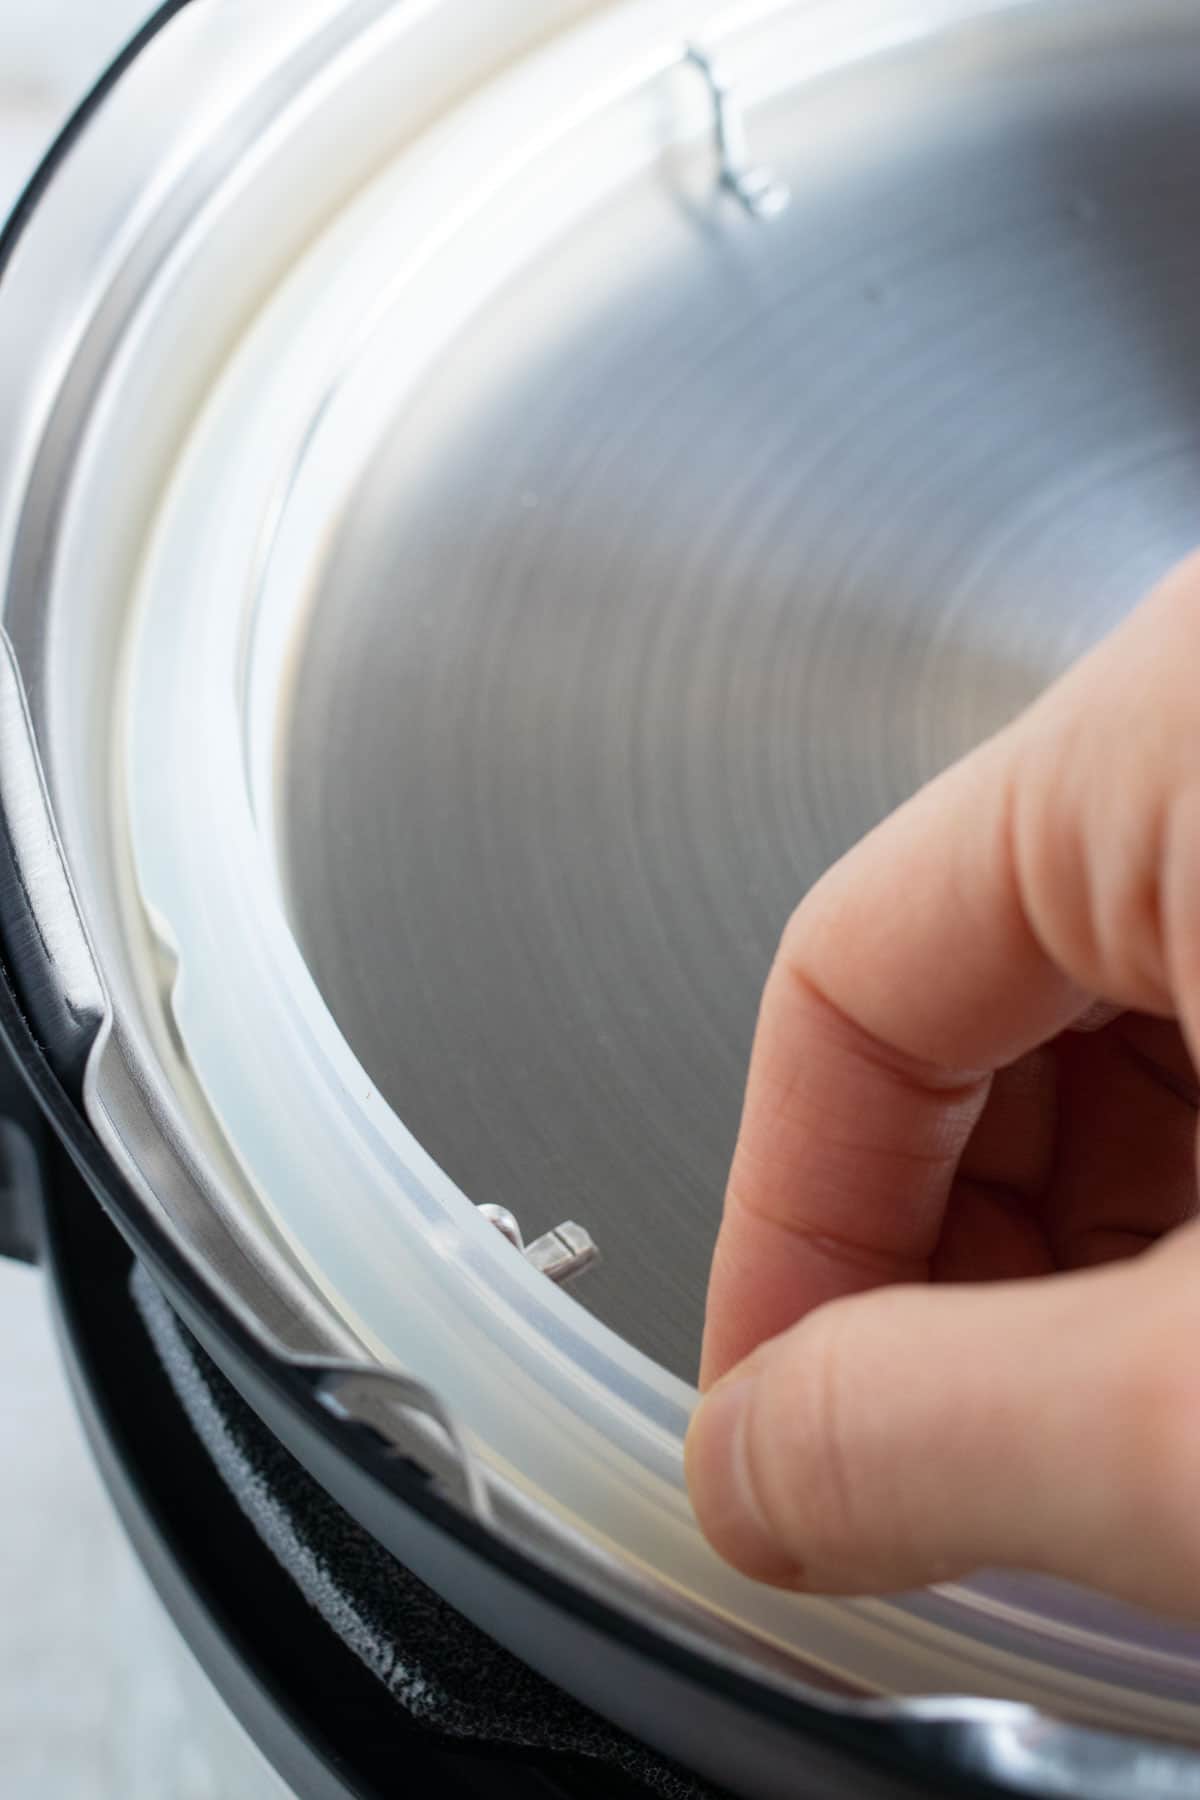
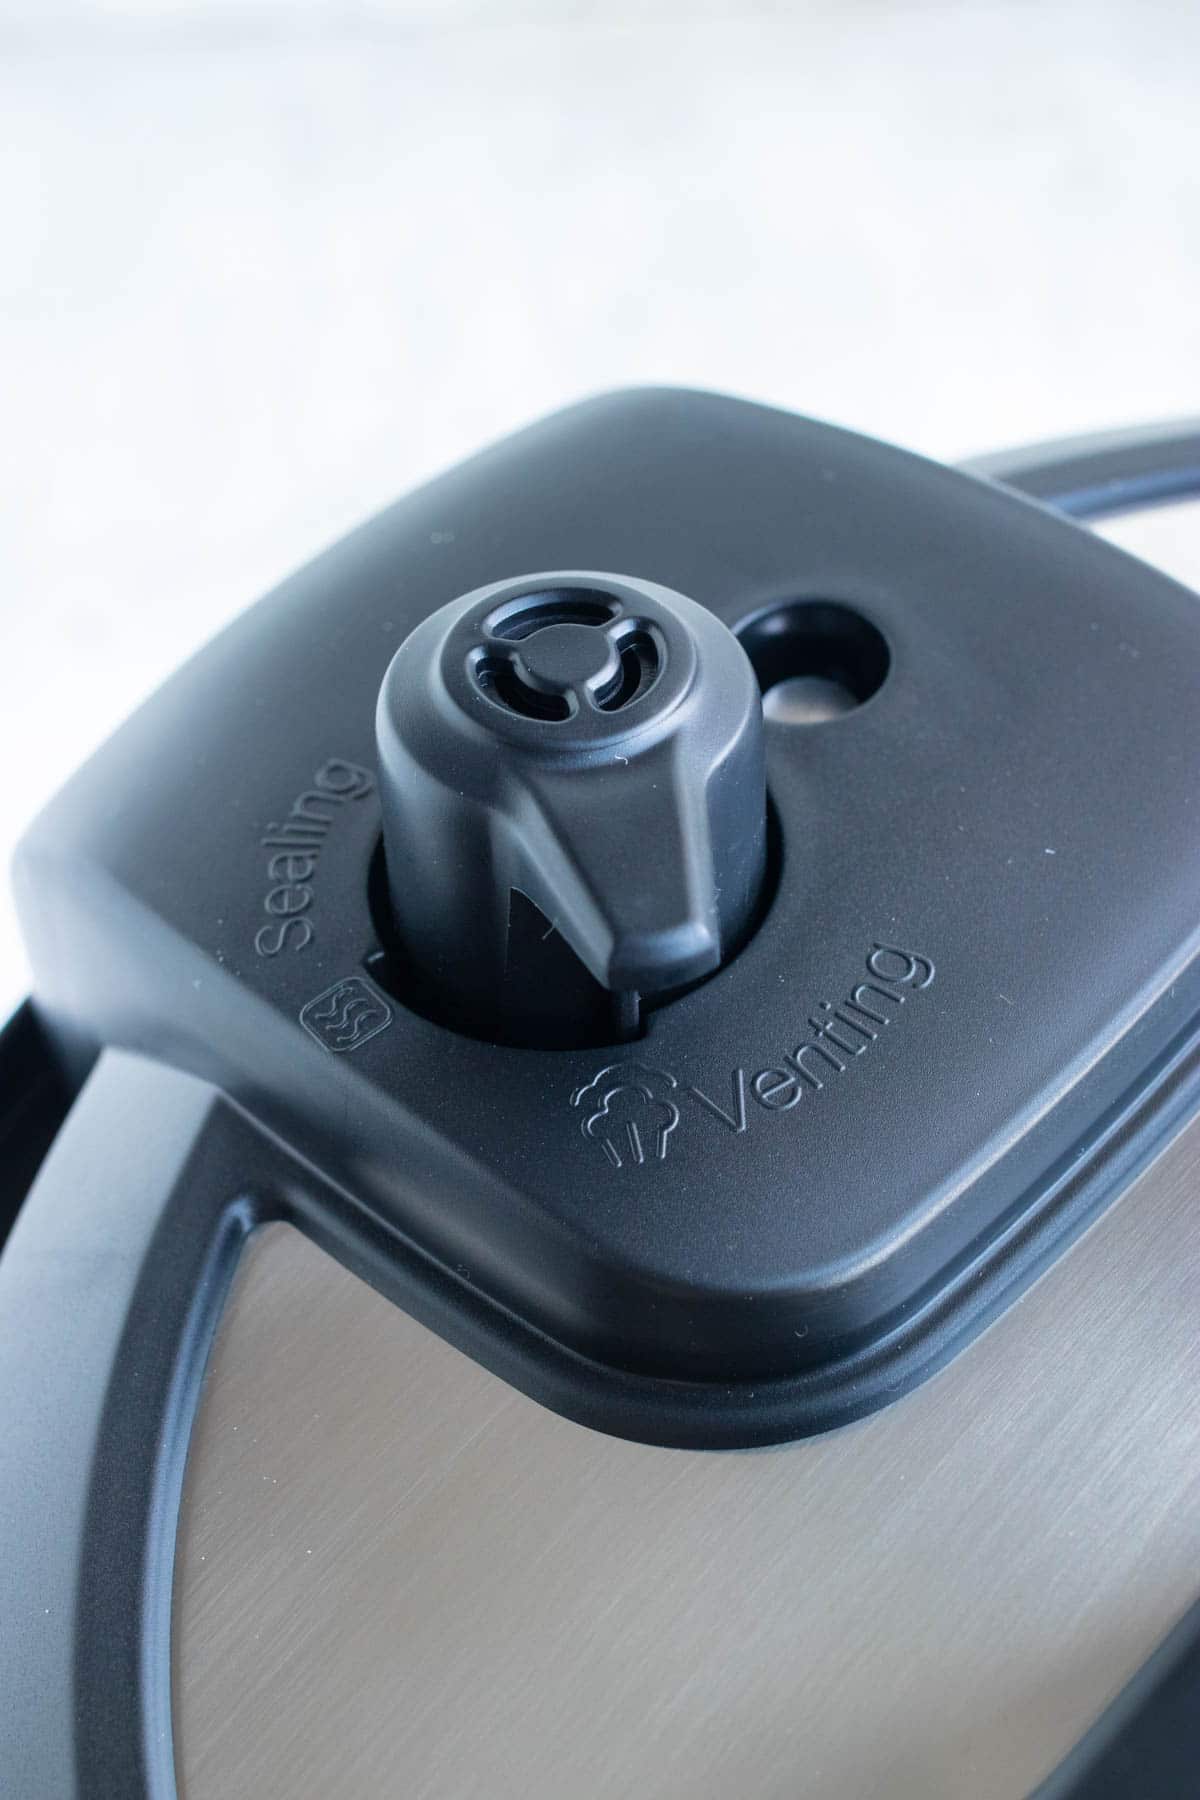
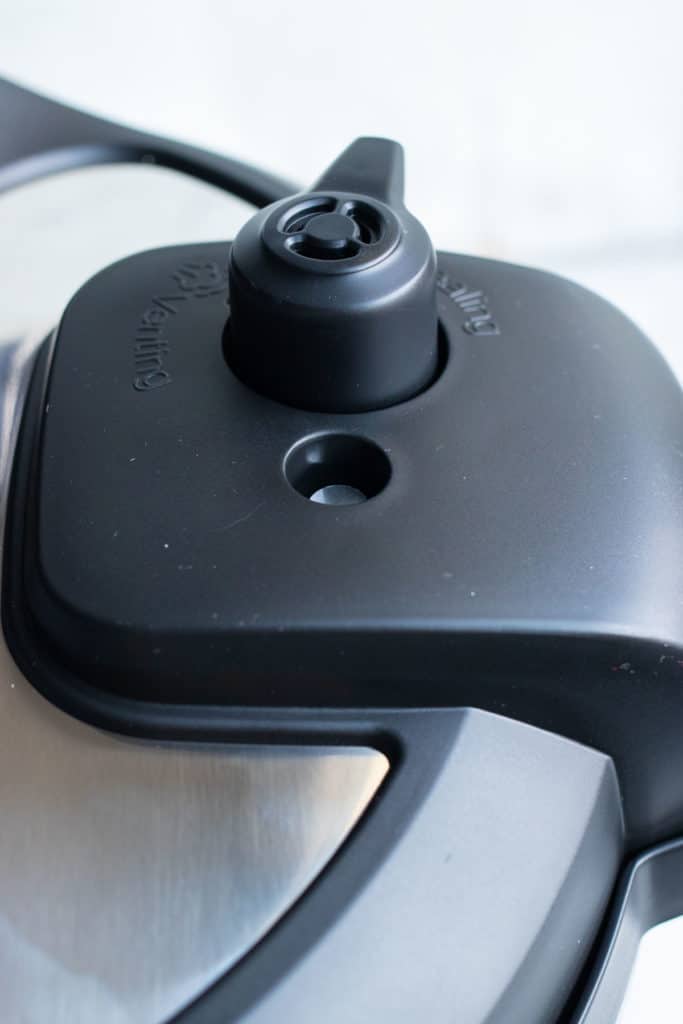
Check to see that the anti-block shield is present and secure.
The anti-block shield is a very important safety feature. This metal shield prevents any food or particles from clogging the steam release valve. Make sure this is always in place and free of food before using so there is not an unsafe amount of pressure created within the pot


Line the inside of the lid with the silicone sealing ring. This normally comes already assembled.

Put the condensation collector on the backside of the Instant Pot until it snaps into place.
Plug in the power cord towards the back and bottom.
How to Use an Instant Pot
Your Instant Pot is assembled, now it’s time to start cooking your first recipe in it!
For almost all recipes you will follow these step-by-step instructions to use your electric pressure cooker:
Fill the Pot
Plug in the power cord to a wall outlet.
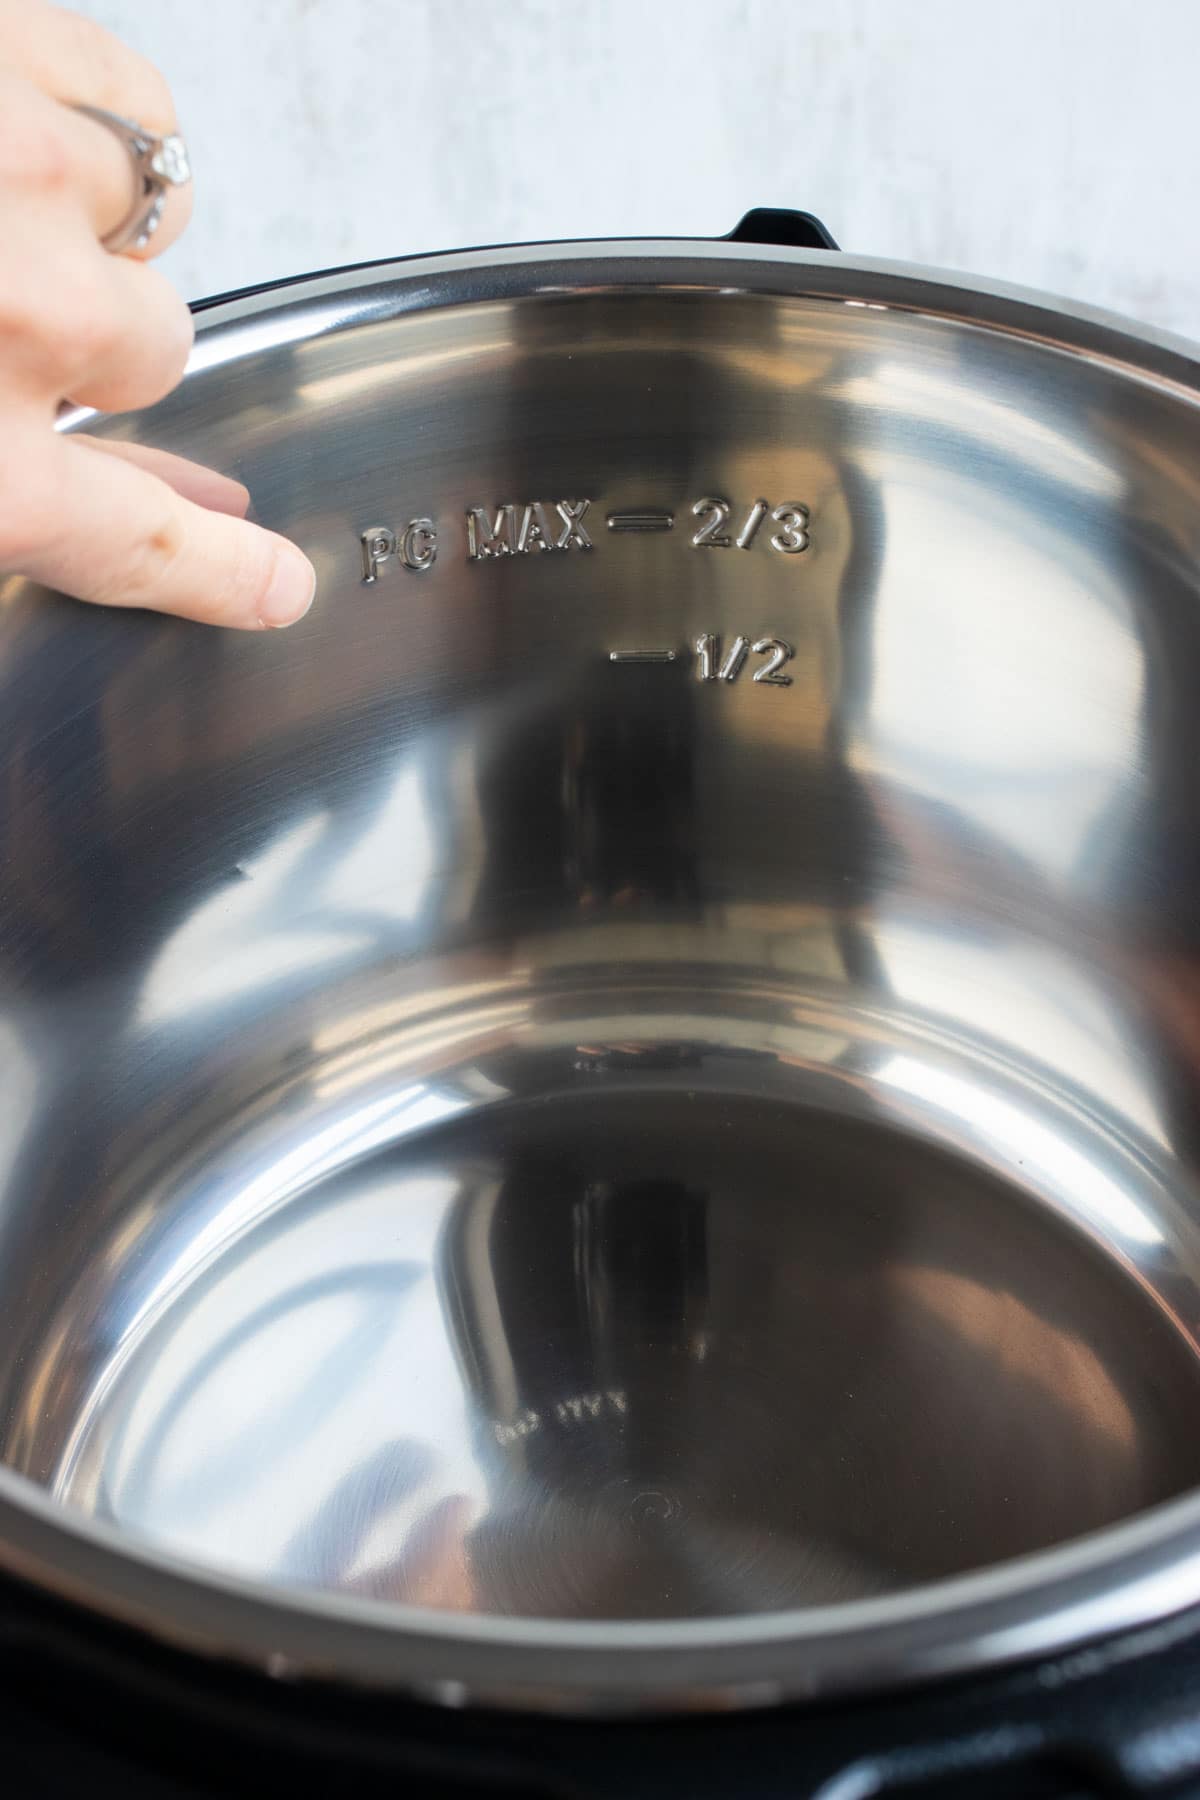
The max fill line is located on the interior of the stainless steel inner pot and is an indicator of the maximum capacity that can safely pressurize.
Make sure to never go above this line when pressure cooking.
Seal the Lid
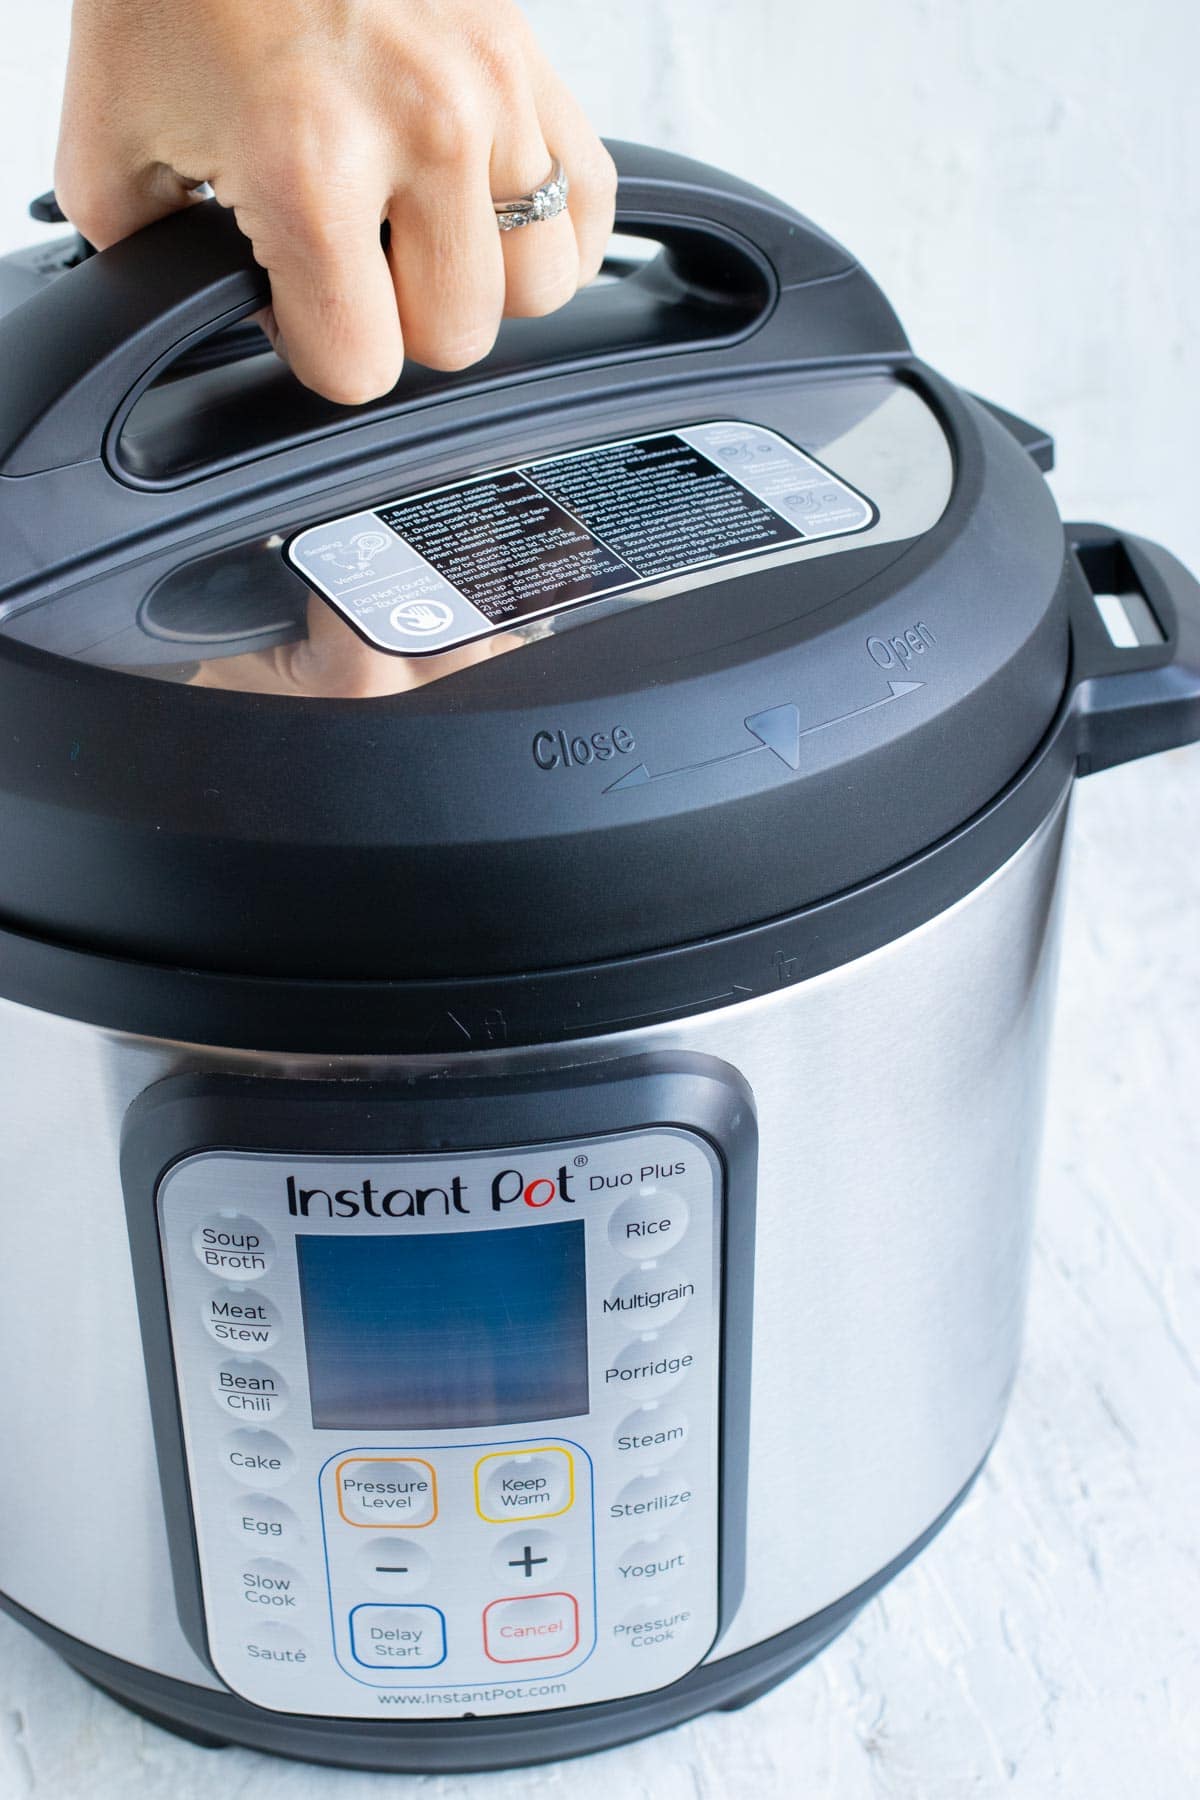
Once your food is loaded, you need to affix the lid.
Place the lid on the top of the pot and follow the arrows on the lid to close it in a clockwise direction.
To open the lid simply turn it in a counter-clockwise direction.
Turn the Valve
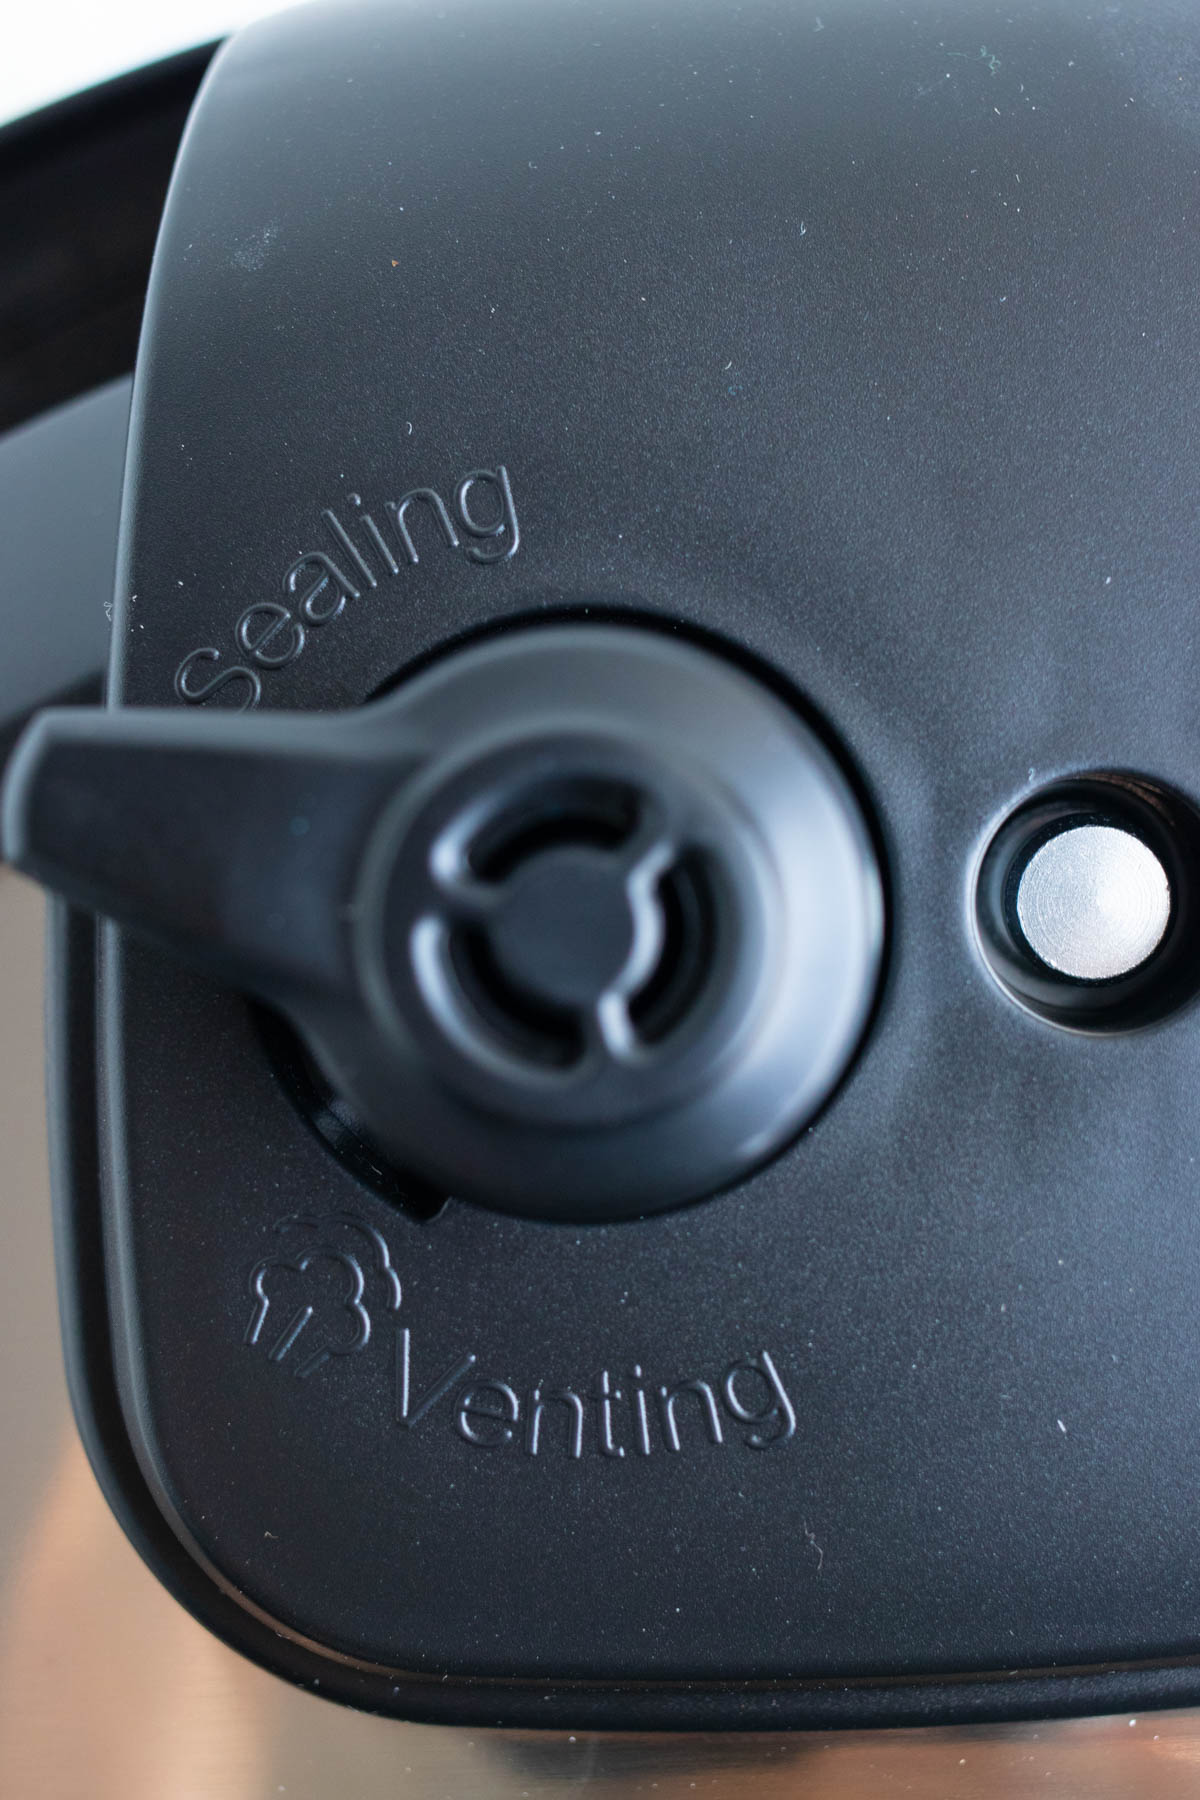
Turn the pressure release valve handle to the sealing position.
This knob will feel a little loose and wobbly. That is totally normally and is to be expected from a properly working valve.
When your food is done cooking, carefully turn the knob to the venting position to let out the steam that has built up within the unit. Pay close attention to where your arm is so it does not get burned by the steam!
Set the Controls
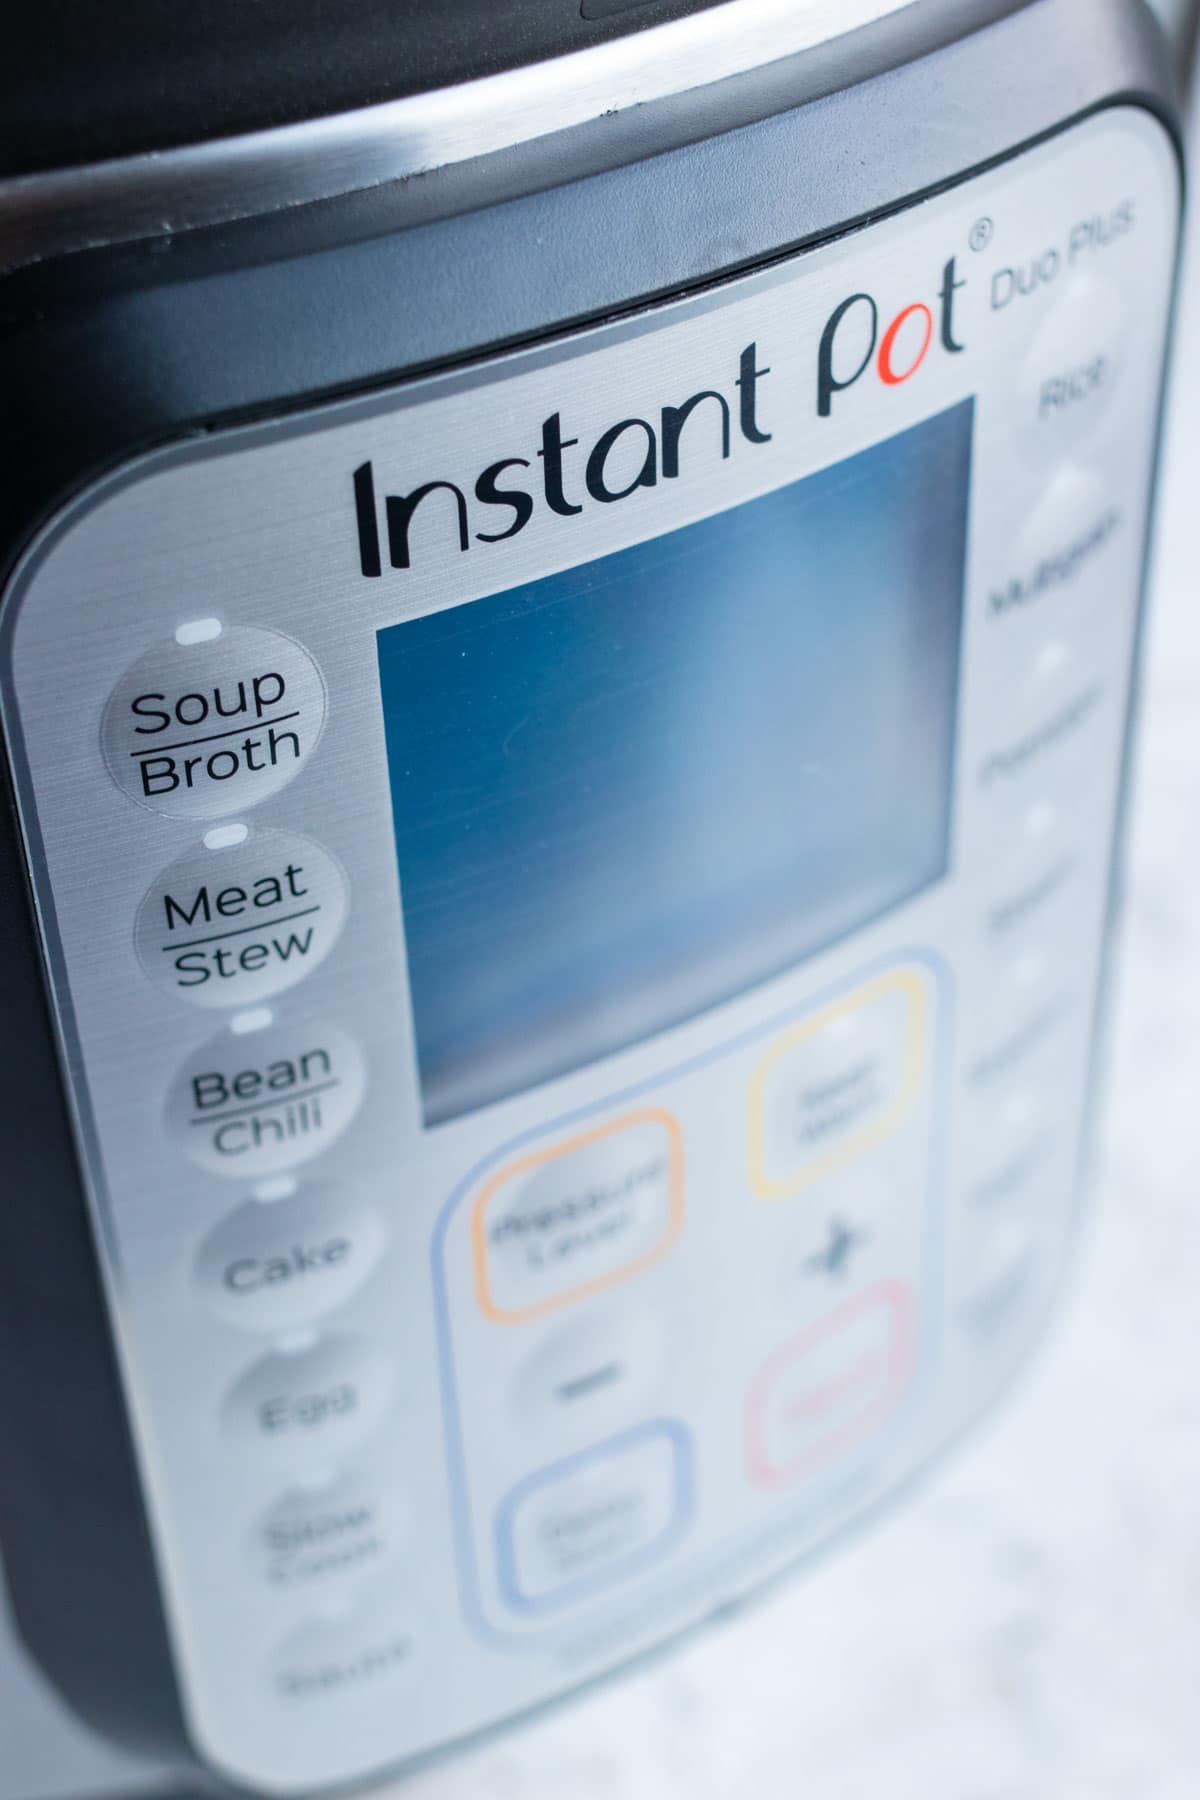
Now that your Instant Pot is totally sealed, we’ll take a look at the control panel and what buttons you really need to pay attention to.
The first set of buttons are for the different cooking methods:
- Sauté: I use this function all of the time when sautéing onions or garlic before pressure cooking.
- When using this function you will want to make sure the lid is OFF so you can stir around your ingredients.
- Adjust the heat level while sautéing by pressing the button.
- You will see the words “Less”, Normal”, and “More” become highlighted as you toggle through the options.
- Slow Cook: This is a non-pressure cooking setting.
- If using the metal lid, make sure to turn the pressure release valve into the venting position.
- A glass lid may also be used when slow cooking so you can see the contents inside.
- Pressure Cook: You will likely use this button the most. It is located at the bottom right corner of the control panel.
- Once you are ready to cook simply seal the lid, press this button, and adjust your cooking time and pressure.
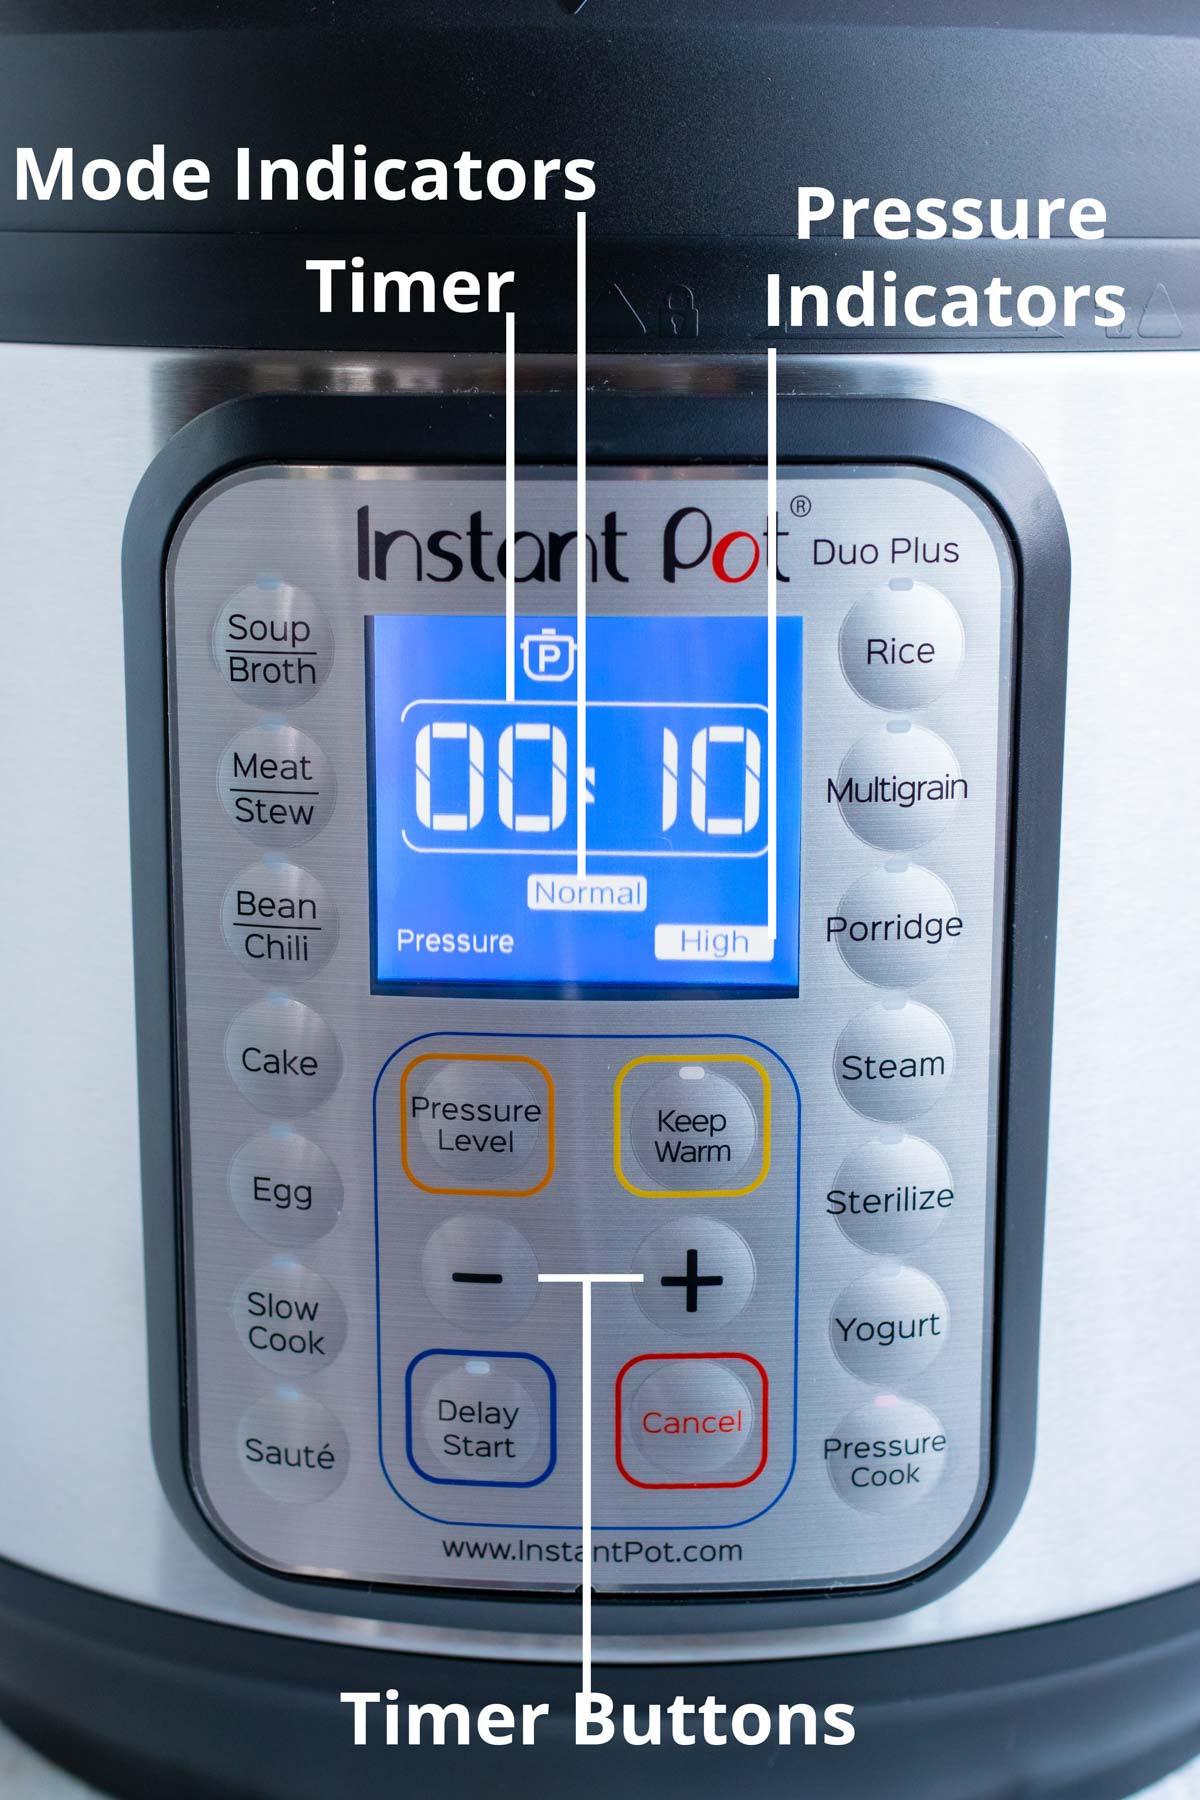
- Plus (+) and Minus (-) Buttons:
- These control the timer in the middle of the LCD display.
- The timer is the amount of time you are setting for your Instant Pot to cook and will be specified in the recipe you are following.
Read the LCD Display
- Mode Indicators:
- Right below the timer you will see the labels Less, Normal, and More, again.
- For the slow cook and sauté functions these modes represent various heat levels.
- When using the pressure cook function, these modes will simply change the cook time.
- Pressure Indicators:
- This is the manual method of setting your pressure cooker’s time and level. You can set it to Low pressure or High pressure.
- All of the other buttons you see on the Instant Pot are preset times that it should take for soups, meats, beans, etc.
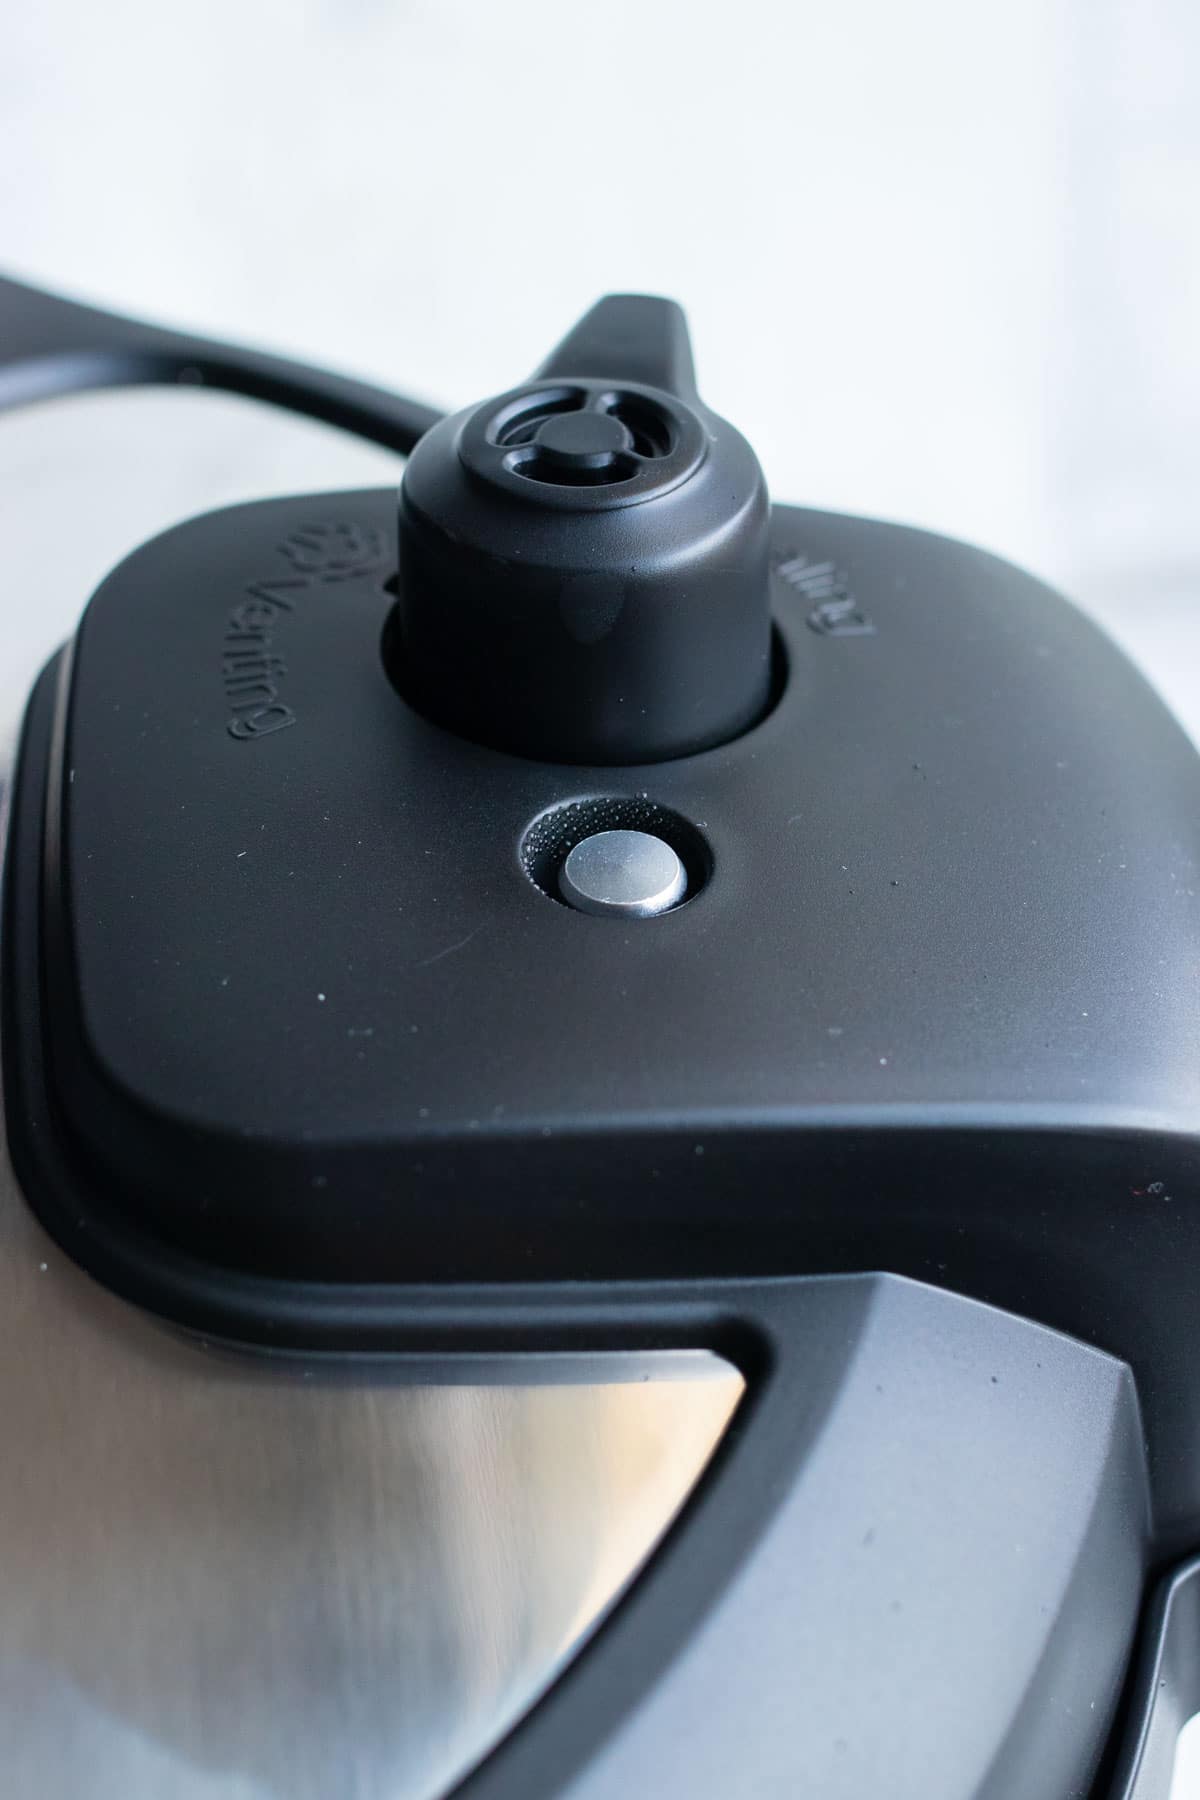
Check the Float Valve
The float valve will remain in the down position as the Instant Pot comes to pressure.
After 5-10 minutes the float valve should pop up and be flush with the lid.
The more ingredients that are inside, the longer it will take to come to full pressure.
Release the Pressure
Turn the pressure release valve to the venting position once the contents are done cooking.
There are 3 ways to release the pressure:
- Natural Pressure Release – This means you let the food sit in the Instant Pot and slowly release until the float valve goes down on its own. Natural release takes the longest time but will give you the most tender food.
- 10-minute Natural Pressure Release – For this method you’ll wait until the food has been in the cooker 10 minutes past the initial timer and then release by turning the valve.
- Quick Release – You release the valve immediately when the timer goes off.
You can use a wooden spoon to turn the valve to avoid burning yourself when the steam is released.
Extra Accessories & A Secret!
A secret tip you may not initially know about your Instant Pot is the lid holder.
On the side handles you will see a hole that perfectly fits your lid. Place the lid here when you are sautéeing ingredients or serving up recipes.

A few accessories to purchase:
- Extra silicone rings – Over time the silicone rings will stretch out or adopt the flavor of various recipes. It’s great to have color-coded replacement rings on hand that are designated for certain types of recipes. (I.e. – red for beef, blue for chicken, white for vegetables only.)
- Steamer basket – This can be used when cooking delicate items like eggs or when making stocks.
- Glass Lid – Using a glass lid when slow cooking and steaming allows you to see inside your pot while cooking.
- Storage Lid – Have some leftovers? Pop a silicone lid on top and store the stainless steel pot in the refrigerator.
FAQs
You always need at least 1 cup of liquid in the pressure cooker so that it can properly pressurize. If you do not have enough you will likely get a “burn” error.
The water goes in the stainless steel portion of the Instant Pot. Never put liquid directly in the base.
It is not necessary to preheat the pressure cooker. Once it is filled, sealed, and turned on it will do that itself.
There are many reasons your Instant Pot is steaming when sealed and not coming to full pressure: 1) There is not enough liquid in the pot. Make sure there is at least 1 cup (8 ounces) of liquid. 2) The silicone ring is not secured. Double check this is in the correct position. 3) The pressure release valve is is in the venting position. Turn the knob to the sealing position.
Expert Tips and Tricks
- Avoid a steamy kitchen. Using the Instant Pot near a window or door is an easy way to release the pressure outside instead of inside.
- Let it rest. Allowing meat to come to room temperature about 15 minutes before cooking will allow it to heat up sooner than with cold meat.
- Go faster. In order to pressurize even quicker add hot liquid to the pot.
- Skip takeout. Forget to defrost dinner? No problems here since pressure cookers can easily prepare frozen meat.
- Check the ring. The silicone ring is critical to getting a proper seal on the lid and can be the reason your Instant Pot isn’t pressurizing.
- Add enough liquid. The official Instant Pot manual suggest at least 1 cup (or 8 ounces) of liquid in the pot in order for it to properly pressurize.
- Clean out the collector. This guy can go unseen for a while, so don’t forget to give him a good scrub!
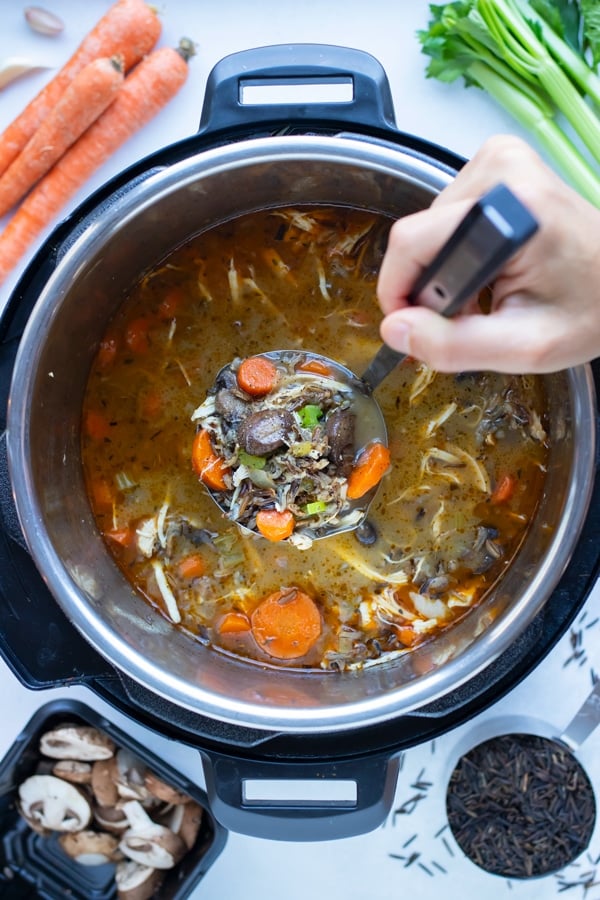
Easy Instant Pot Recipes
When you’re first learning how to use your pressure cooker, it’s best to start off with some quick and easy recipes.
A few of the best healthy Instant Pot recipes include:
Mexican Rice Recipe – instead of using a rice cooker!


I’m making Mac & Cheese. My pot did not come with a book. I don’t even know if I put the time right. I did put elbow noodles and 1c water, added seasonings and it only went to 4. Now it’s on 7. Geez.
Oh no! No book!? That’s so hard! What kind of Instant Pot did you get? Also, what does the 4 and the 7 represent on your Instant Pot? (Is that cook time or temperature?)
My daughter just bought me one. I am a cancer patient and can’t spend all morning cooking.
I am reading about it on this site. No book came with it how to operate it. Sad.. no receipes, nothing. Interesting though.
Hope this post was able to help you learn how to use your instant pot. There are many delicious and easy instant pot recipes as well. Let me know if there is anything else I can do to help you! Good Luck Debbie!
I have 2, one I bought, one gift. Air fryer is one. ,Scared to use them. ,The few simple things I’ve cooked do not turn out. In both cookers, things either don’t thoroughly cook and/or burn. So weird. Burned cabbage, eggs. Use 1 to.1 1/2 cups water. My other brand cooker never had these problems
I cannot figure out what’s wrong. HELP.
Have you checked the plastic ring inside of the lid? Sometimes if this is dislodged, old, or loose the pressure cooker won’t fully seal and things won’t fully cook or they’ll burn up all of the liquid. Hope this helps!
Difficult to clean. Tried all of your suggestions but after cleaning the pot still smells bad. Took out the ring and soaked in Dawn replaced and in the morning my cupboard still smelled. I’m worried about the fact that it holding food in the parts. Any other cleaning suggestions would be great.
Normally the ring is the culprit – so soaking it was a great idea! Also, make sure you double-check the plastic collection piece on the back-side of the Instant Pot to make sure that is drained. Hope this helps some, Leslie!
So often , we single household folk get left behind. I need information on how to use the 3 quarts mini.
I’ll keep that in mind, Wendy!! Most of the basic instructions for the 6 quart should be very similar to your 3 quart, though, so the information should still be pretty applicable!
Thank you!
I am from India and use this for simple pressure cooking of rice and lentils daily. After using for a month or so I am finding that the lentils remain half cooked. I keep separate utensils for lentils with water at bottom and rice with water at the top in the pressure pot. I keep it for pressure cooking for 15 minutes and another 20 minutes for cooling.
How and why the lentils remain half cooked is not understood? In normal and old Prestige pressure cooker same stuff takes only 7 minutes for pressure cooking. Please let me know as I am worried about functioning of this new and popular gadget!
Where to get extra silicone rings?
Hi Tonya! I purchase mine on Amazon. Here’s a link to the ones I get – https://amzn.to/3a0MU0I Hope this helps 🙂