

There is a MUCH simpler way…

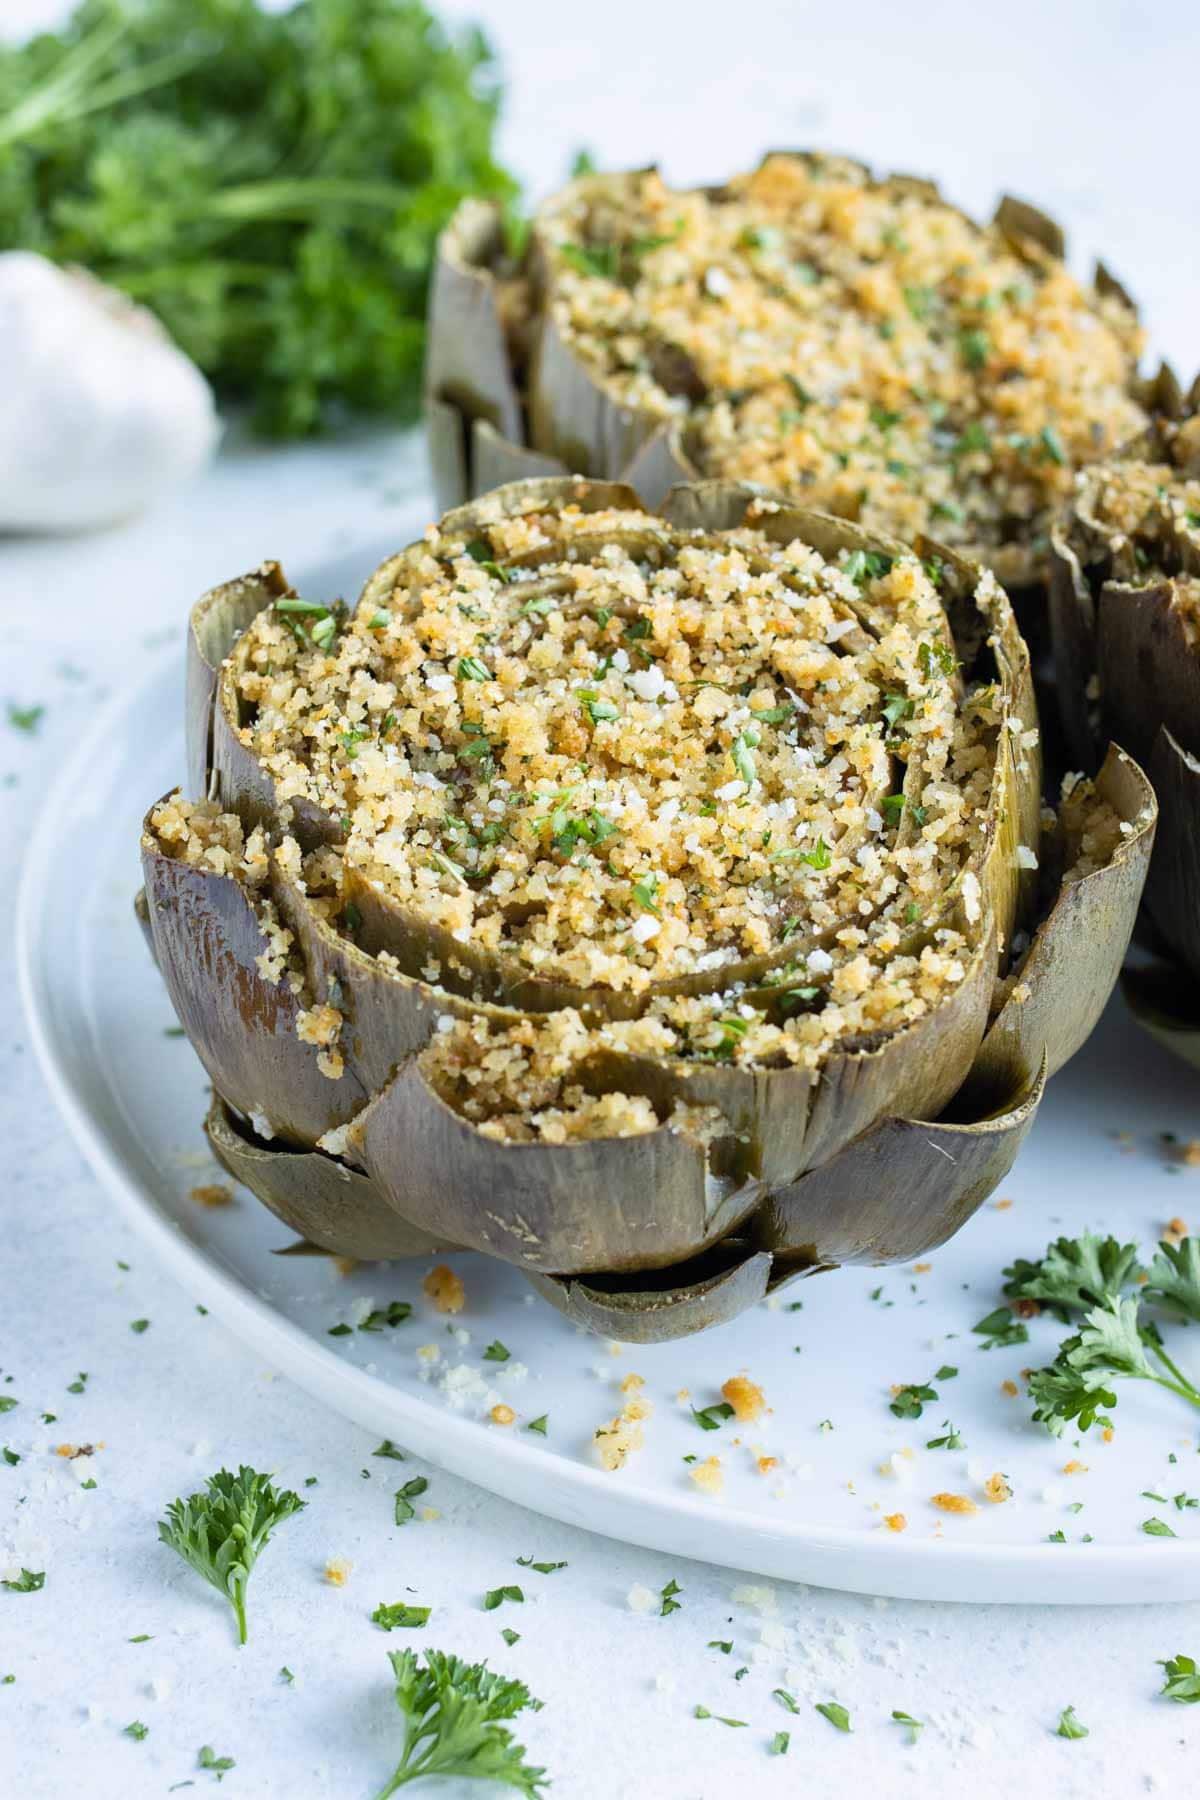
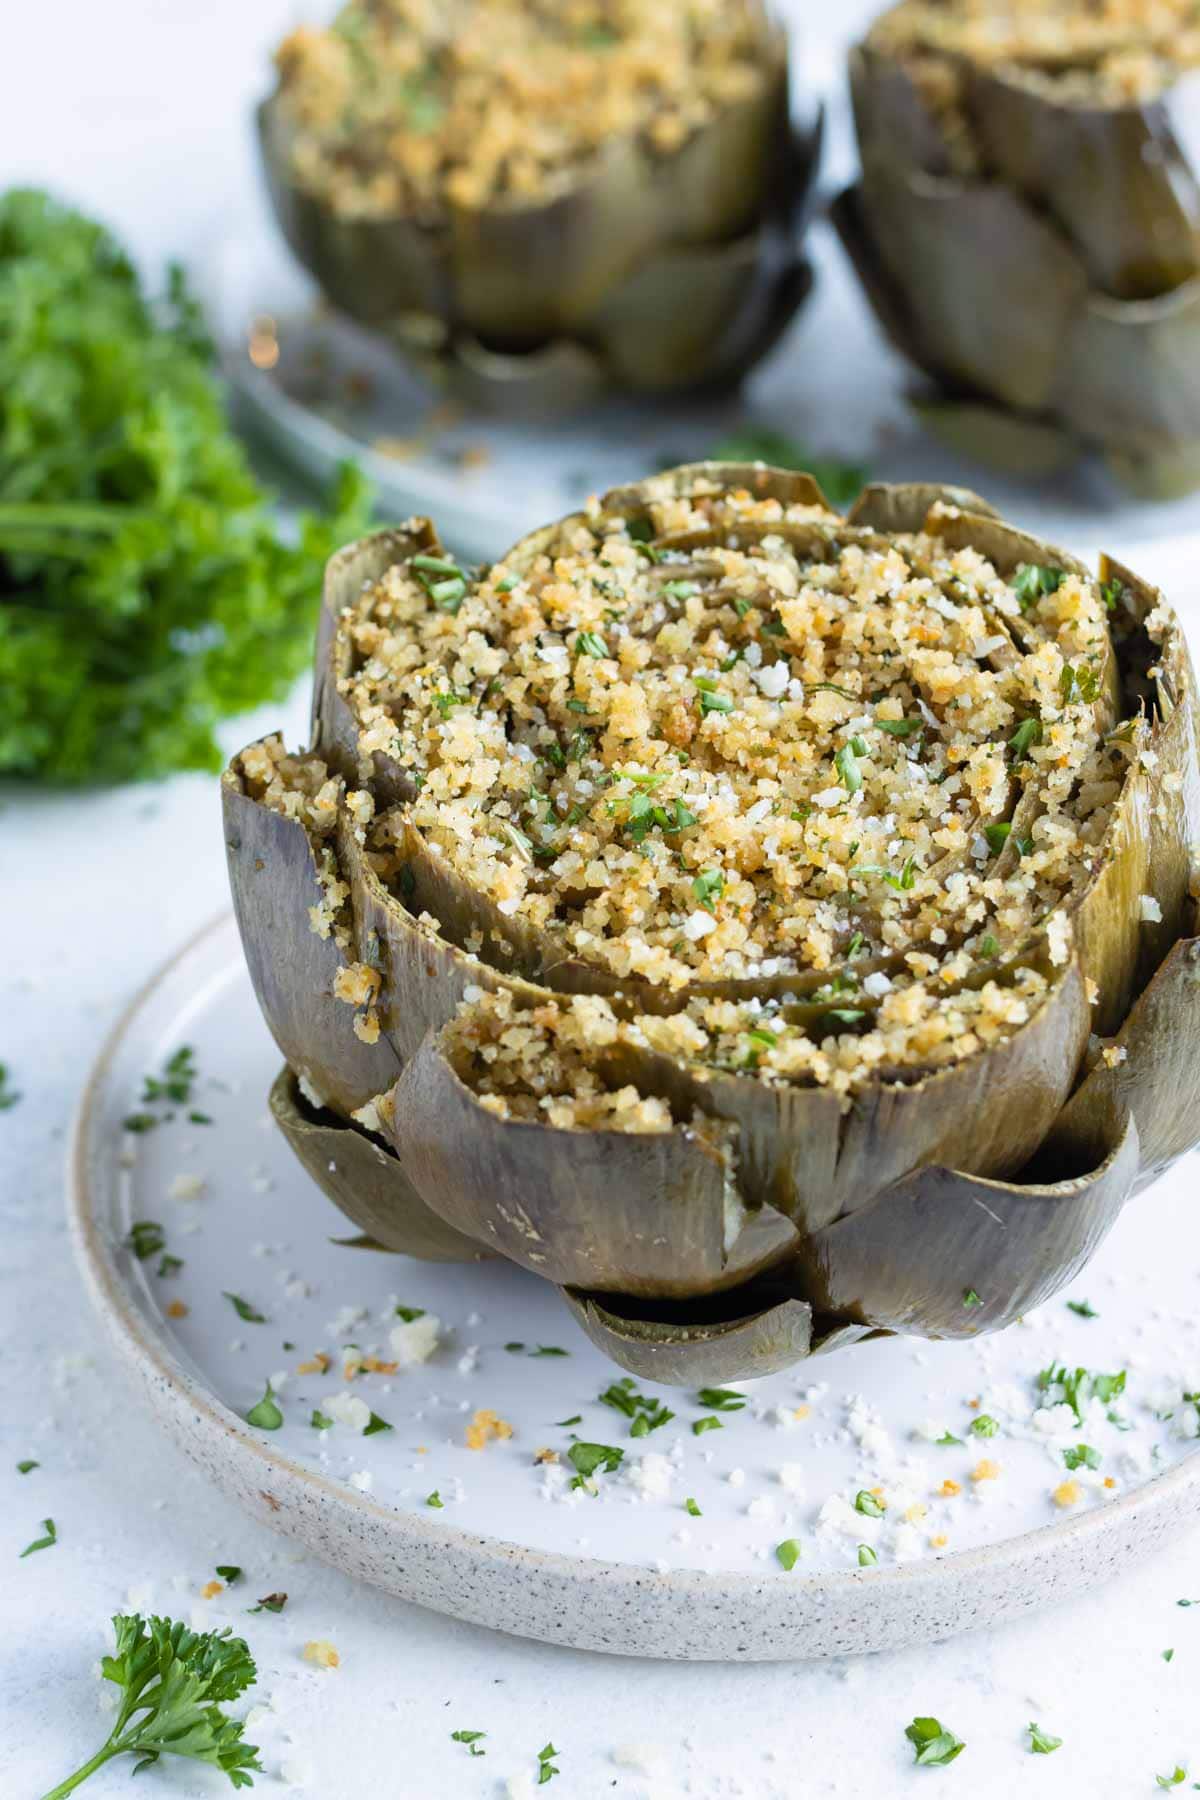
I still remember the first time I tried a stuffed artichoke at a fancy Italian restaurant. The tender leaves paired with the crisp, buttery breadcrumb filling were out-of-this-WORLD delicious.
For years though, I avoided making them at home. Most recipes seemed way too fussy, with steps like par-boiling the artichokes or steaming them forever before you even get to the stuffing. (Who has time for that?!)
Once I finally worked up the courage (and made a few trial-and-error messes in my kitchen, LOL), I realized there’s a much simpler way.
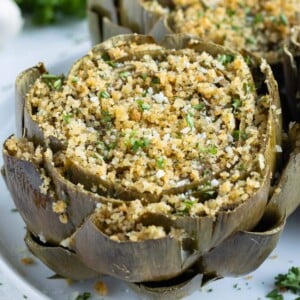
My baked stuffed artichokes skip the par-boiling, go straight into the oven, and come out with perfectly crispy breadcrumb topping, tender leaves, and that signature garlic-lemon flavor. It’s the easiest, most delicious way to bring this classic Italian appetizer to your holiday table.
This is exactly how my grandmother did hers. I would call her every time I made them for instructions. Needless to say I never wrote them down because she loved telling me.
Thank you for sharing this they were perfect for my Christmas dinner. Now I won’t ever lose this.
– Dina
Ingredient Notes and Substitutions
For the exact measurements and detailed instructions, you can see the recipe card below.
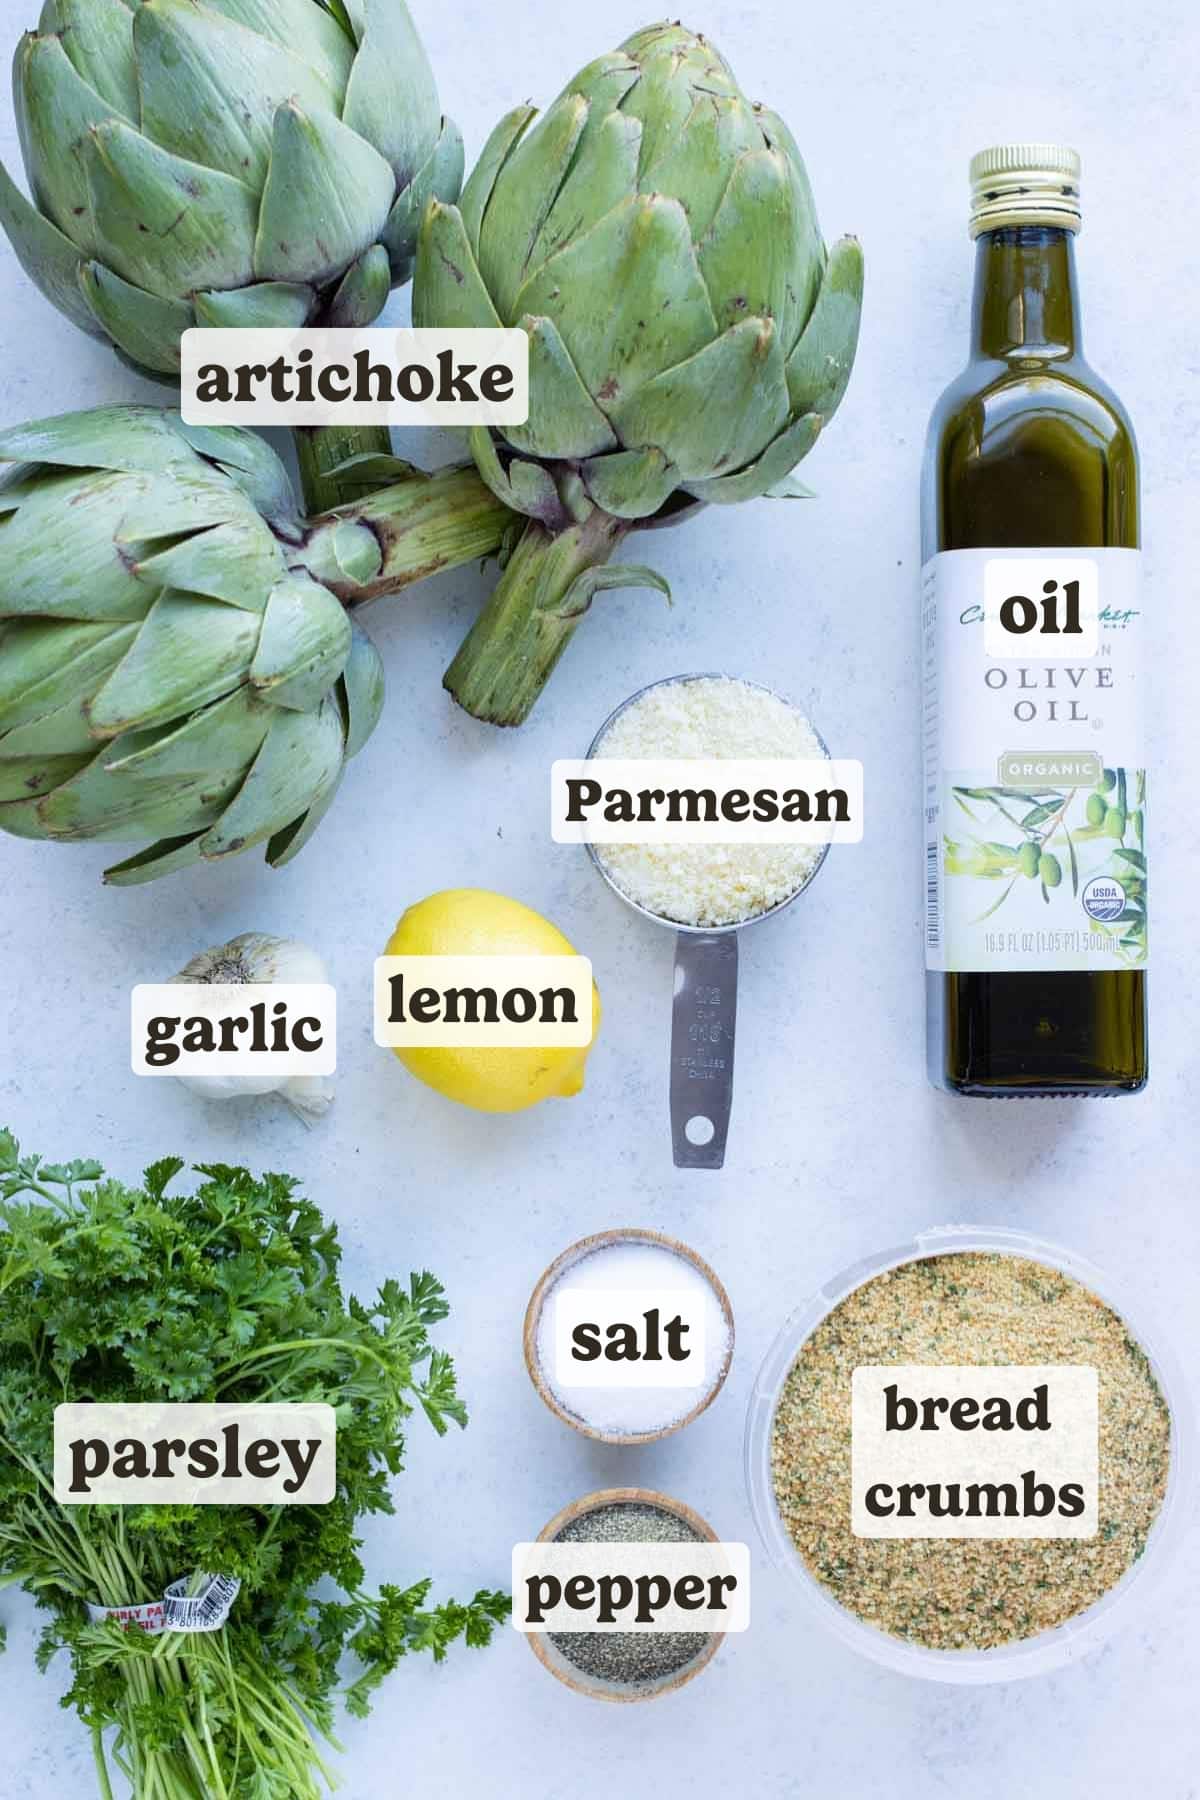
Lemon. The juice from the lemon prevents the leaves from browning, while the zest adds a lovely fresh bite to the filling. (Be sure to get the lemon zest before cutting into the fruit for the juice.)
Artichokes. You want 3-4 medium artichokes, which is the equivalent of about 2 to 2 ½ pounds. Try to get them all as close to the same size as possible so they cook up at the same rate.
Breadcrumbs. The quickest trick I’ve found that gives the filling the most flavor is to use already-seasoned Italian breadcrumbs. You can also add a teaspoon or two of your own Italian Seasoning to plain or Panko breadcrumbs if that’s all you have on hand.
Parmesan. Grated cheese is essential as it will mix more easily with the breadcrumbs and crisps up quickly in the oven.
Garlic. Fresh garlic cloves are key for that classic Italian flavor. (I use a garlic press to get the cloves SUPER finely minced!)
Get My 10 Holiday Sides with Serious Swagger
Tasty twists on classics that will get the WHOLE table talking!

Step-by-step Instructions
See the recipe card below for the full instructions, ingredient amounts, and a printable recipe.
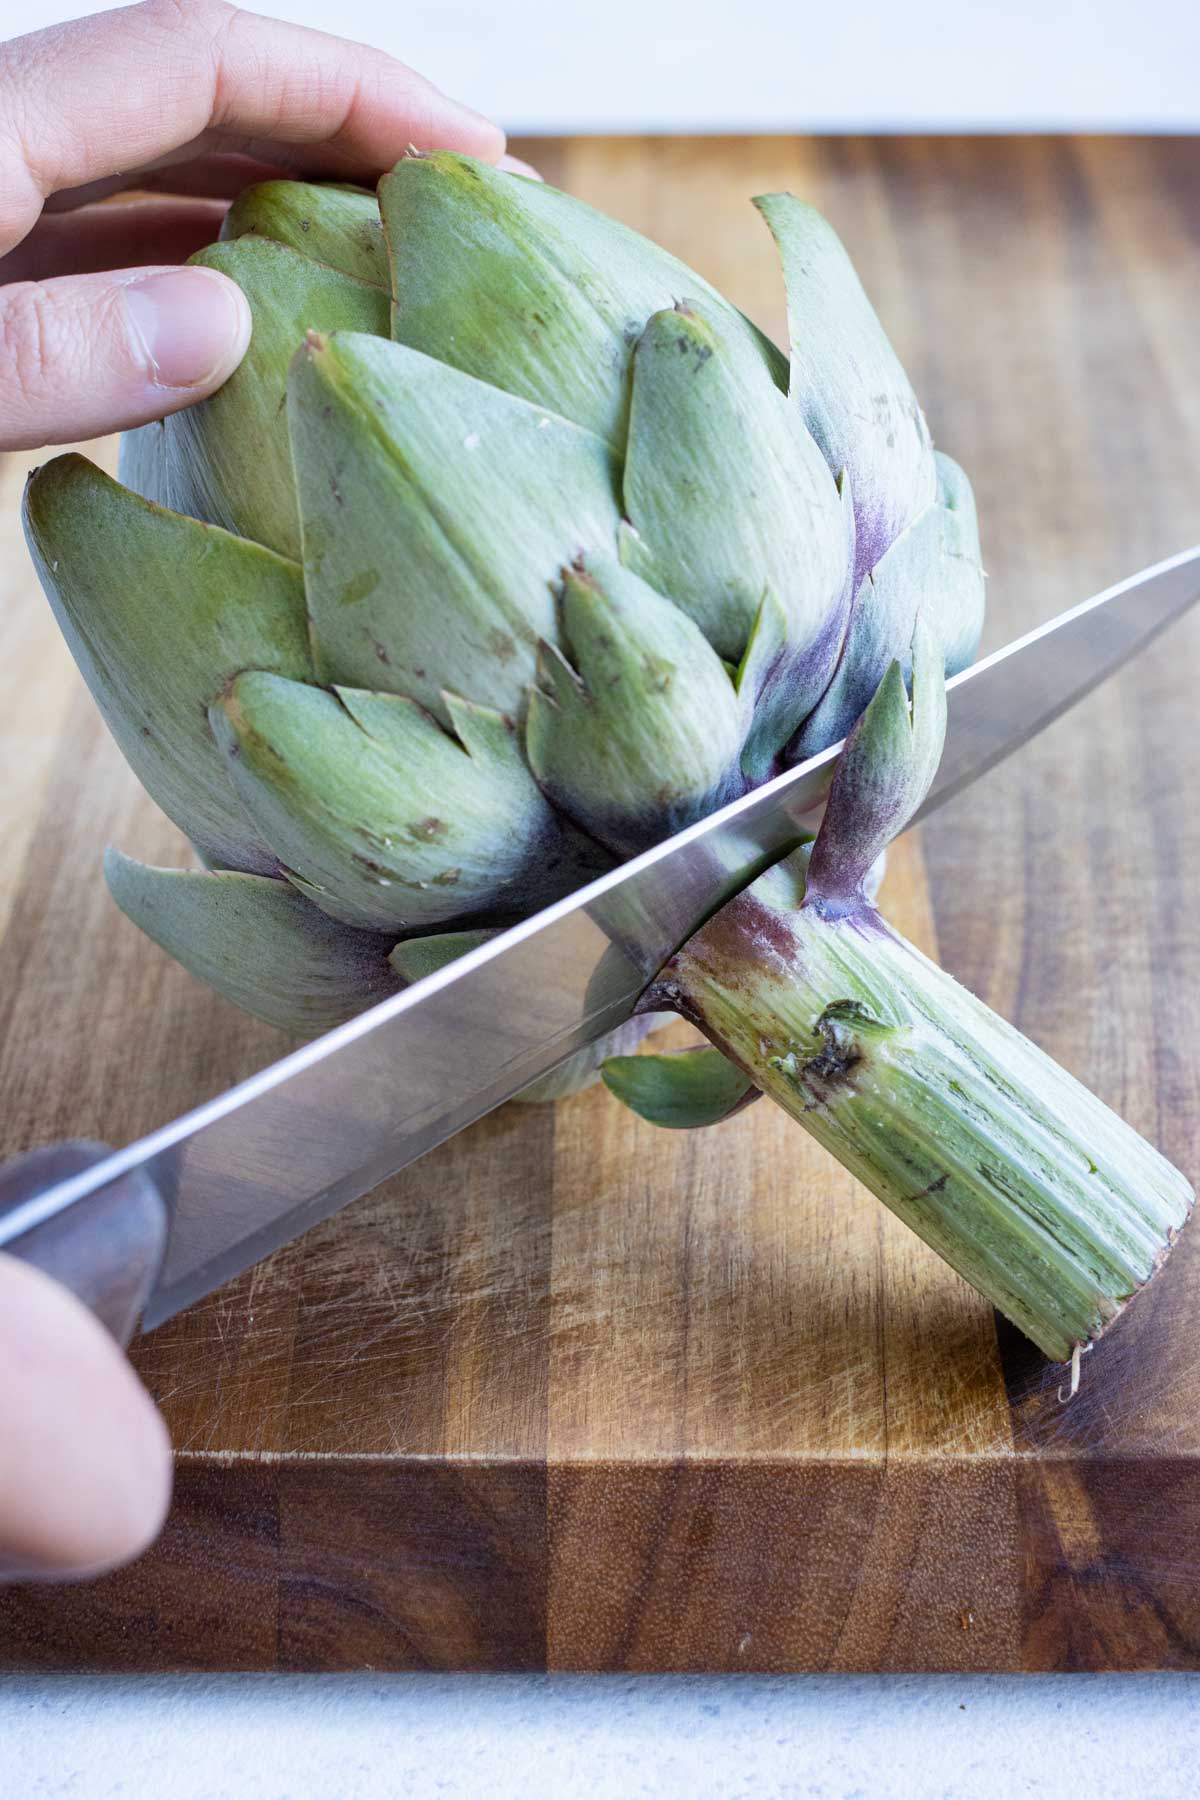
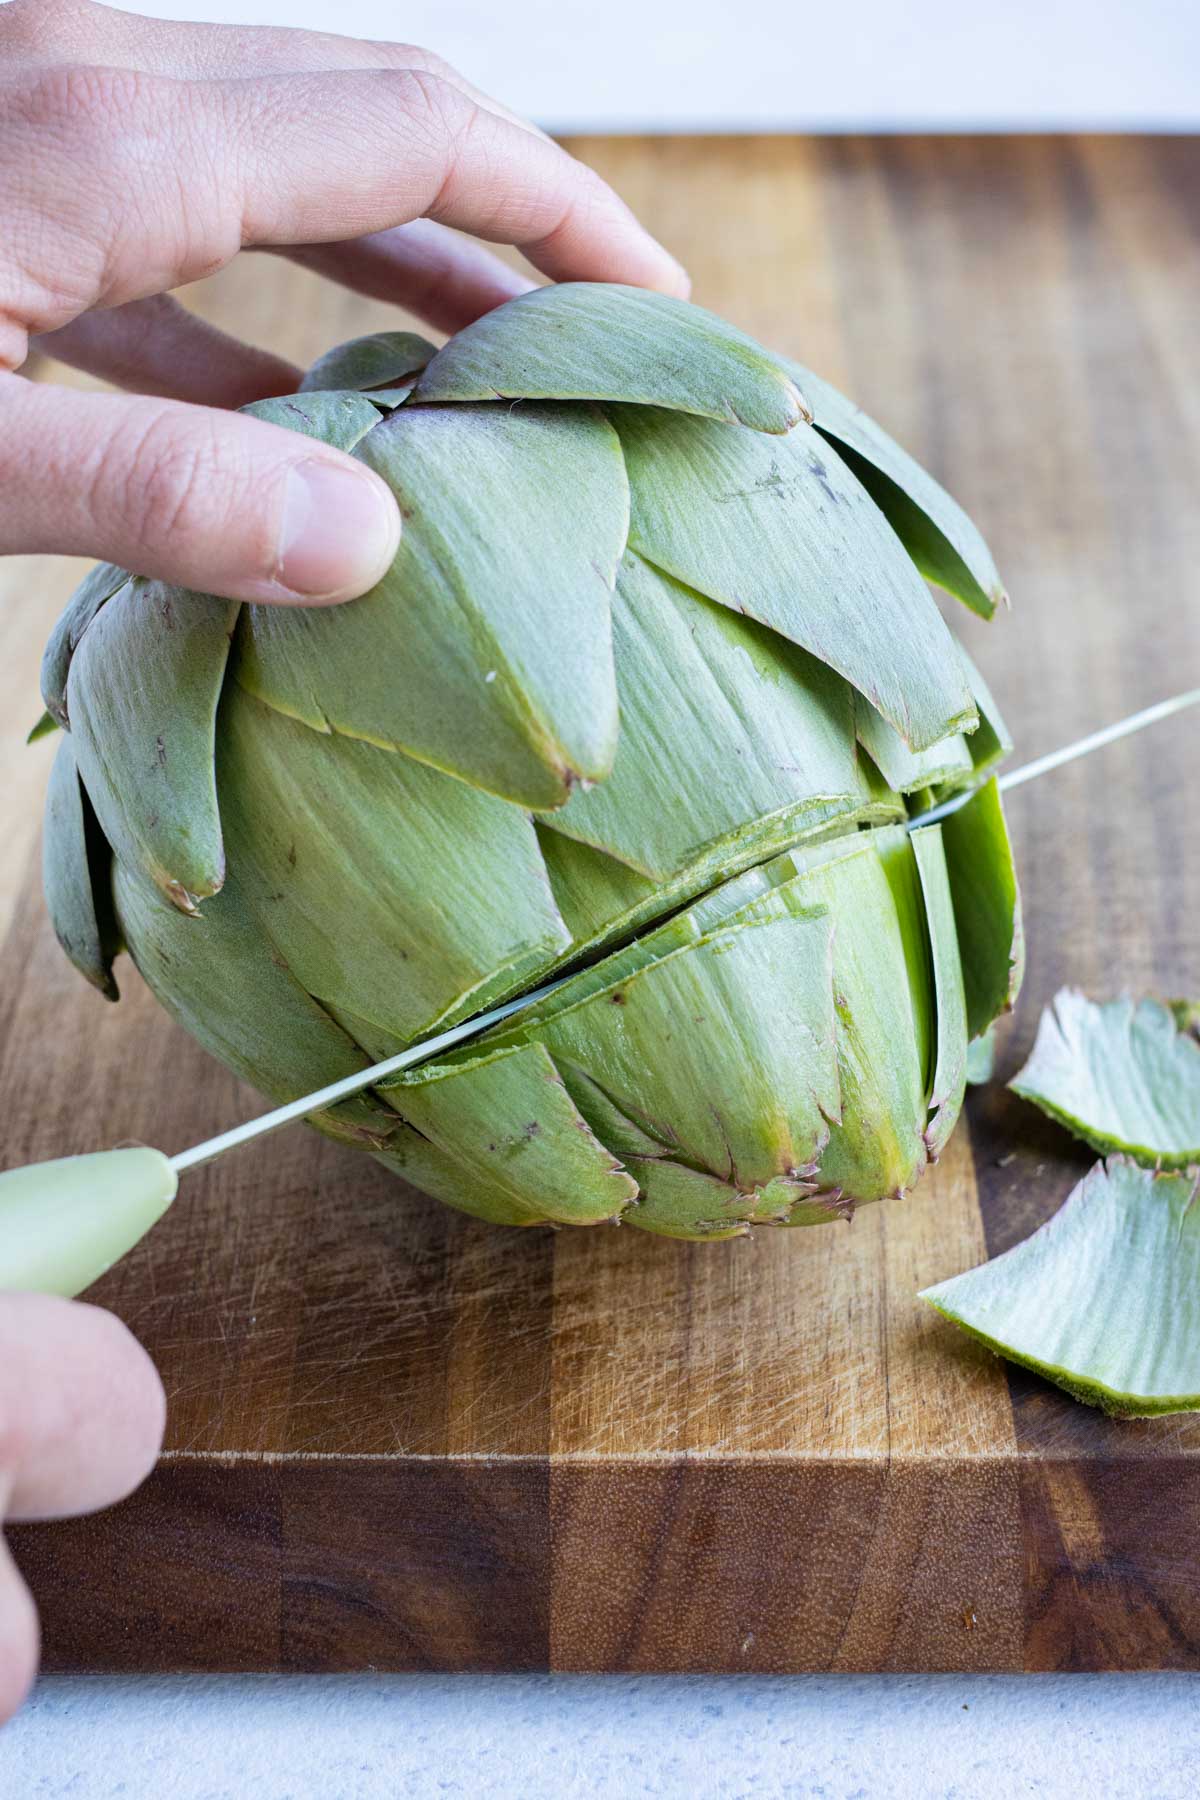
Trim the ends of the artichokes.
Slice off the stem of the aritchokes so about ½ inch remains. Then, cut 1 inch off the top of each artichoke to remove the pokey leaf tips.
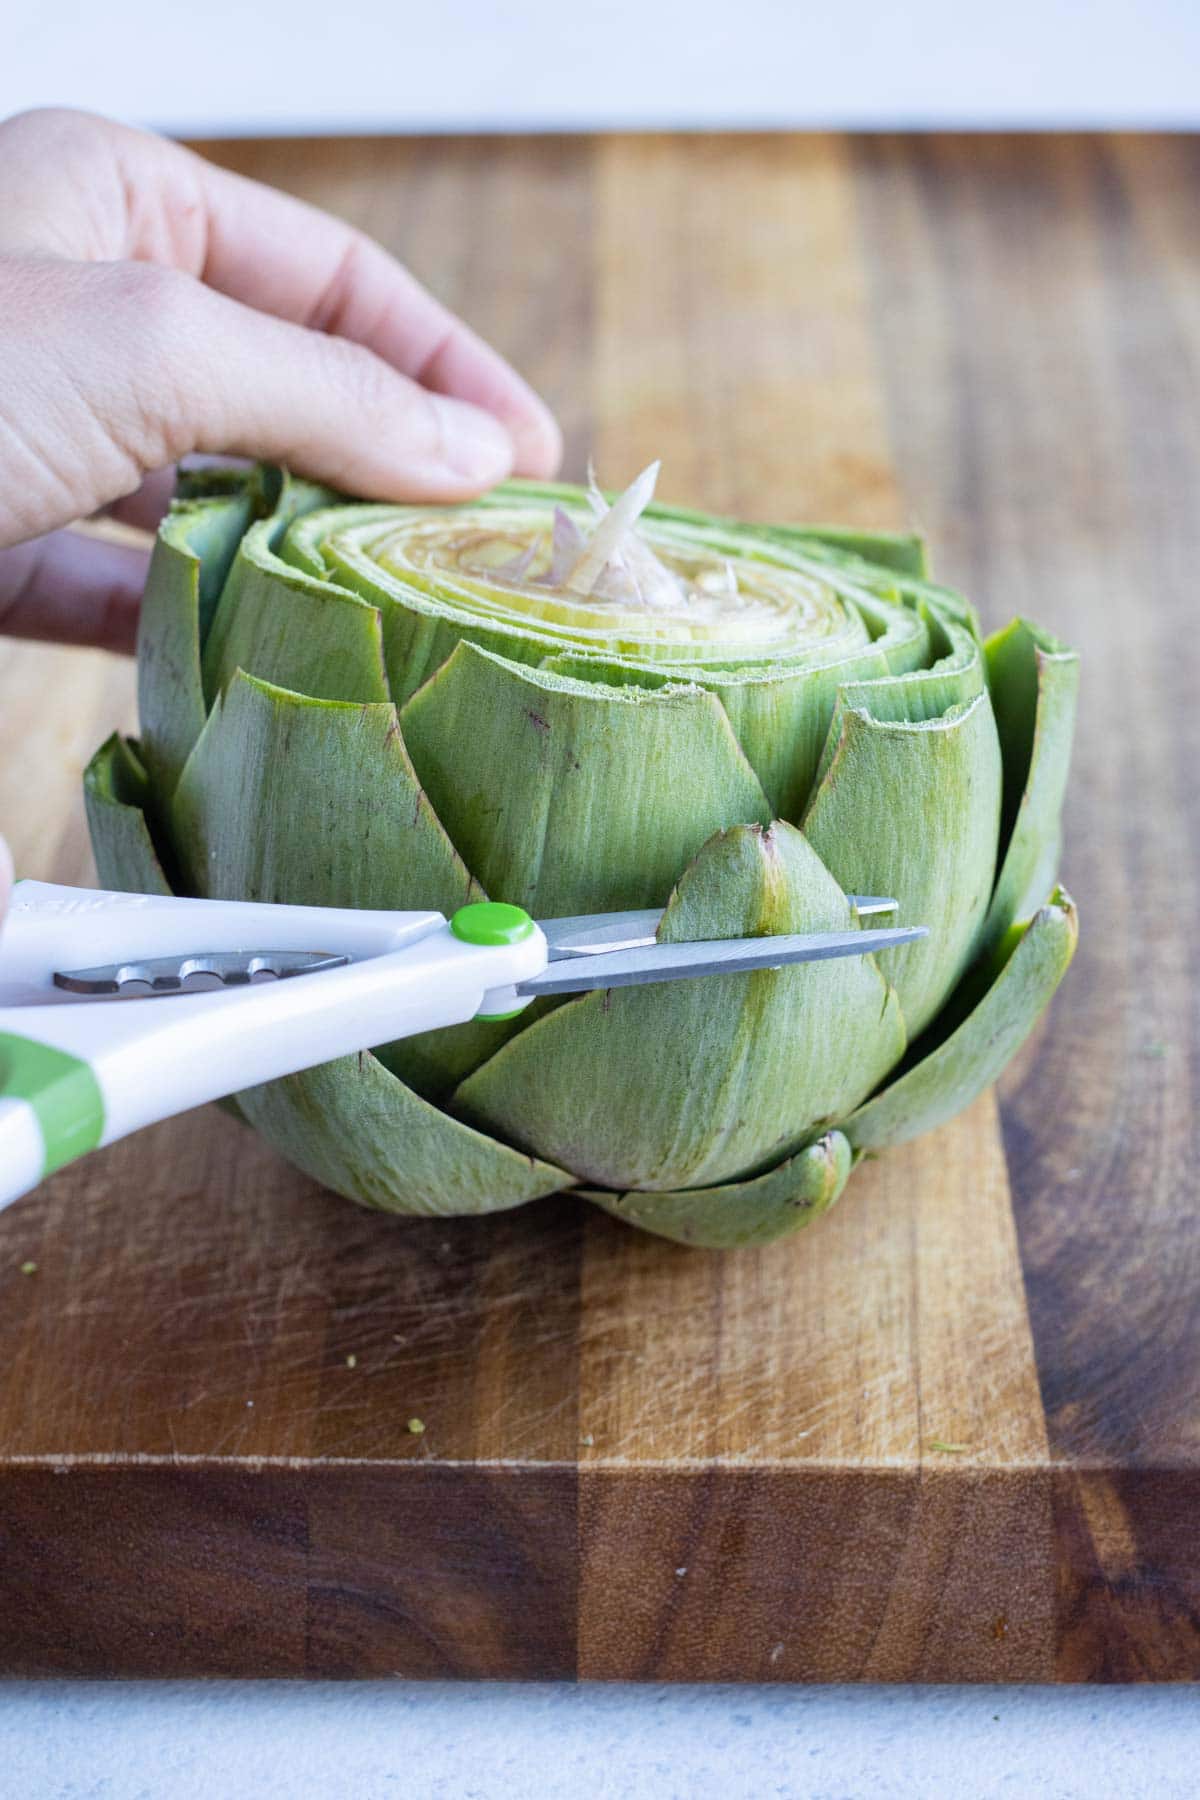
Pro Tip: I’ve found a serrated knife works best here. The leaves are tough and can be tricky to cut cleanly with a regular knife!
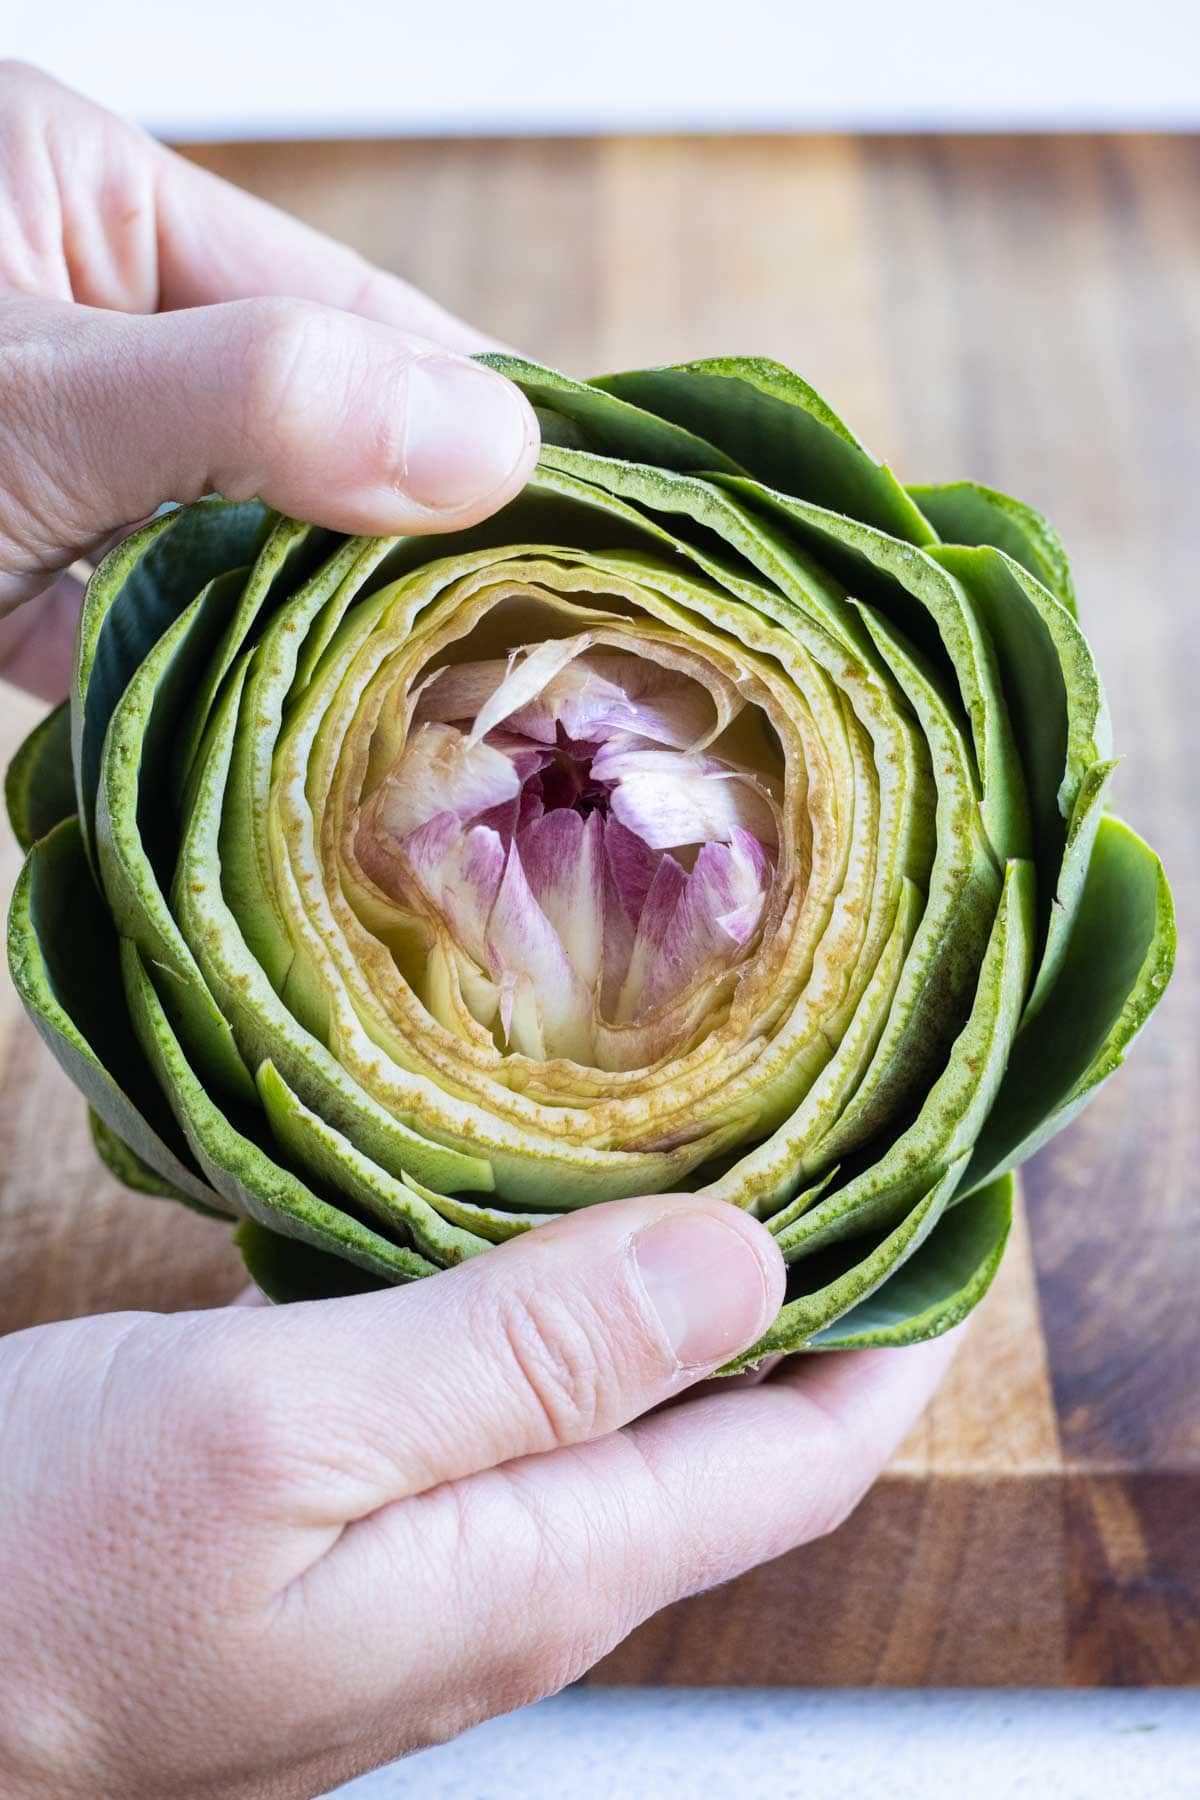
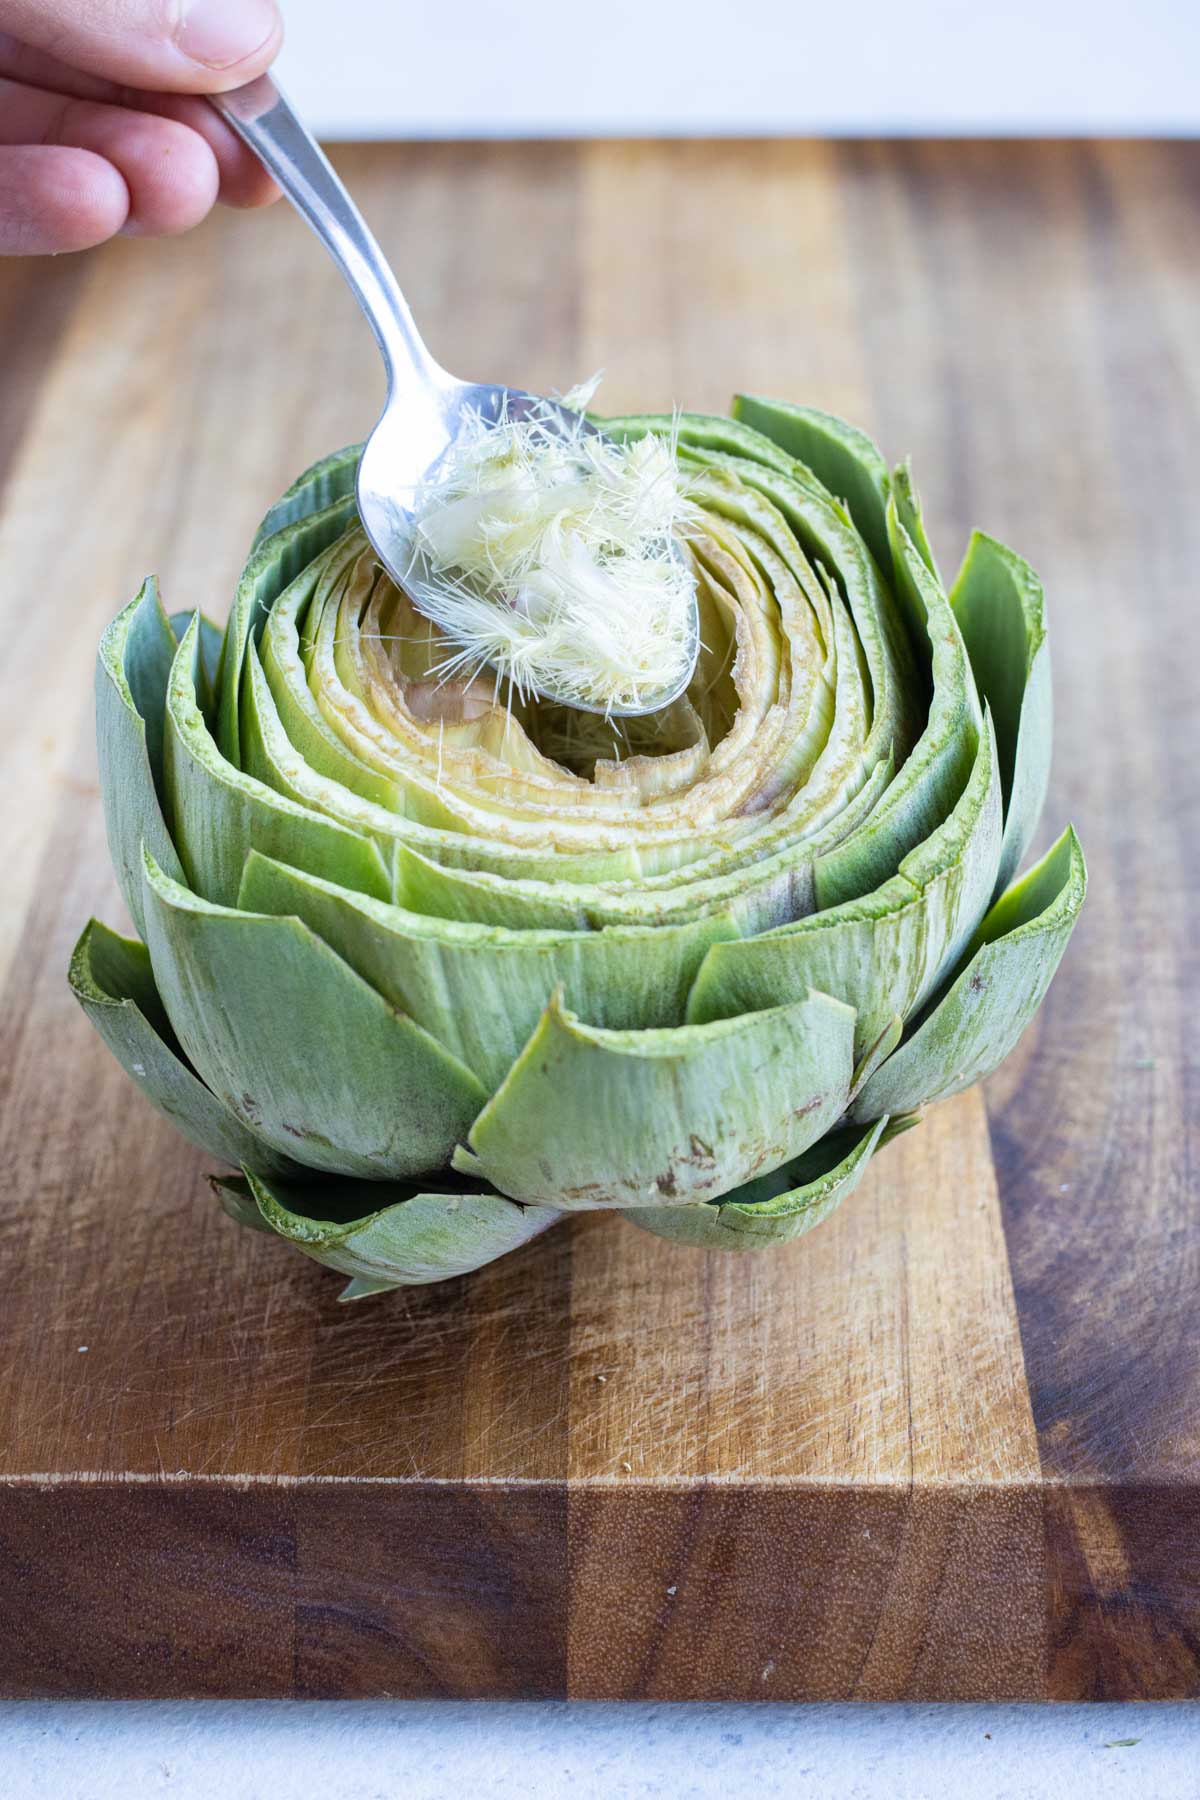
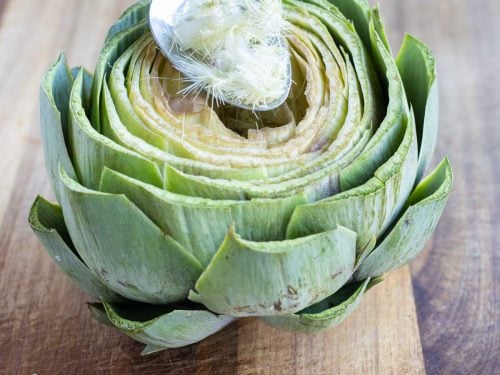
Remove the choke.
Use your hands to gently pry open the leaves until you can see the center. Pull out the feathery purple-tinted leaves, then use a spoon to scrape out all of the fuzzy choke.
Pro Tip: Be thorough on this step!! Any leftover fuzz can leave a really unpleasant bitter taste.
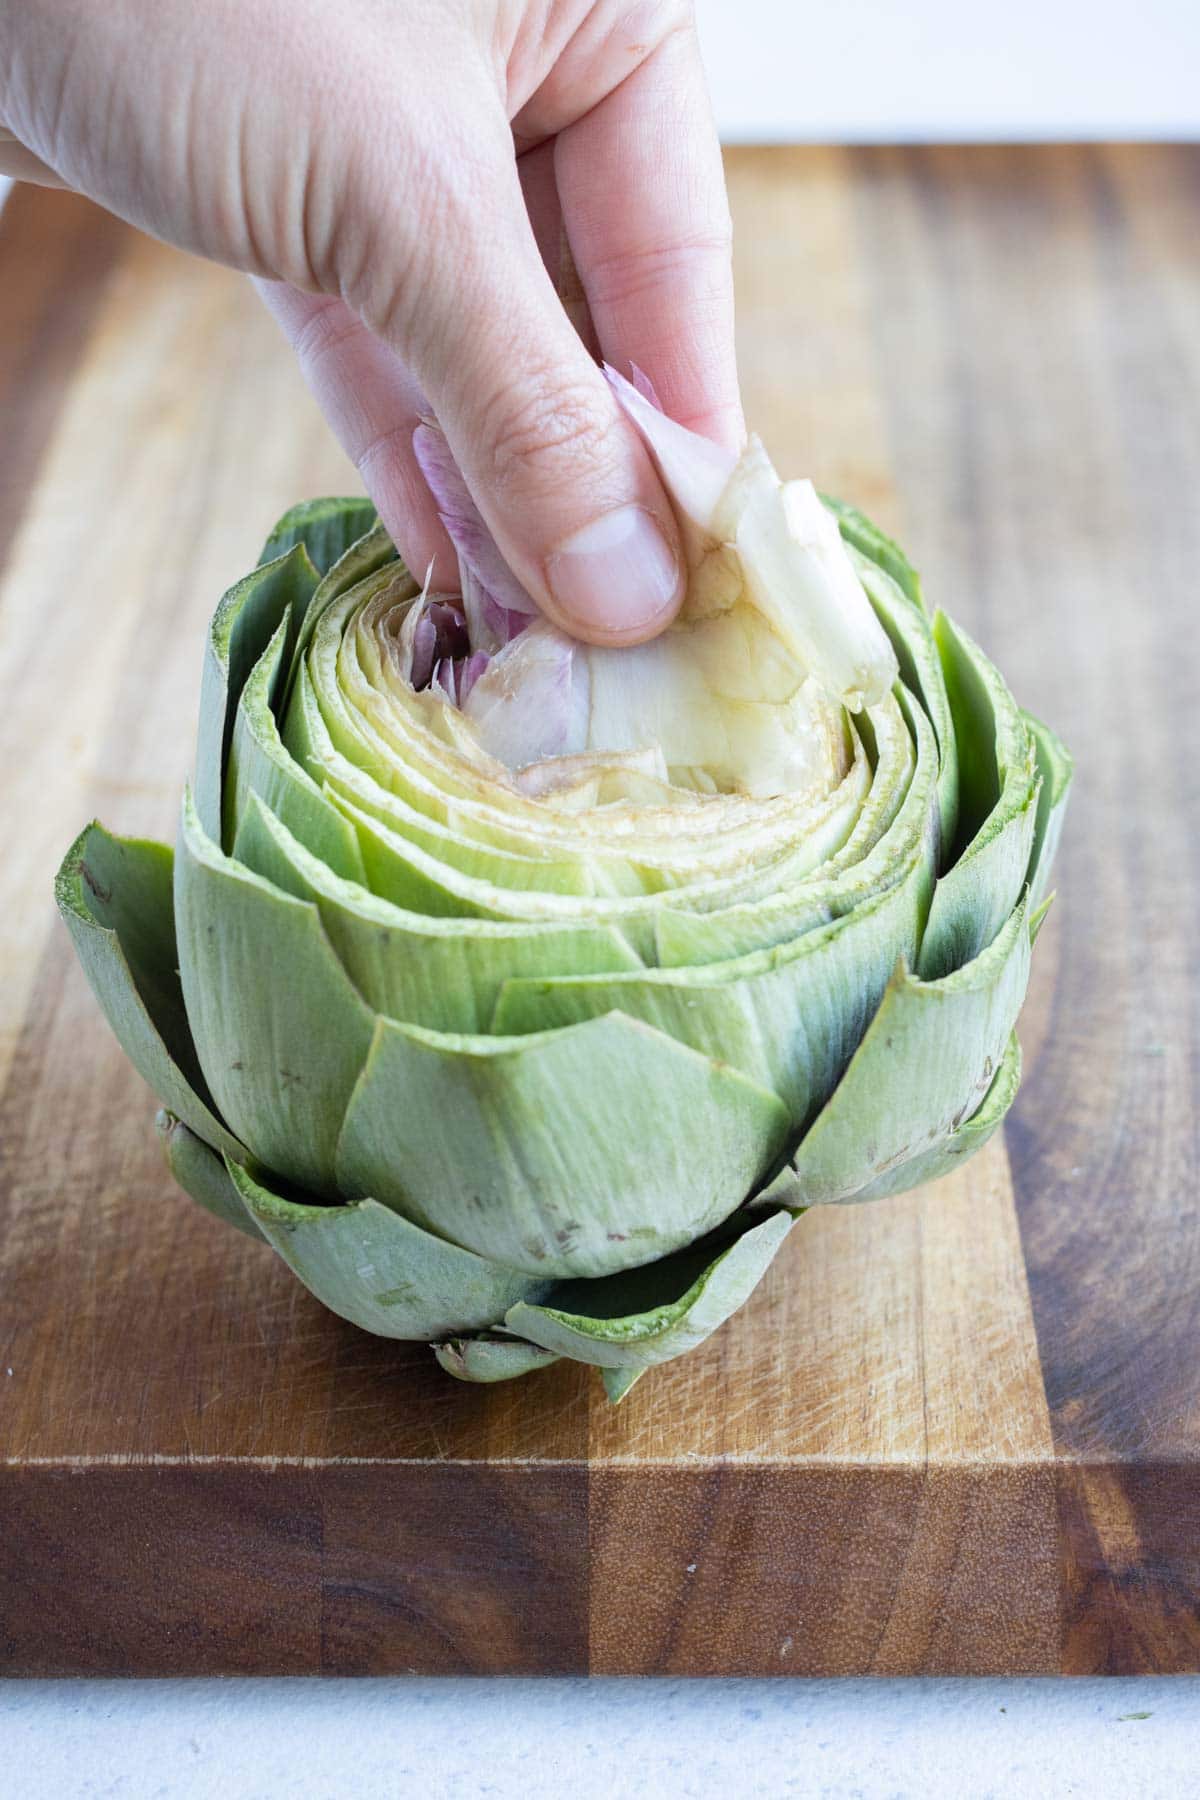
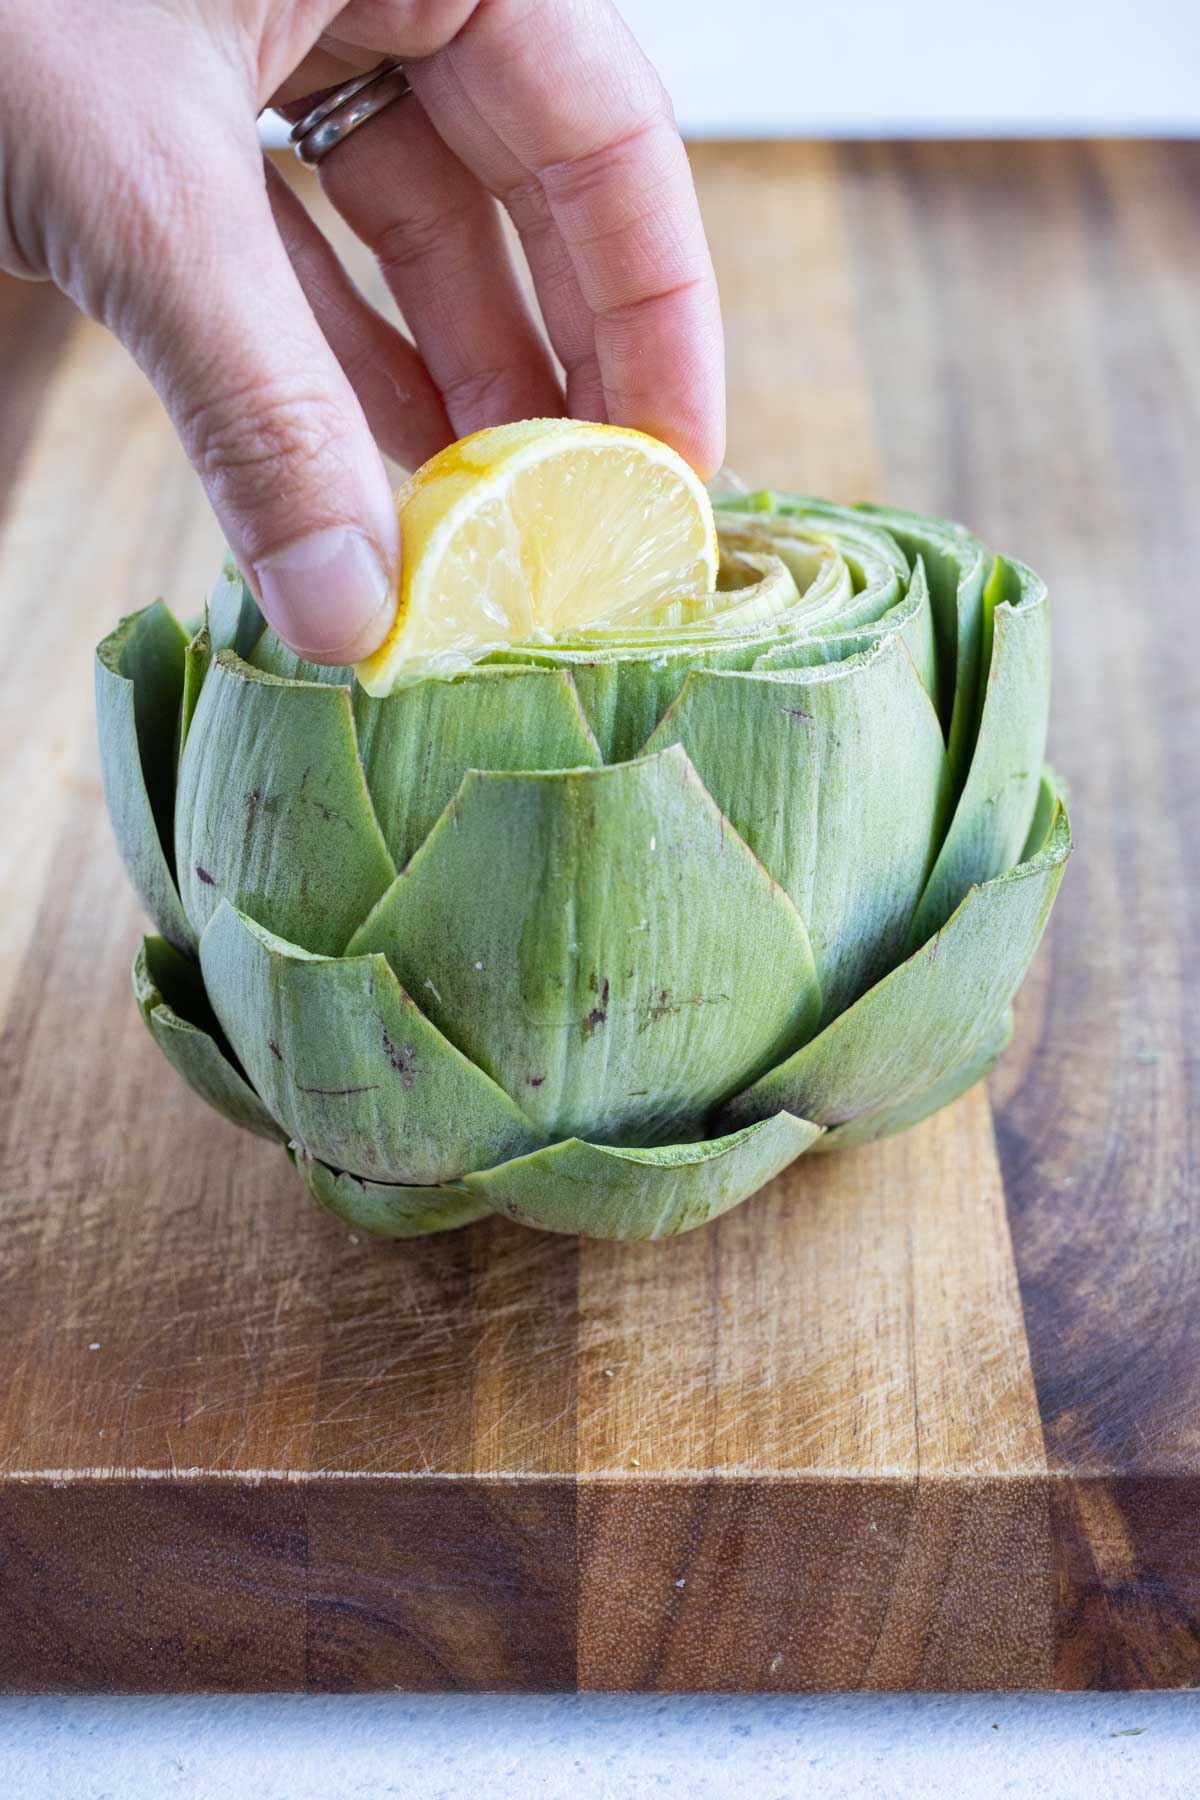
Prepare the leaves.
Trim the pointed tips of the outer leaves using kitchen scissors. Slice your already-zested lemon into quarters and rub the juice over the cut edges to prevent browning.
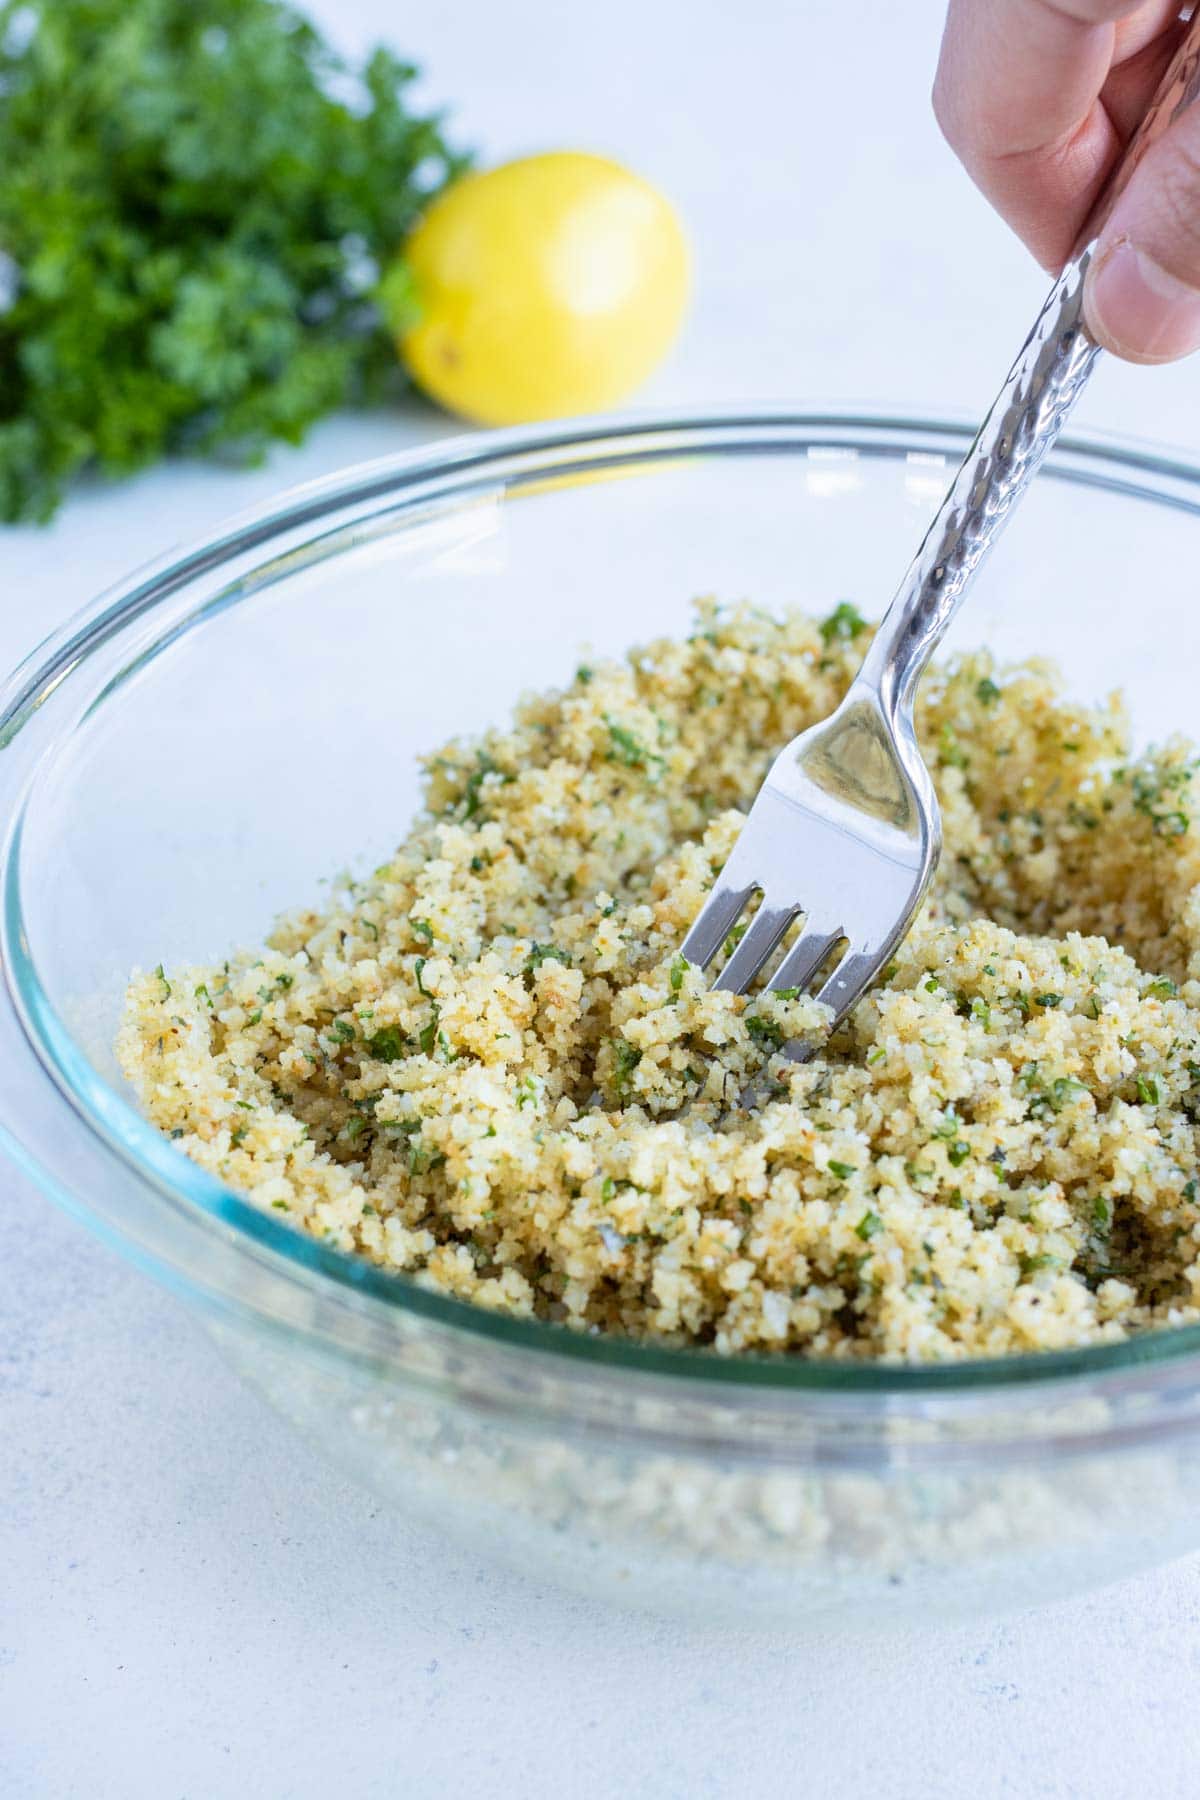
Mix the filling and stuff the artichokes.
In a large bowl, mix together the bread crumbs, Parmesan, oil, parsley, garlic, lemon zest, salt, and pepper. Pull apart the leaves and fill each one with the breadcrumb mixture, making sure to get filling between all the larger leaves.
Pro Tip: Do this over a cutting board so you can scoop up and reuse any filling that falls out!

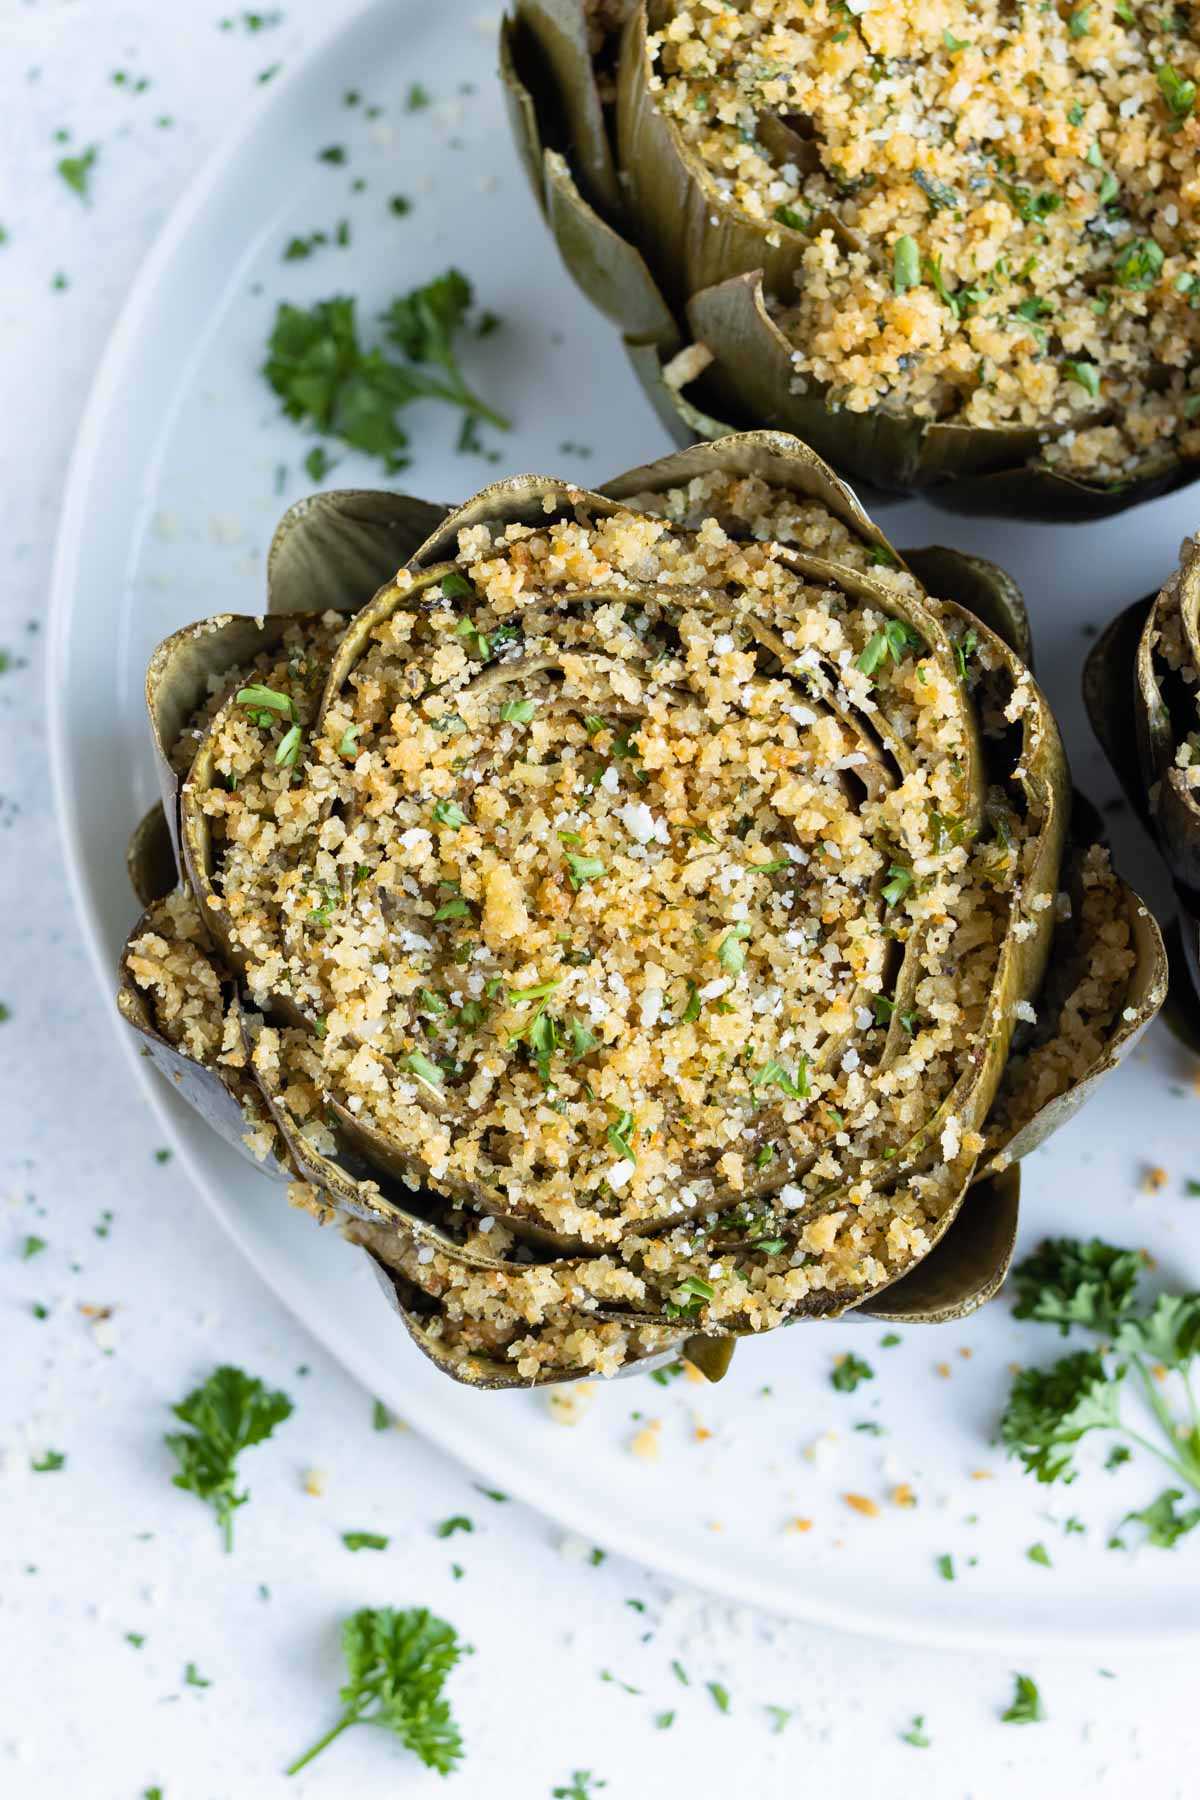
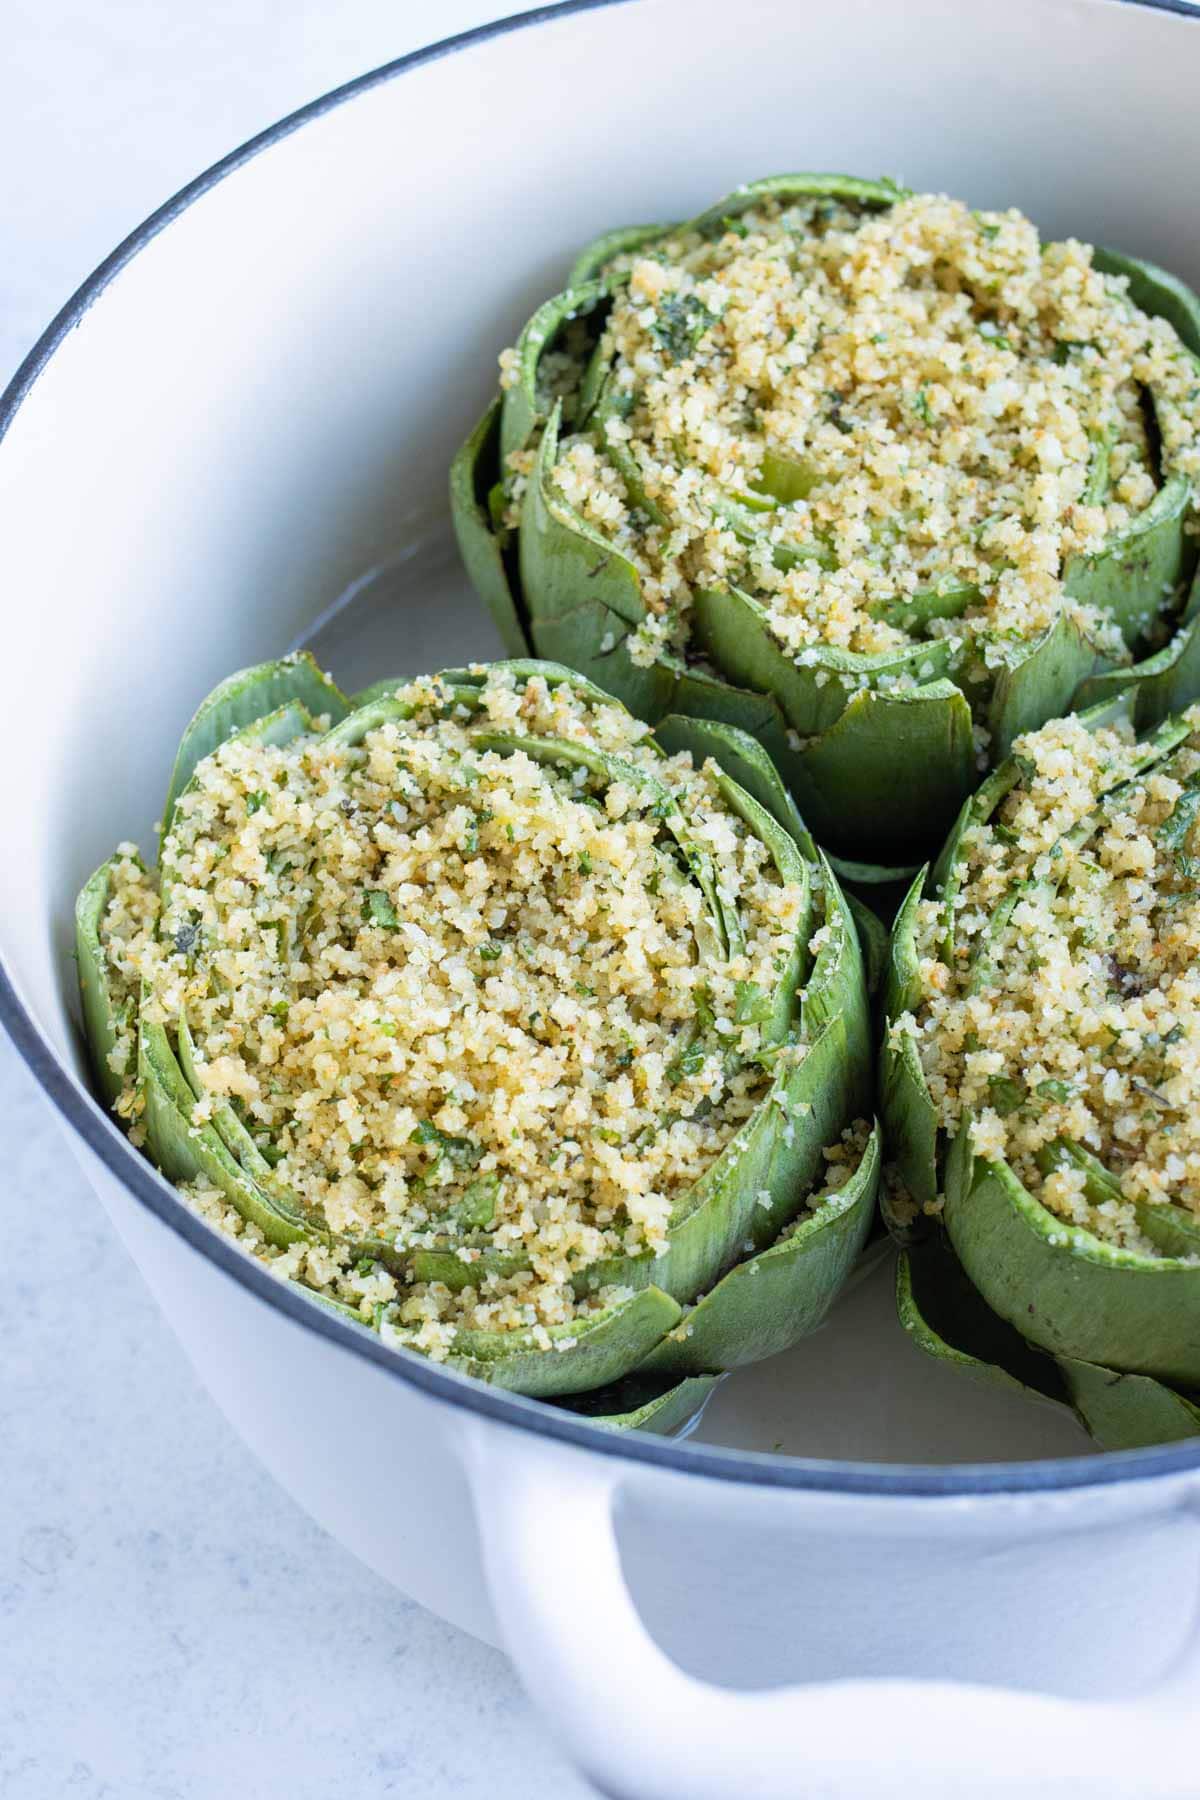
Bake in the oven and serve!
Place the stuffed artichokes in a Dutch oven or baking dish. Pour water into the bottom just until it reaches the base of the leaves, then cover and bake at 375°F for 45-50 minutes, or until the breadcrumbs are golden and the artichokes are tender.
FAQs
Nope! This recipe skips the pre-boil step and bakes the artichokes instead, which steams them right in the oven. Just make sure there’s enough water in the baking dish so they cook through.
The outer leaves should pull off easily, and a knife should slide smoothly into the base of the artichoke. The stuffing will also be golden brown and toasty on top.
Yes! You can prep and stuff them up to a day in advance. Store covered in the fridge and bake when you’re ready to serve.
Leftover stuffed artichokes can be stored in an airtight container in the fridge for up to 3–4 days. Reheat in the oven or microwave until warmed through.
Tap stars to rate!
Italian Stuffed Artichokes Recipe
email this recipe!
Ingredients
- 2 pounds artichokes about 3-4 medium-sized
- 1 ½ cups plain breadcrumbs Italian seasoning*
- ½ cup grated Parmesan cheese plus more for serving
- ⅓ cup olive oil
- ¼ cup parsley finely chopped
- 2 cloves garlic finely minced
- ½ teaspoon lemon zest
- ½ teaspoon salt
- ½ teaspoon black pepper
- 1 lemon
- Finely minced fresh parsley
Instructions
- Preheat oven to 375°F.
- To prepare the artichokes, cut the stem flat so that no more than ½ of an inch remains. Using a serrated knife, trim the other end with the pokey leaves by at least 1 inch.2 pounds artichokes

- Hold the artichoke with both hands and spread out the leaves to reveal the choke. Pull out all of the feathery pieces with purple-tinted edges. Remove the choke by using a spoon with a relatively sharp edge, being sure to scrape the sides so all of the fuzzy pieces are removed.
- Trim the pointed end of each of the leaves with scissors so they are flat. Cut the lemon into quarters and brush the cut parts of the artichoke with juice. Repeat this process with the remaining artichokes.1 lemon
- In a medium bowl, mix together the breadcrumbs, Parmesan cheese, oil, parsley, garlic, lemon zest, salt, and pepper. Stuff each artichoke with equal amounts of the filling, being sure to get some in between the larger leaves by pulling them apart.1 ½ cups plain breadcrumbs, ½ cup grated Parmesan cheese, ⅓ cup olive oil, ¼ cup parsley, 2 cloves garlic, ½ teaspoon lemon zest, ½ teaspoon salt, ½ teaspoon black pepper
- Place the stuffed artichokes in a large Dutch oven or baking dish and then fill up with water until it reaches the level of the first leaves. Cover with a lid (or a piece of aluminum foil if using a dish) and bake in the preheated oven for 45-50 minutes, or until the artichoke is tender and the breadcrumbs are golden brown. (They might take closer to 1 hour if you have really large artichokes!)
- Serve immediately with a sprinkle of parsley and Parmesan cheese.Finely minced fresh parsley


Tap stars to rate!
Video
Notes
- Artichoke: Be sure to grab similar-sized artichokes so they cook evenly.
- Tools: A serrated knife makes trimming the artichokes much easier.
- Lemon: Don’t skip this step, lemon keeps the edges from browning, but be sure to zest it first before cutting into quarters.
- Storage: Keep leftovers in an airtight container in the fridge for up to 3 to 4 days.
Nutrition
Nutrition information is automatically calculated, so should only be used as an approximation.
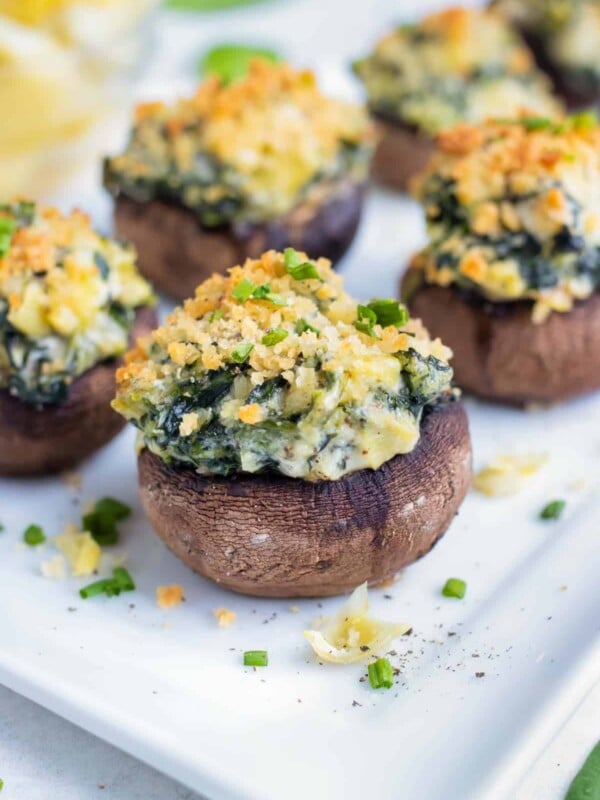
More Holiday-Worthy Appetizers
No one wants their guests to be hungry while they wait for the big meal! Here are a few of my go-to apps that are perfect for the holidays.


Delicious and simple
Yay, Tonia! I’m so happy you loved the recipe so much. Thanks for taking the time to leave a comment and rating letting me know 🙂